Home > SI Documentation (v20) > Administrator Guide > Setup > Control Panel > Azure Active Directory
Azure Active Directory
Azure Active Directory
Table of contents

Our integration with Azure Active Directory (AAD) allows you to use the same credentials used in AAD to log into SI, providing a Single Sign-On option to you. This means that no passwords are created or stored in SI, adding a layer of security for you.
Setup
In order for this integration to work, you must first make some setting changes in our instance of AAD.
- Sign in to your instance of AAD using this link: https://aad.portal.azure.com/. You must be an “Application Administrator” or a “Global Administrator” to configure the “App registration” in AAD.
- Click "All Services" on the left panel and then click Azure Active Directory.
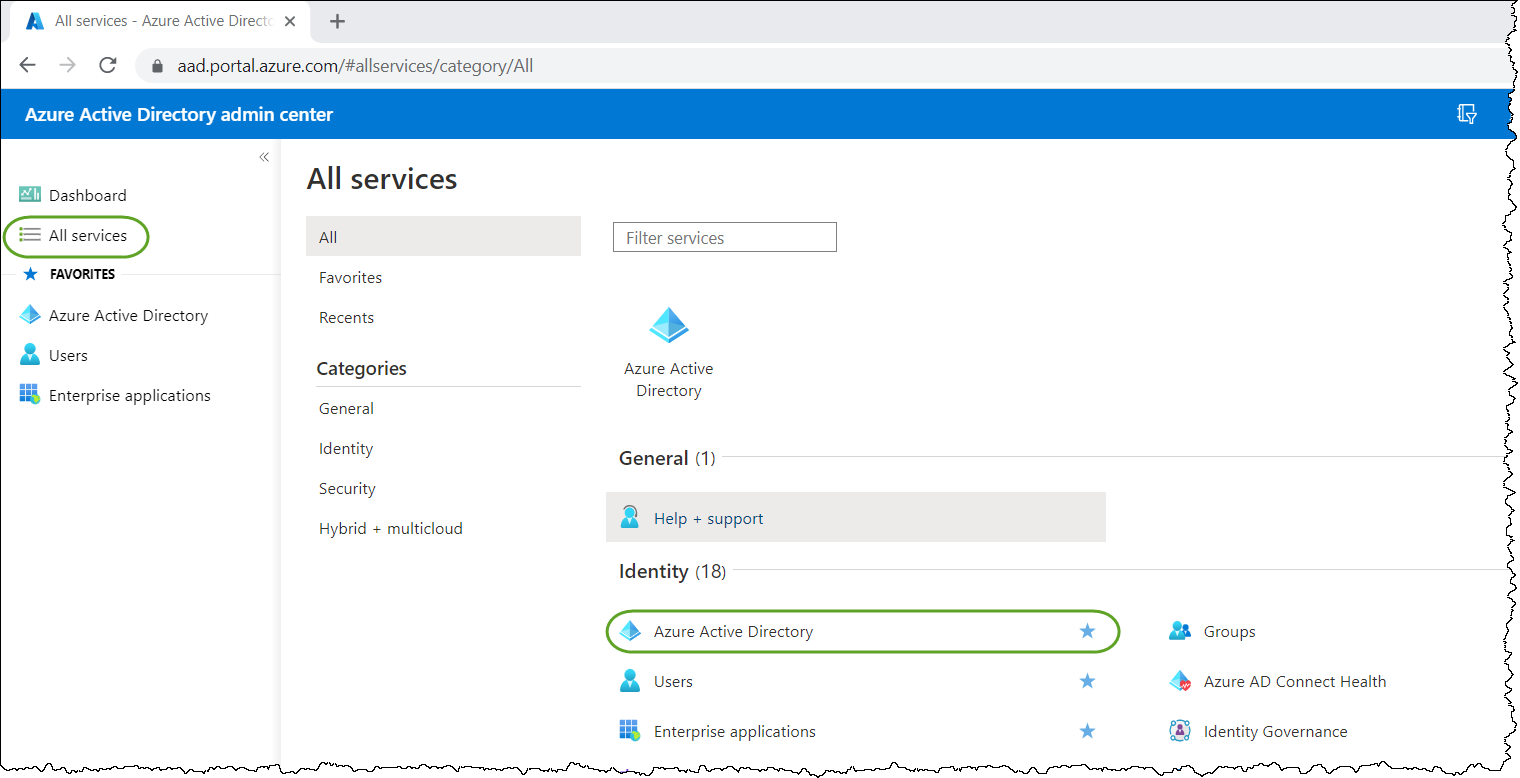
The Company Overview window will display.
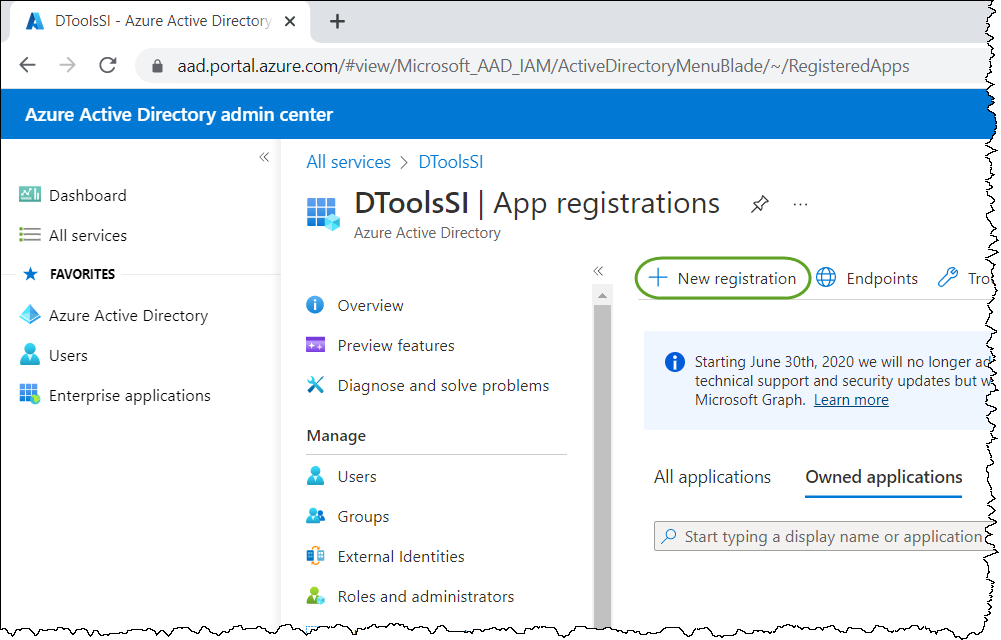
- Click "App registrations" under Manage.

- Click "New registration":
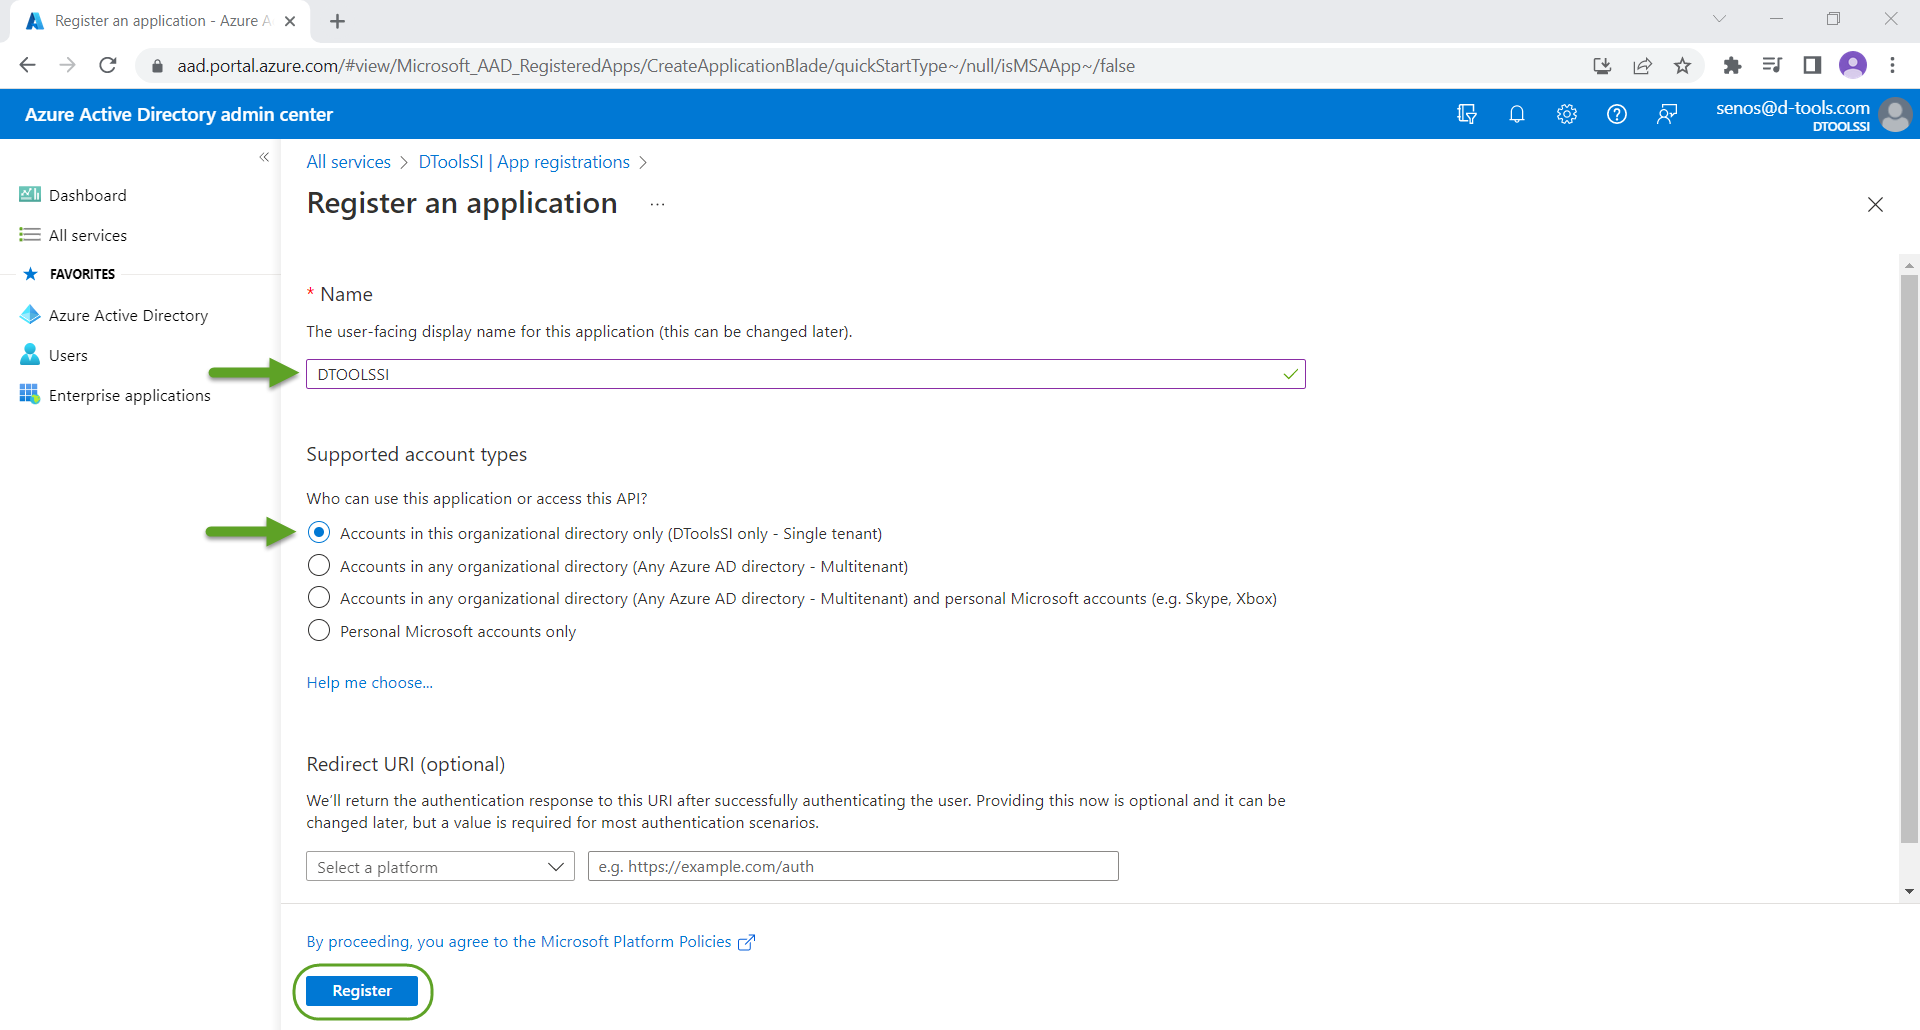
- Enter a name, DTOOLSSI is a fine name. Leave the "Accounts in this organizational directory only...." option selected and click the Register button.
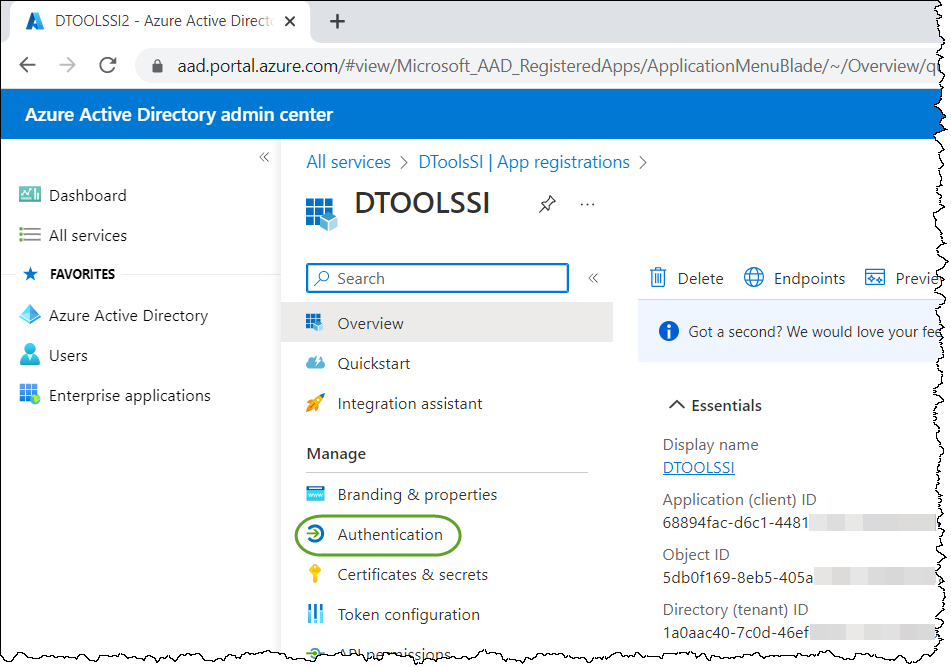
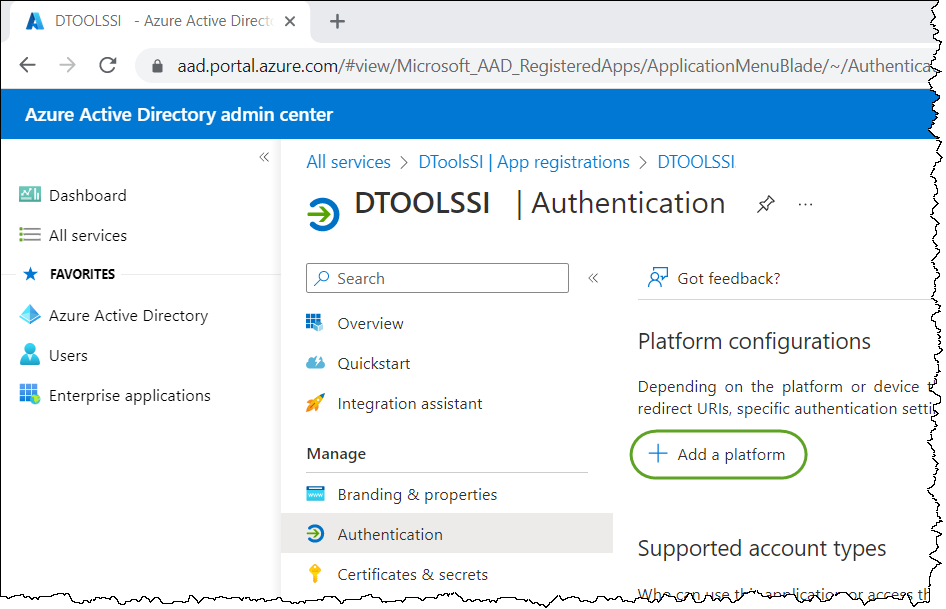
- Click "Authentications" under Manage.
- Click "Add a platform":
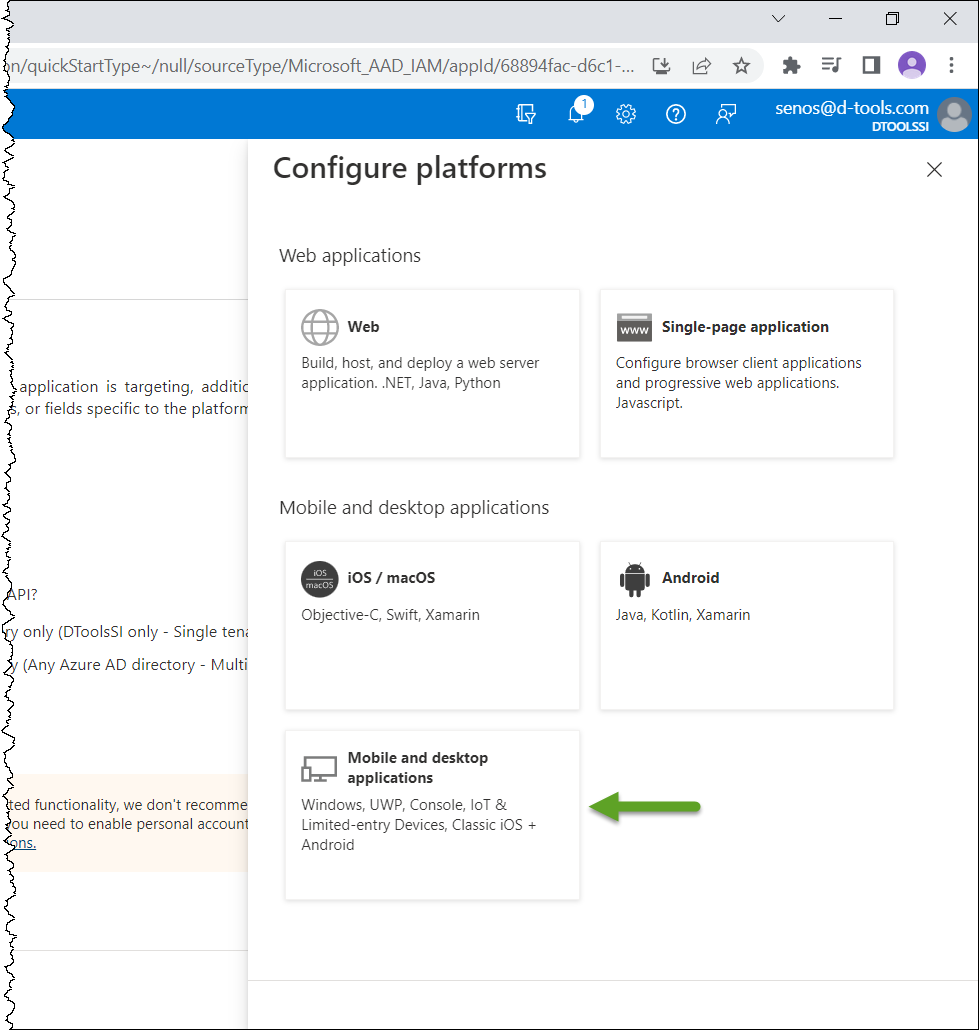
- Click "Mobile and desktop applications":
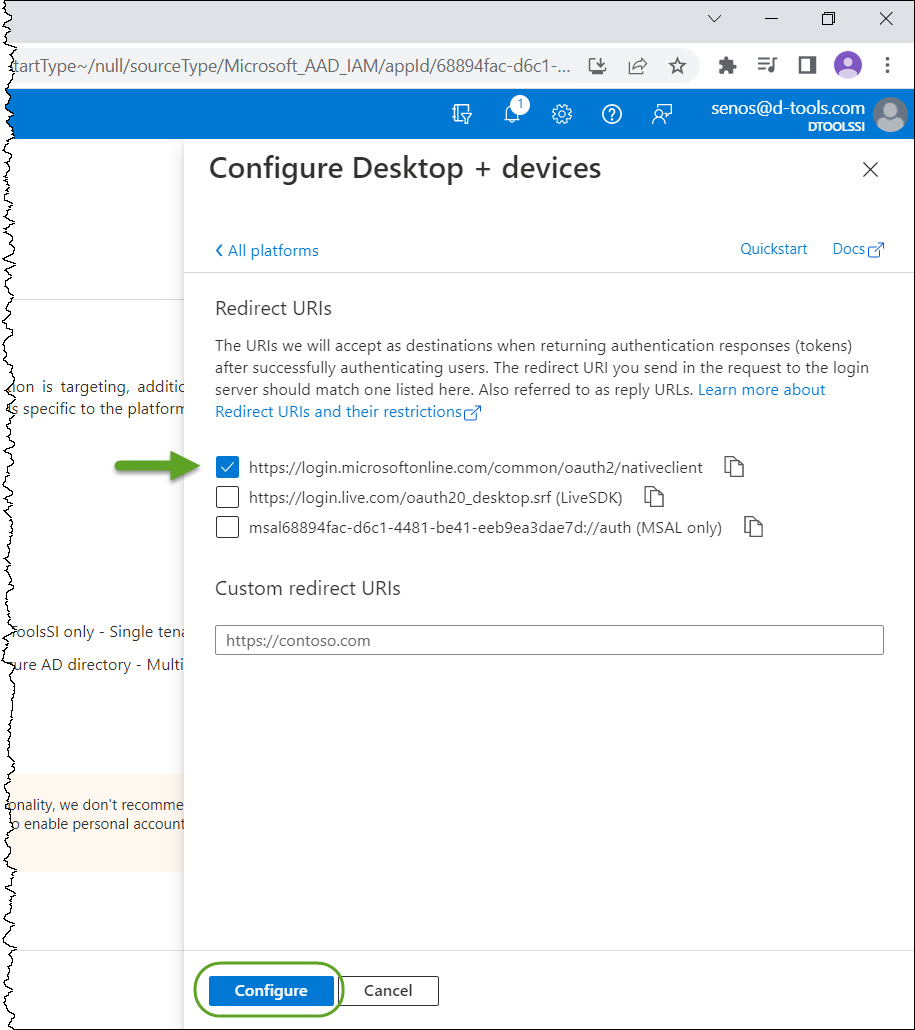
- In the "Configure Desktop + devices" window, select the first option and then click the Configure button:
- Scroll down and click Yes to "Allow public client flows" and then click the Save button:

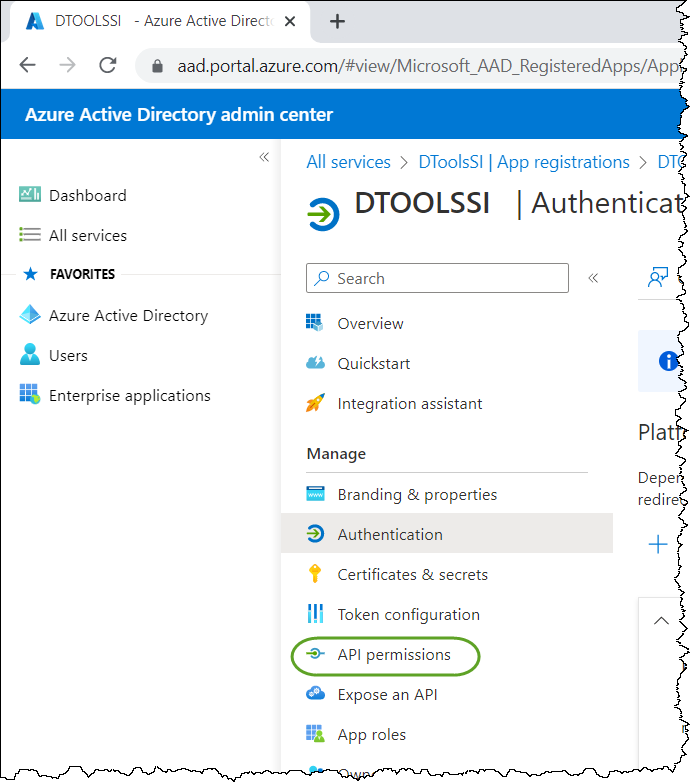
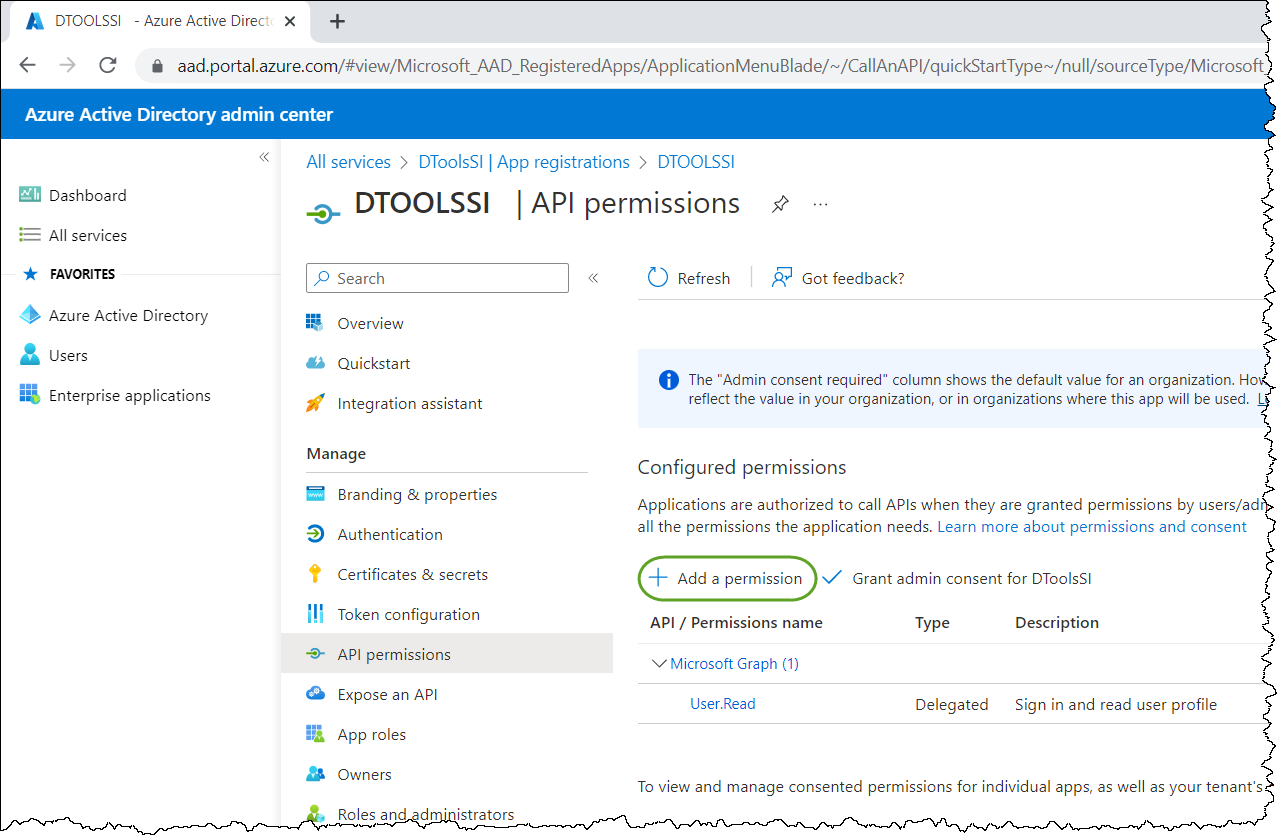
- Click "API permissions" under Manage:
- Click "Add a permission":
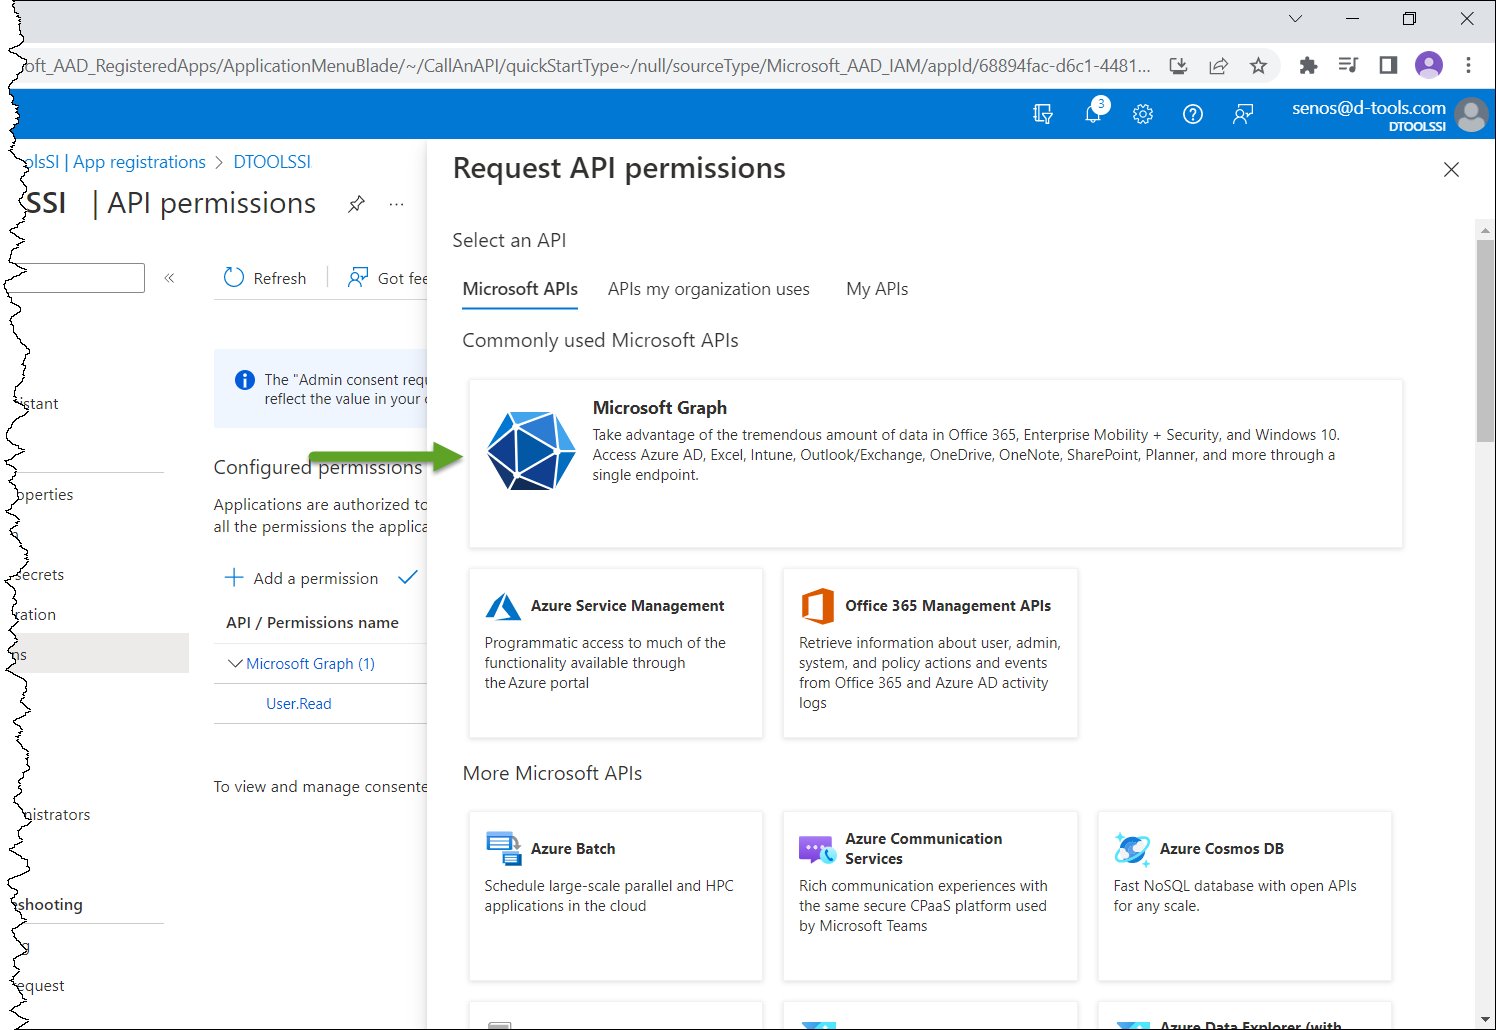
- Click "Microsoft Graph":
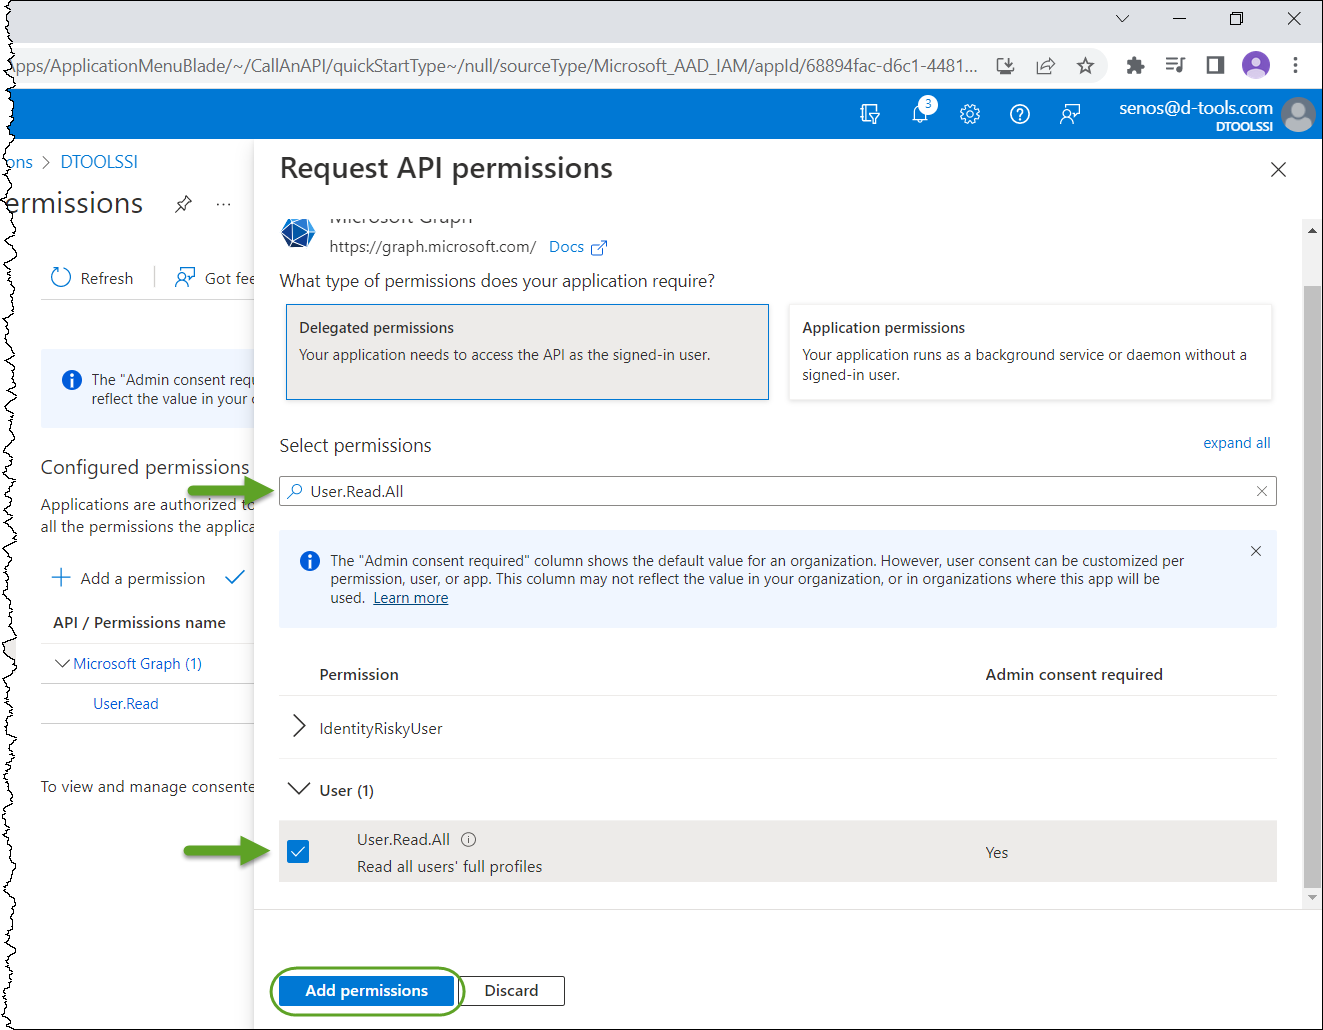
- Click "Delegated permissions":

- Search for User.Read.All, click on it to select the permission. then click the Add Permissions button:
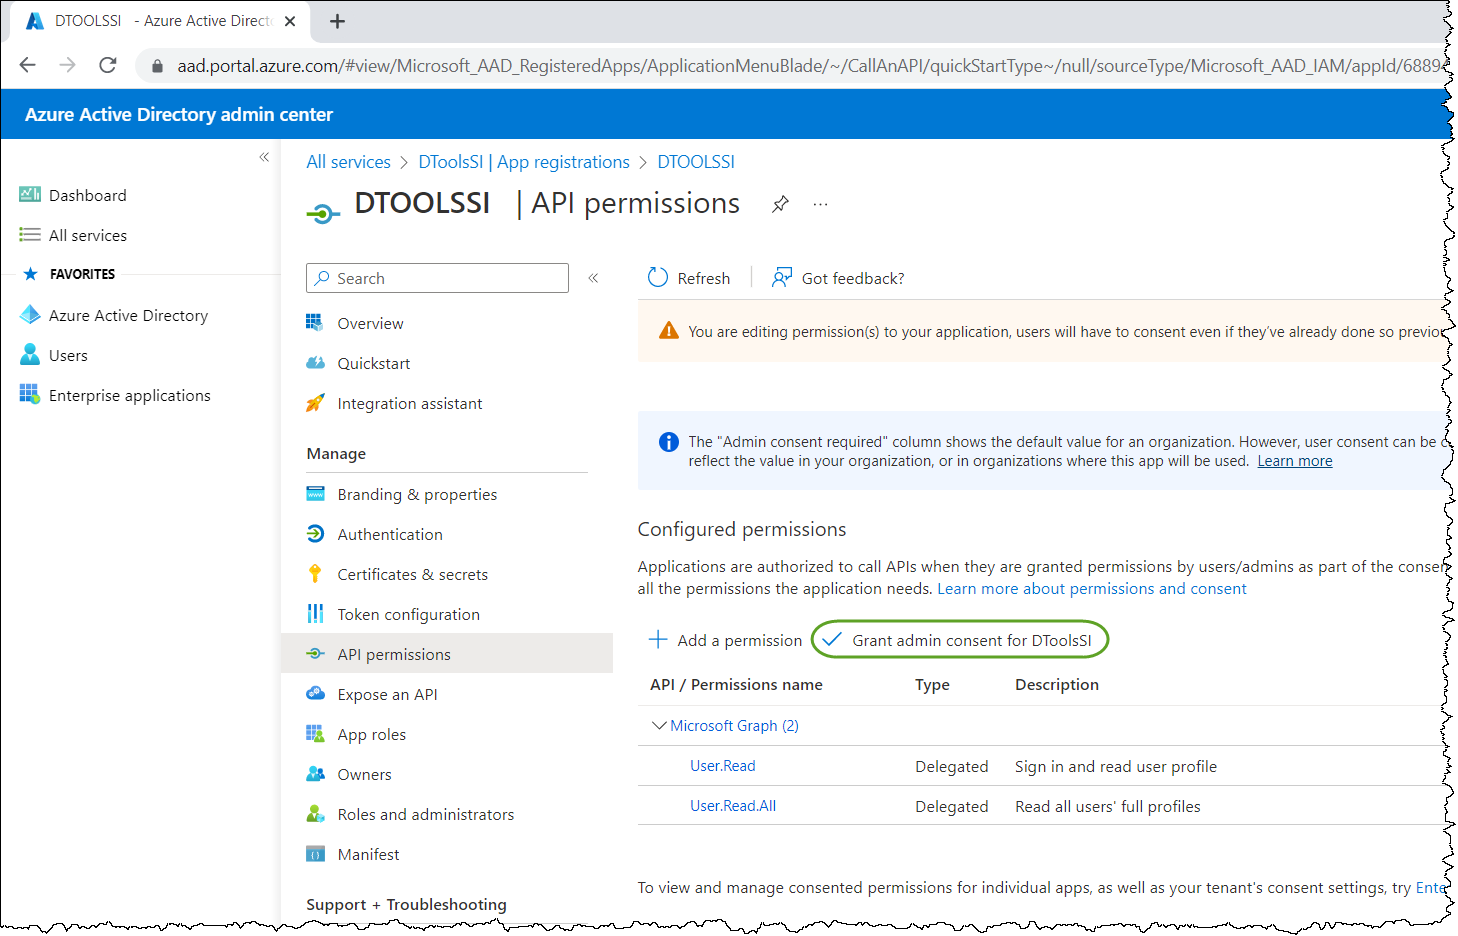
- Click "Grant admin consent for DTOOLSSI" (or whatever you decided to name the integration in step 5):
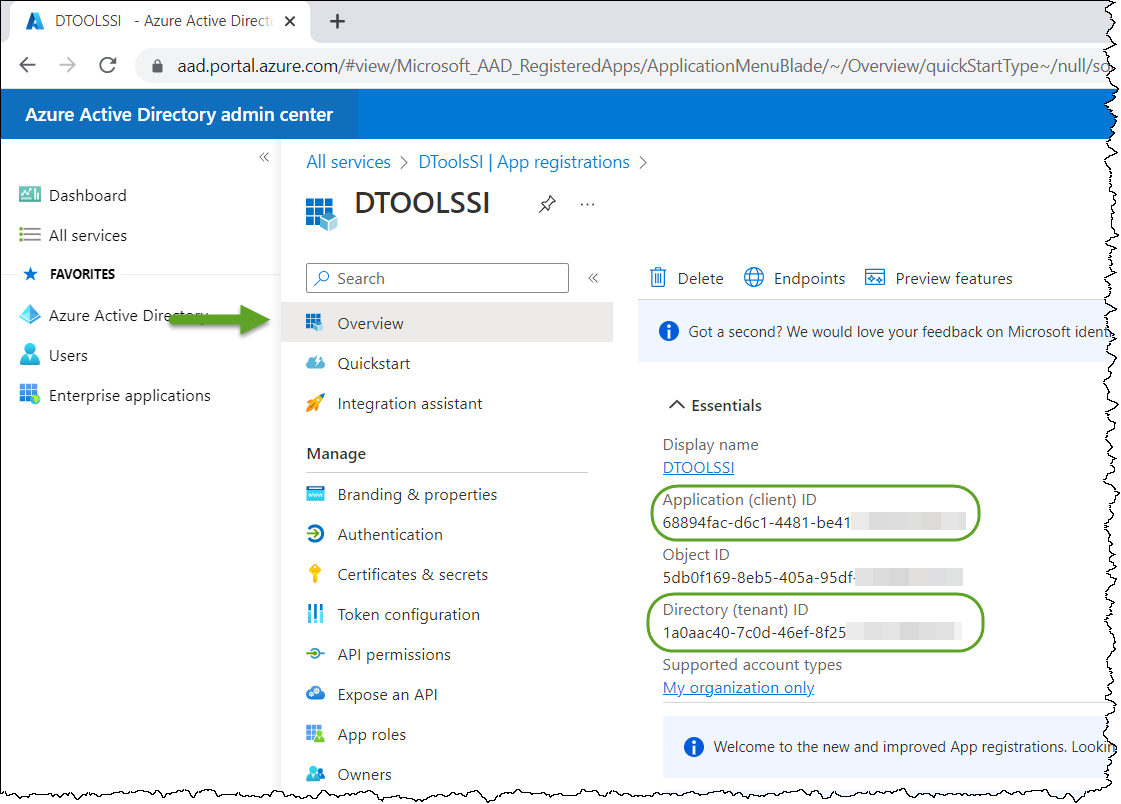
- Click "Overview" and make a note of the Application (client) ID and Directory (tenant) ID values:
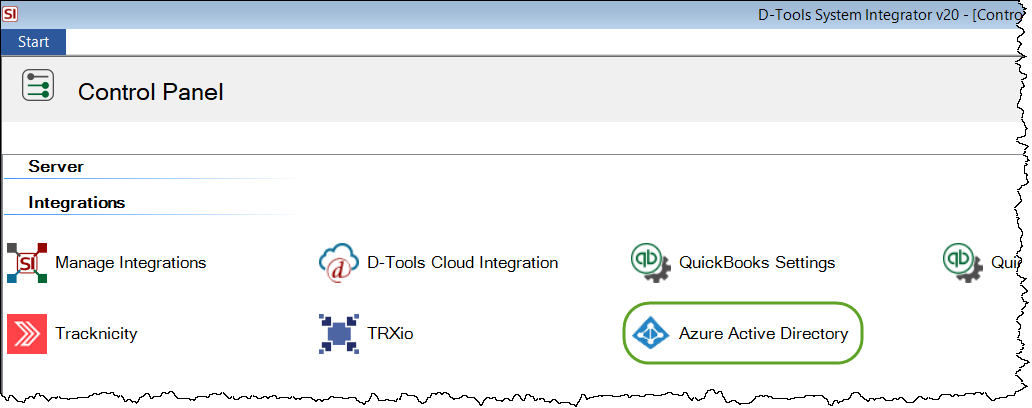
- Open System Integrator and click Start->Setup->Control Panel.
- Double-click the "Azure Active Directory" icon.
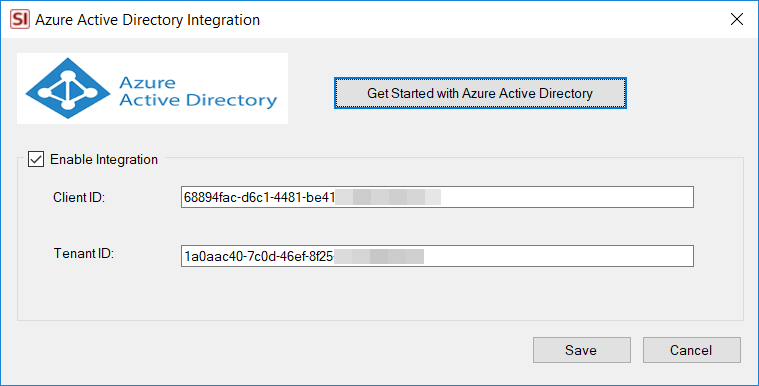
- Tick the "Enable integration" checkbox and then enter your Client ID and Tenant ID from AAD and then click Save:
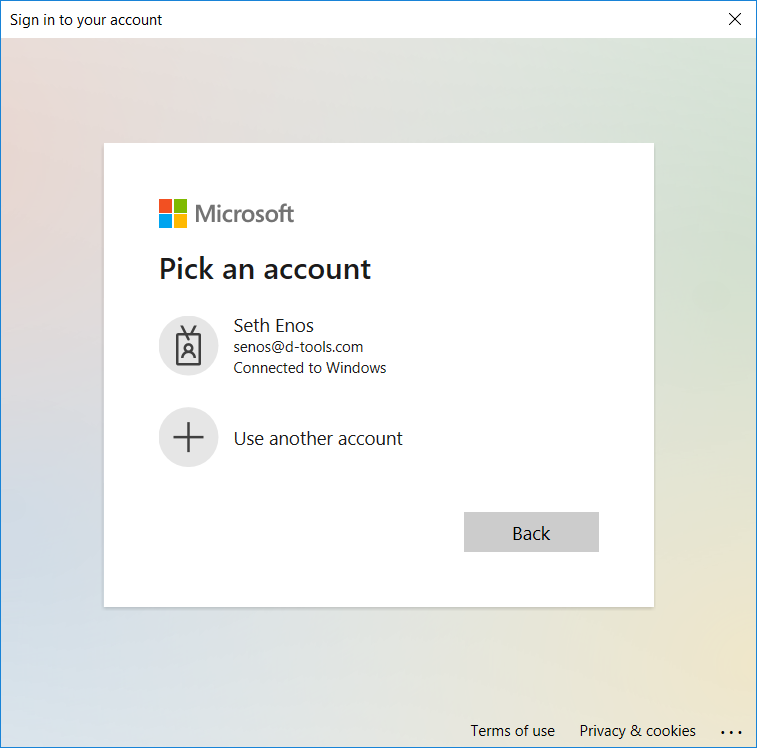
- You will be prompted to sign in to your instance of AAD:
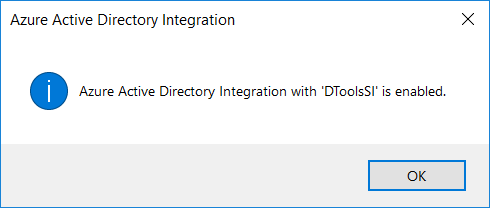
Once you sign in you will get a confirmation the integration is enabled:
You can now import Users into SI from AAD or link existing SI user's to AAD. Click here for details.
- © Copyright 2024 D-Tools