Avalara Tax Integration
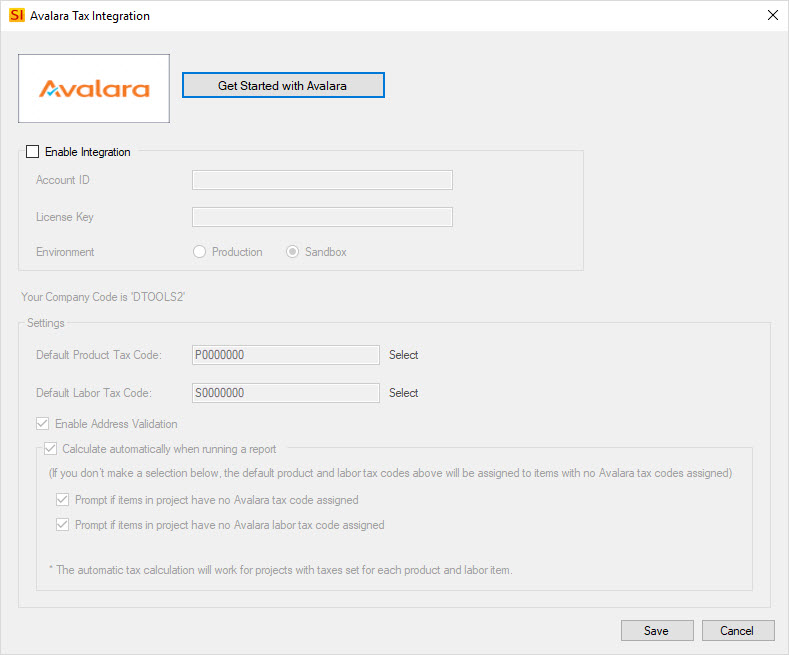
Setting
![]()
Details
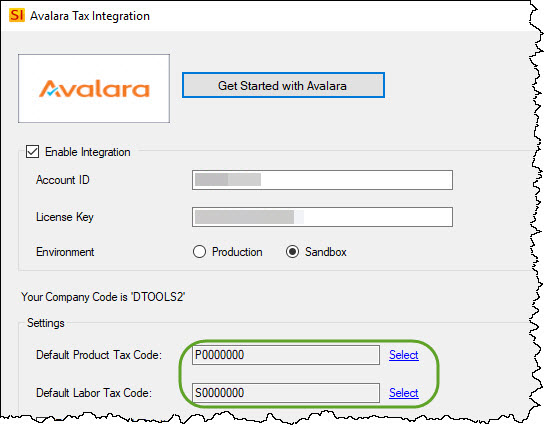
D-Tools' integration with Avalara, a leading provider of tax compliance automation for businesses, provides SI users with the ability to accurately calculate applicable taxes for every billing line item by location, in real-time, at no cost. An enhanced option is available to customers of both systems with the ability to unlock advanced features such as adding tax codes to each product/item in their catalog.
Note: Your user must have the proper permissions to be able to edit the Avalara Tax Integration. Also, this tax integration only works for US and Canadian addresses.
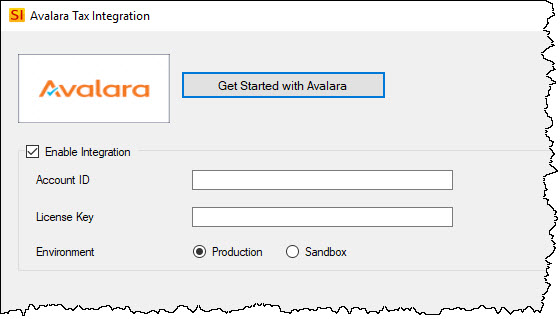
You will need to have an Avalara Account ID and License Key in order to make this connection. You will most likely choose the Production radio button but we have provided the Sandbox option for any user that happens to have a sandbox Avalara account.
Products and Labor Items
Once enabled, you will see an additional fields on the Price tab for Products:

Labor Items will have one additional field:
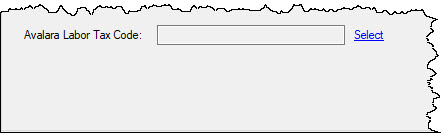
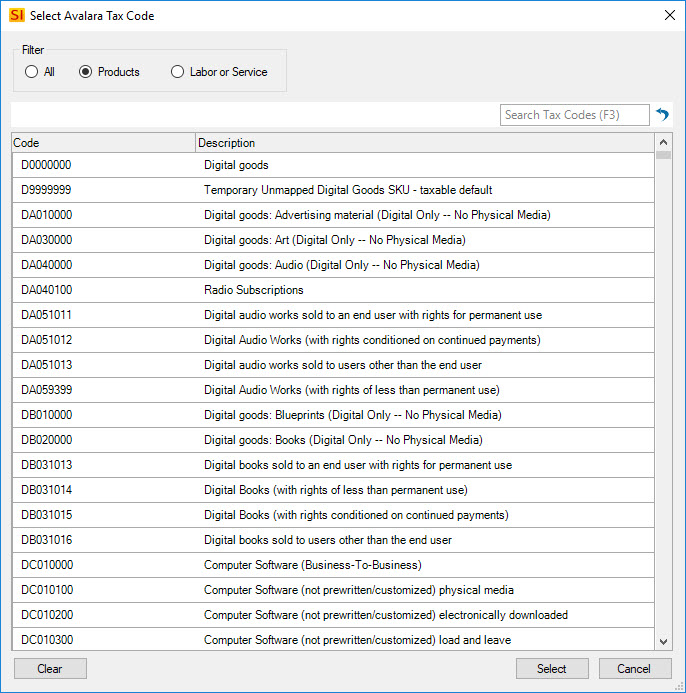
Clicking the "Select" link will open a dialog where you can search for and select the appropriate Avalara tax code:
This feature is also available via Mass Update in the Product Explorer and/or Project Editor:

Clients
Also, once the Avalara Tax Integration has been enabled, Clients will have the following additional field that will allow you to add an Avalara Tax Exemption Code to the Client:
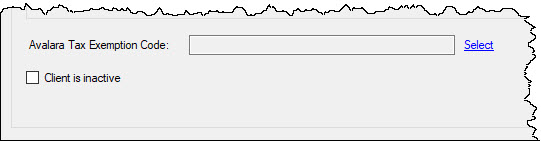
Clicking the "Select" link will open a dialog where you can select the appropriate Avalara Exemption Tax Code:

Calculating Taxes
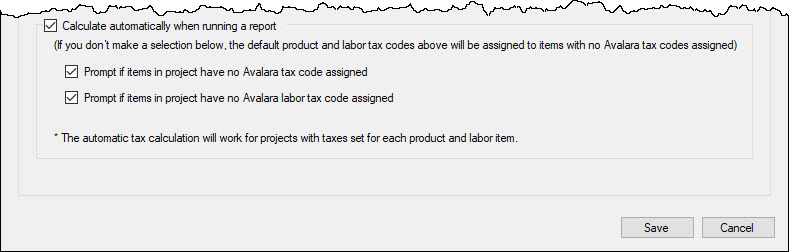
There are settings to automatically calculate taxes from Avalara as shown below:
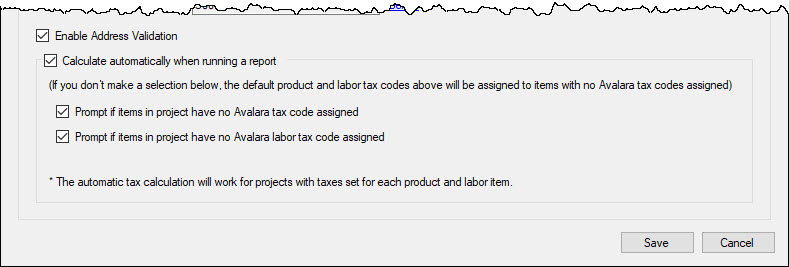
If you choose "Calculate automatically when running a report", and don't choose either of the two "prompt" options, you won't be prompted for anything while running a report. If items are missing an Avalara tax code, your default codes will be used:
If you choose to be prompted for either missing tax codes or labor tax codes, you will skip the address validation steps and be brought to Step 3 of the wizard (see below).Address validation will display or not display based on the "Enable Address Validation" setting as well.
Manually Calculating Taxes
If you do not choose to calculate taxes automatically when running reports, you will need ot manually calculate the taxes. From within a Project, click the Settings tab->Taxes->Calculate Tax Using Avalara:
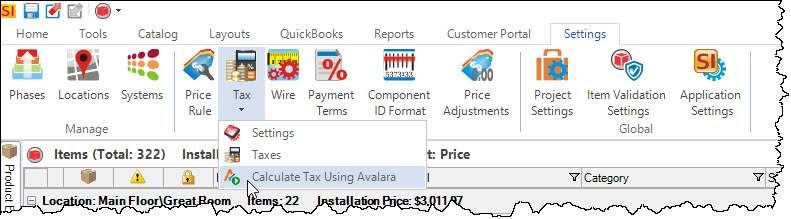
This will open a four step wizard.
Step 1
The first step is where you can modify your company address if needed:
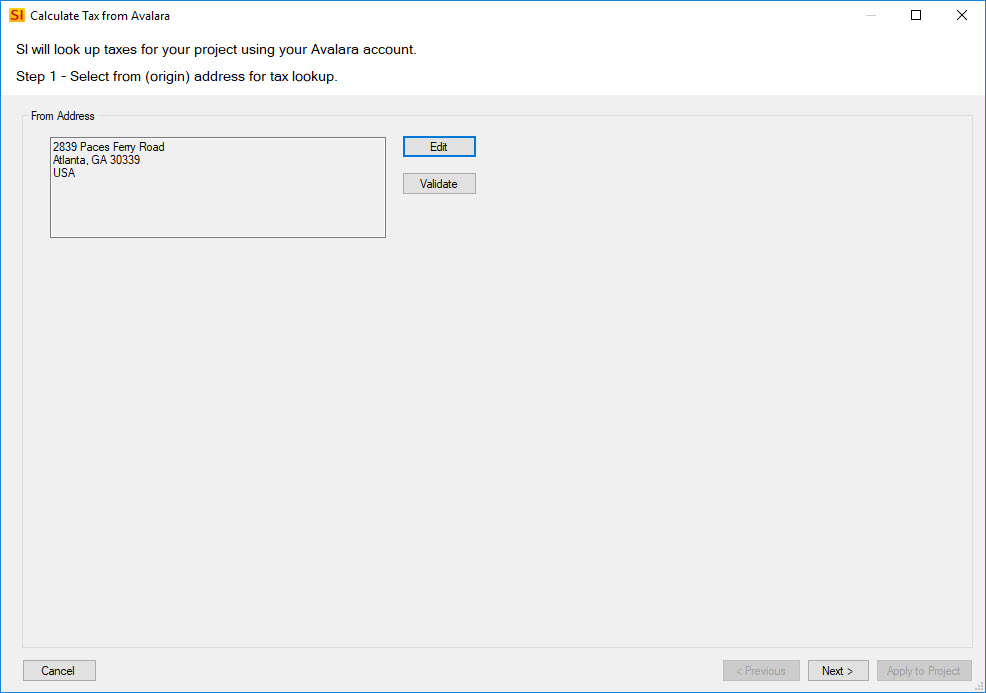
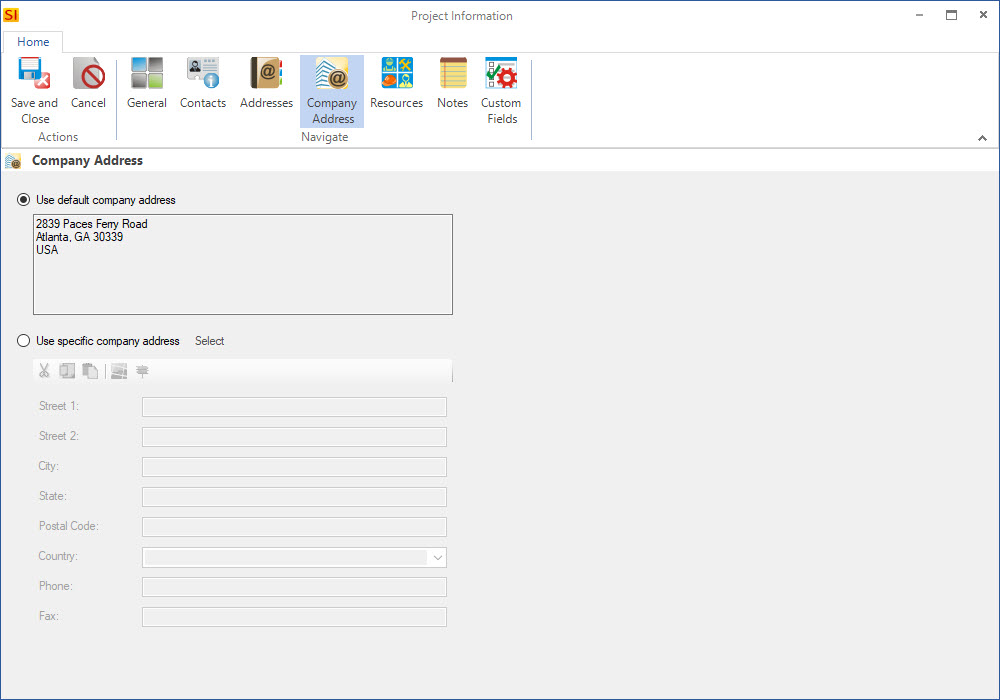
The [Edit] button will open the Project Information interface:
The [Validate] button will use an Avalara service to verify the address and offer a suggestion for the address formatting:
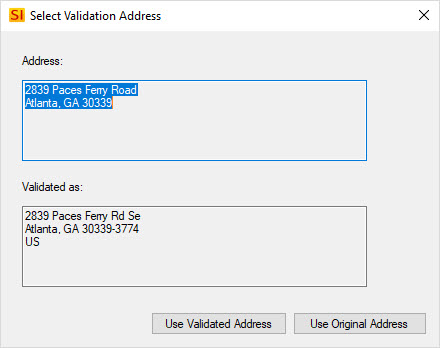
Note: If you choose [Use Validated Address] the actual address formatting within the Project will not be updated. The validated address will only be used to calculate the taxes.
Step 2
Here you can choose which of the project addresses you wish to use. Just like in step 1, you can edit either address and/or validate either address:
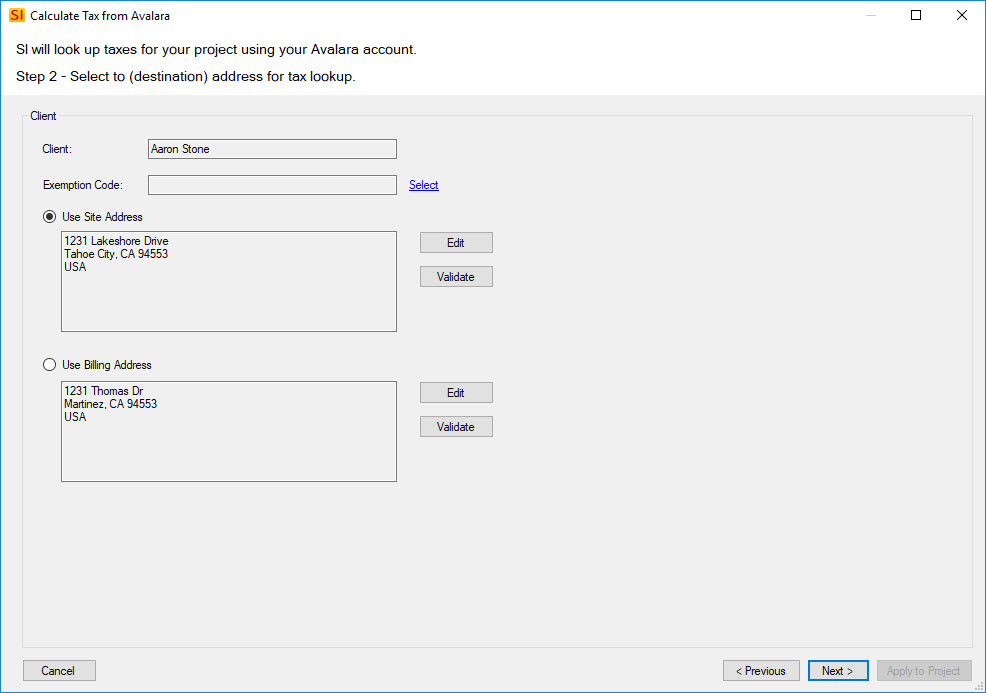
Note: If the Client has an Avalara Exemption Tax Code set it will display here. You can also use the "Select" link if you would like to set one for this Project.
Step 3
On this step you will see a summary of all the items in the Project and their assigned (if assigned) Avalara Tax Codes and Avalara Labor Tax Codes.

If any items are missing Avalara Tax Codes you can select them and use the button on the ribbon to assign codes:

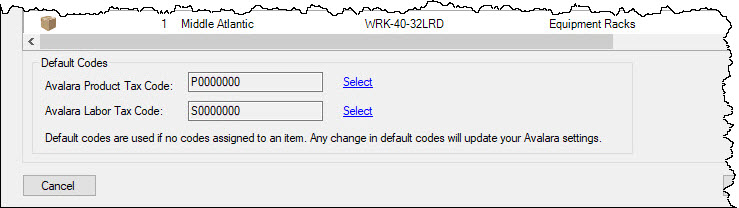
If you don't assign Tax Codes or Labor Tax Codes to items, the default Tax Codes shown at the bottom of the interface will be used:
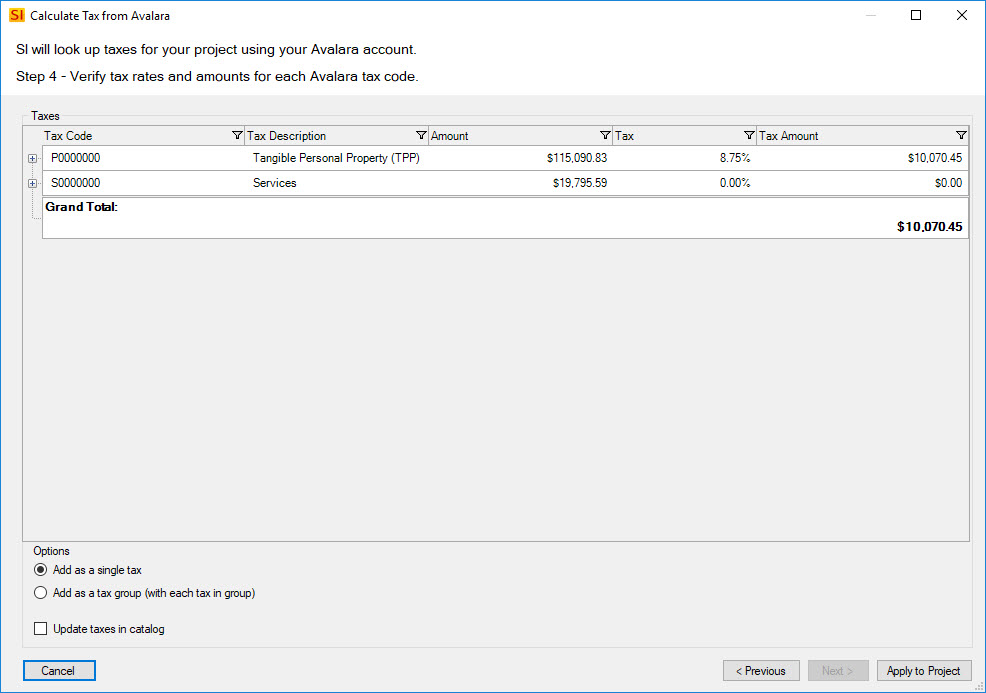
Step 4
This step will display the tax values returned from Avalara.
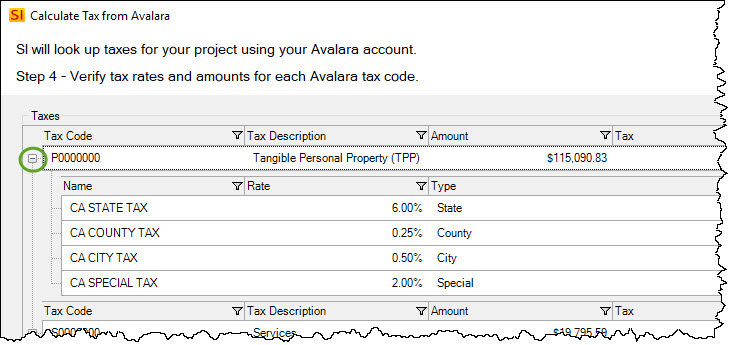
You can expand each tax to see the details if desired:
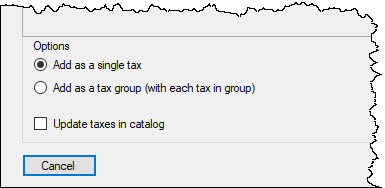
There are options to add these taxes as a single tax to the Project, a tax group with each individual tax in the group, and you can also choose if you want to add the the taxes to your Catalog or not.
When happy, click the [Apply to Project] button. You will get the following confirmation:
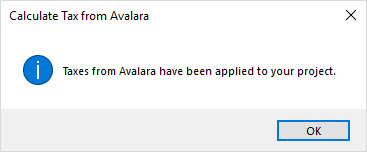
Note: If you add additional Items to your Project after this, you will need to run through the wizard again to verify that Avalara Tax Codes have been assigned to the Items. You may want to consider changing your Avalara Tax Integration settings to automatically calculate but prompt you if any Tax Codes are missing:
Remarks
If you are subject to the Florida Discretionary Surtax, please note that our implementation only works at the item level, not at the "document" level. Click here for a post from Avalara describing this surtax.
- © Copyright 2024 D-Tools