Labor Rates (Phases)
Table of contents
Setting
Here you can add/edit/delete Phases, which are one way to charge for labor in SI.
The Manage Phases form lists all of the Phases you have in your Catalog.
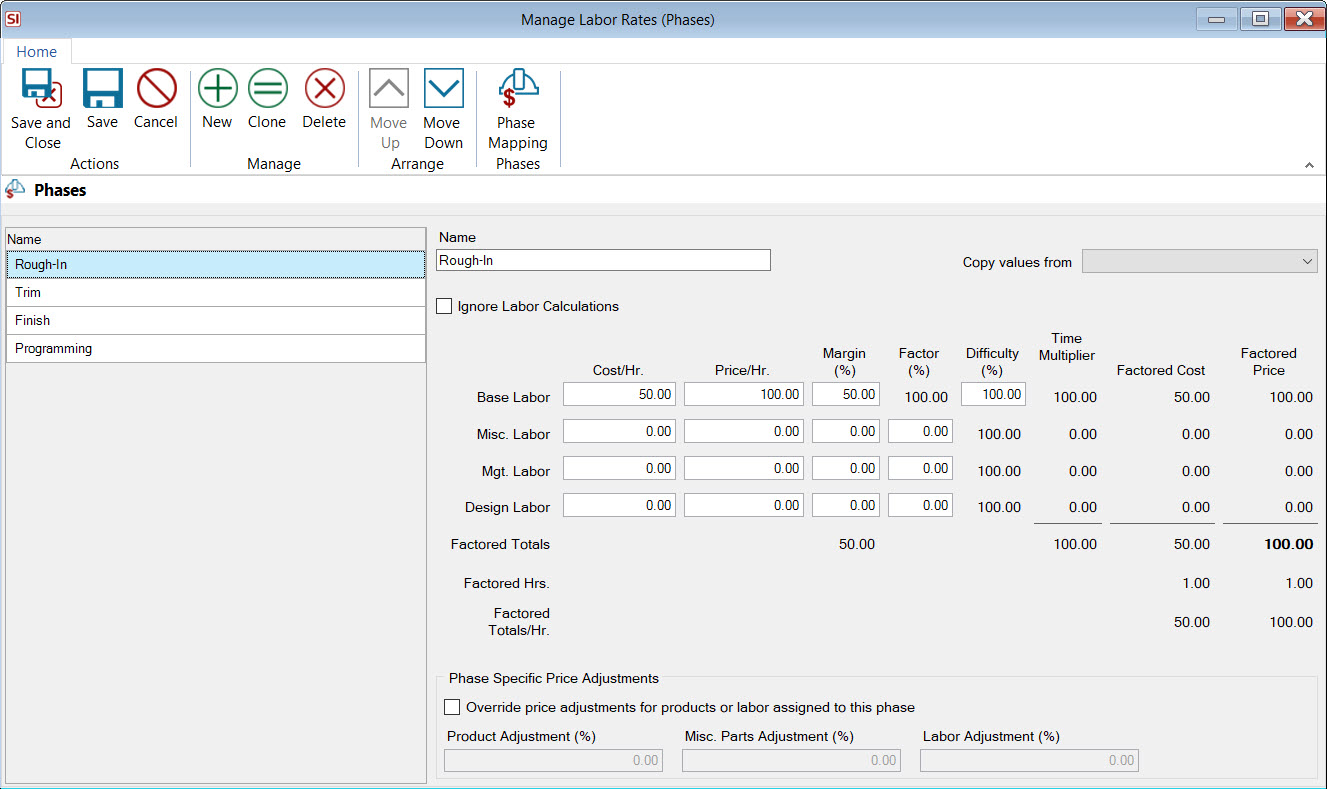
Phases allow you to identify the Phase of the project that Items are assigned to within a project, as well as charge for labor within a project on a per/product basis.
See Labor Considerations for your options for charging for labor in SI Projects and Service Orders.
Details
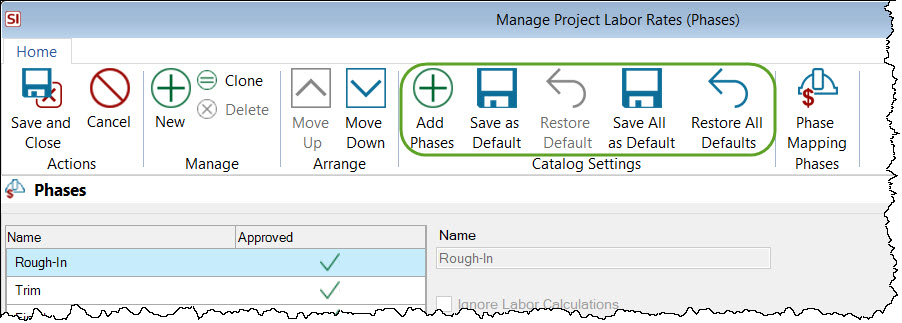
Manage/Arrange
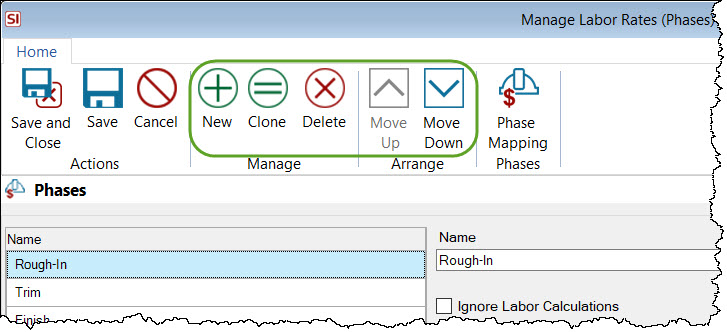
You can add new Phases or edit existing Phases. If you edit a Phase name, all products in your Catalog assigned this Phase will be updated with the new Phase name. When you delete a Phase, Items in your Catalog assigned to this Phase will be designated "Unassigned".
You can order your Phases using the Move Up/Down buttons.
Fields
Each Phase is broken down into four sections: Base Labor, Misc. Labor, Mgt. Labor and Design Labor. The Misc. Labor, Mgt. Labor, and Design Labor are considered Subphases. There are eight columns: Cost/Hr, Price/Hr, Margin (%), Factor (%), Difficulty (%), Time Multiplier (%), Factored Cost/Hr, and Factored Price/Hr.
|
Field |
Description |
|---|---|
|
Cost/Hr: |
How much labor costs you per hour |
|
Price/Hr: |
How much you charge per hour of labor |
|
Margin (%): |
The margin between Cost/Hr and Price/Hr |
|
Factor (%): |
What percentage of each Base Labor hour you are charging the client. This number is always 100% for the Base Labor but you will most likely vary the Misc., Mgt., and Design percentages. This will affect the number of hours used in calculations. For example a Design Labor factor of 25% would mean that you would include .25 hrs (15 minutes) of Design Labor for each hour of Base Labor (Install Labor). |
|
Difficulty (%) |
This field is a multiplier for hours and it affects the Base and Misc. hours only. This number should be set to 100% by default but can be changed on a per project basis if you wish to increase the number of hours charged for Base and Misc. Labor. For example, if you change this number to 200% for the Rough-In Phase within a project, all products assigned to the Rough-In Phase would will double the existing hours. |
|
Time Multiplier (%) |
These numbers show the details of what is being multiplied. |
|
Factored Cost/Hr: |
Displays your Cost/Hr based on the number you enter for the Factor(%) |
|
Factored Price/Hr: |
This field cannot be edited. It is your Price/Hr based on the number you enter for the Factor(%) |
Ignore Labor Calculations
This option to have no labor calculations compute for a particular Phase. You might use this option within a Project, for example, where you were not charging labor and only want to charge a client for the equipment within a particular Phase.
Phase Specific Adjustments

This section for each allows you to set a Product Adjustment %, Misc Parts Adjustment %, and/or a Labor Adjustment % on a per Phase basis. When you check the Override Project Defaults for this Phase box, these values will override the Product Adjustment %, Misc Parts Adjustment %, and Labor Adjustment % settings under Price Adjustments Settings. Using these price adjustment settings on a per Phase basis gives you more control and accuracy than if you charge a percentage all products in a project.
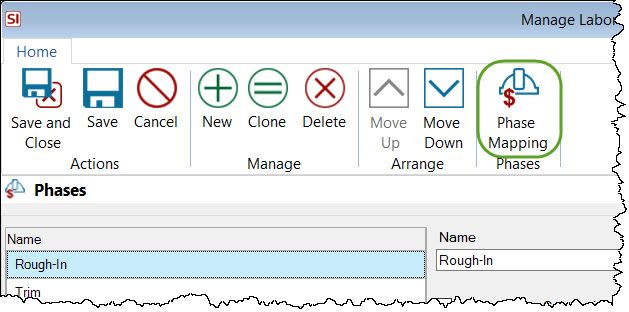
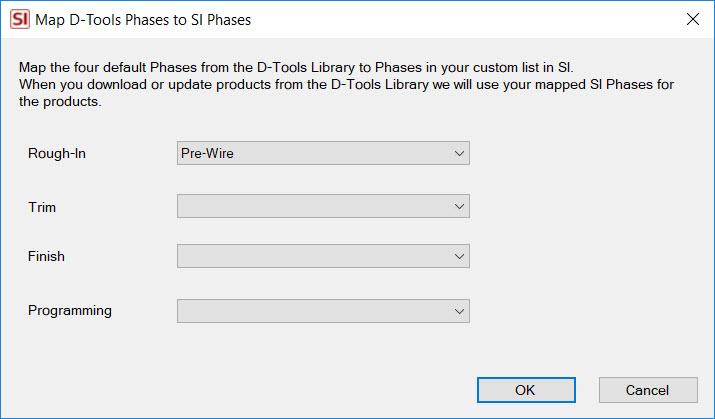
The Phase Mapping button allows you to map your custom Phases to our default Phase names so that when you download products from the D-Tools Library they will be assigned to the Phase of your choice. Click here for details.
Phase Mapping
This feature allows you to map the default Phases assigned to products in the D-Tools Library to your own custom list of Phases.
Within the Project Editor
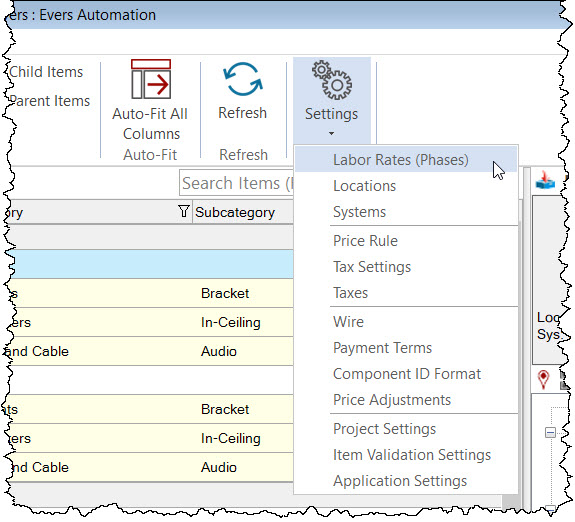
There are additional functions on the Manage Phases form within the Project Editor. To open this form, click the Settings tab then the Phases button:
Within a Project you can adjust your Phases specifically for that Project. However, if you want the changes you make within a Project to be saved to your Catalog for all future Projects, you can. The Save as Default button will save the currently selected Phase to the Catalog while the Save All as Default button will save all Phases. The opposite of this is the Restore Default and Restore All Defaults buttons. These buttons will populate the Phase settings within the Project with whatever is in the Catalog.
These functions are most commonly used by new users who create their first Project before setting up their Phases and then want the changes they make in the Control Panel to apply to their existing Project(s).
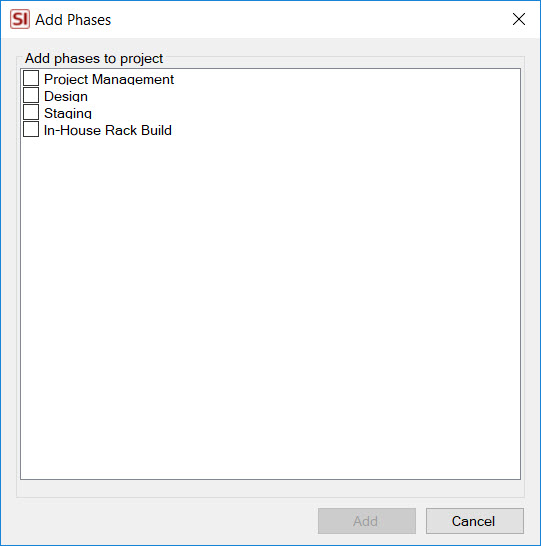
The Add Phases button can be used if you created a Project and then created new Phases in your Catalog via the Control Panel. When you click this button, a form will open showing you the Phases that are not already in the Project. You can select the ones you want then click the Add button:
- © Copyright 2024 D-Tools