Labor Items

Details
Labor Items are one way of charging for Labor in SI 2015, see Labor Considerations. These are Items in your SI 2015 Catalog that are set to Type "Labor". The Type is determined by your Category Settings.
General Tab
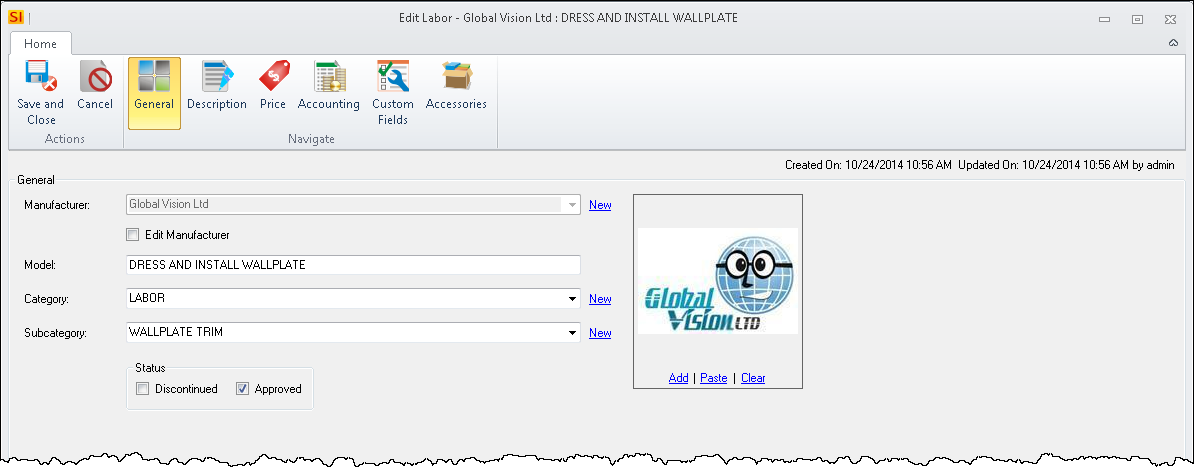
Manufacturer
The dropdown menu lists all the Manufacturers in your Catalog. Click the "New" link to create a new Manufacturer. This is a required field.
Model
This displays the Model number of the Labor Item. This is a required field.
Category
The dropdown menu lists all the Categories in your Catalog. Click the "New" link to create a new Category. This is a required field.
Subcategory
The dropdown menu lists all the Subcategories in your Catalog. Click the "New" link to create a new Subcategory.
Status
Here you can mark a Labor Item as Discontinued or Approved. Discontinued can be used to keep a Labor Item in your Catalog, but not have it display on forms by default. Approved data automatically synchronizes to your SI 2015 Server for use by all User, unchecking this setting keeps your data changes local to your machine.
Image
Here you can add an image to a Labor Item. You can use the Add, Paste, Clear functions or you can drag and drop images directly into the field.
Description Tab
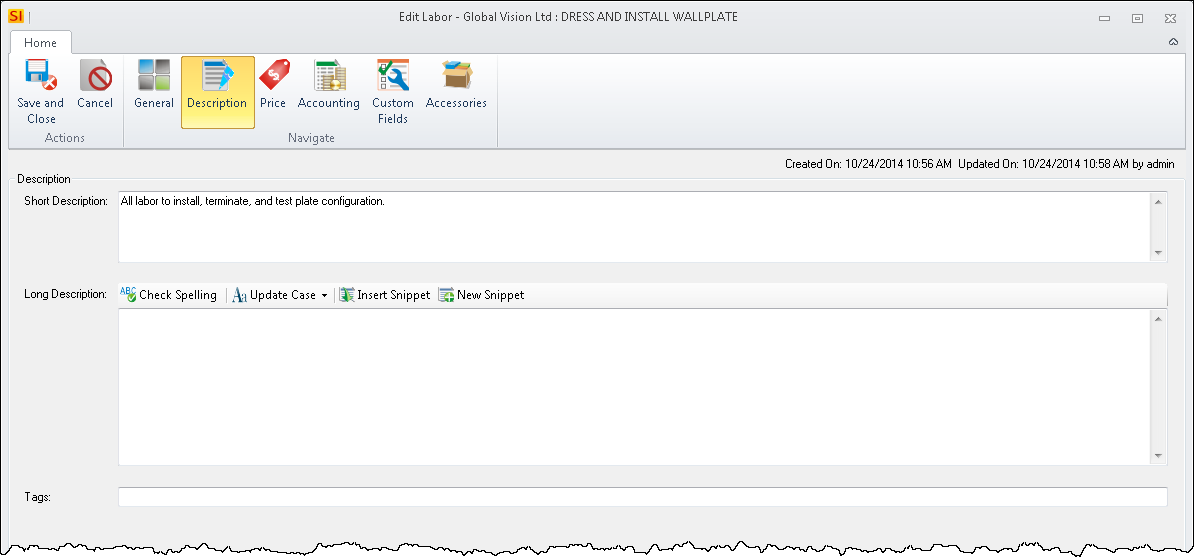
Short Description
Here you can enter a brief description for a Labor Item for use on "internal" vs. client reports. Maximum of 255 characters.
Long Description
Here you can enter a longer description for a Labor Item. When this field is populated, all client reports will use this description. If this field is blank, client reports will use the Short Description field.

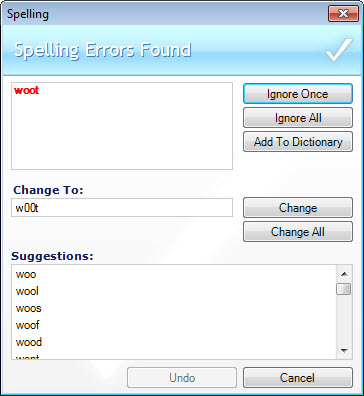
You can Check Spelling:
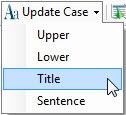
You can change the case of whatever you have selected in the Long Description field. Your options are: Upper, Lower, Title, and Sentence.
You can also insert an existing Snippet or add a new Snippet. See Snippets.
Tags
Here you can add tags to help identify Labor Items while searching.
Price Tab
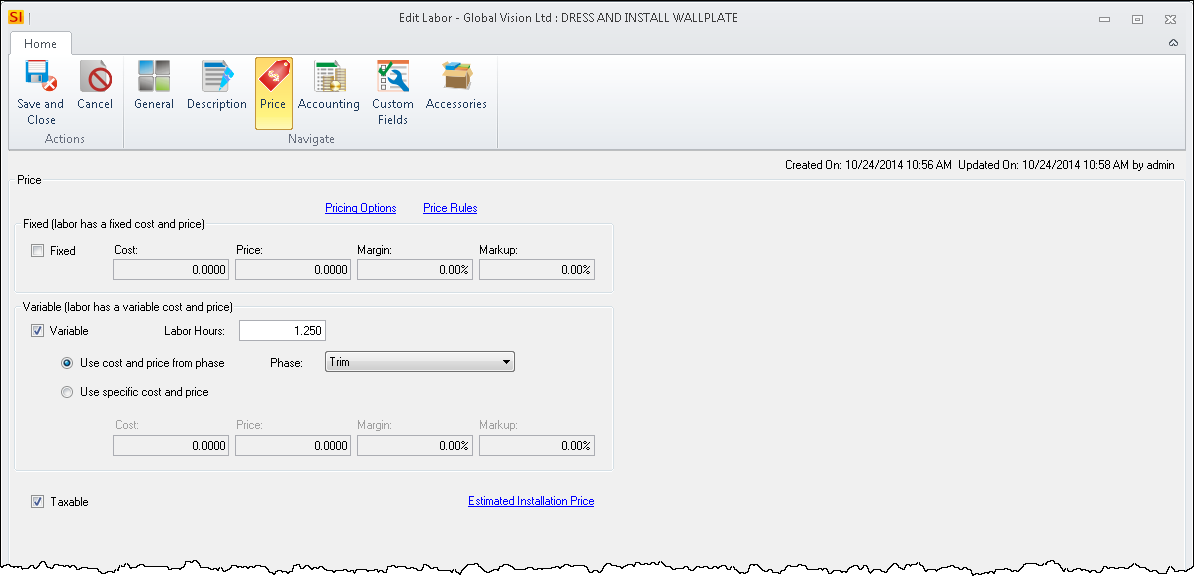
There are three ways to charge for labor on a Labor Item: Fixed, Variable, and a combination of both.
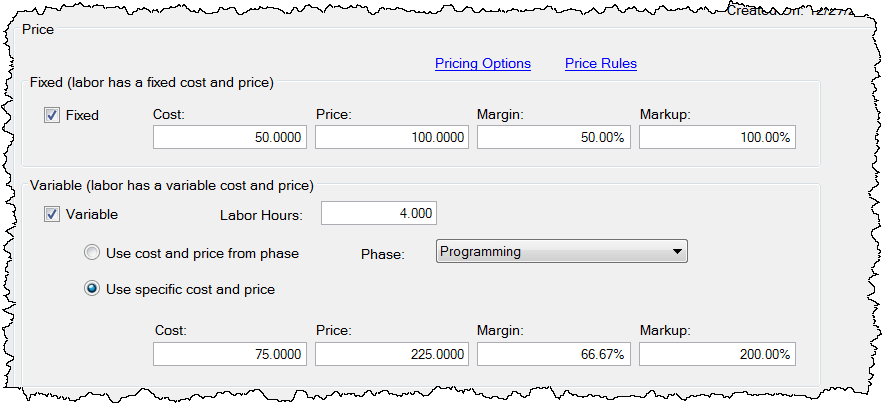
Fixed
"Fixed" charges a flat rate for the Labor Item and has four fields.
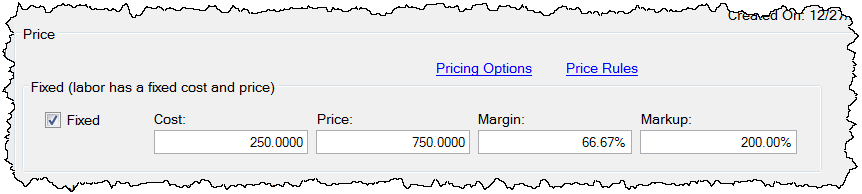
Cost
Enter how much the labor costs you
Price
Enter how much you sell the labor for
Margin
Margin =(1 - (Unit Cost / Unit Price)) x 100. This field calculates automatically for you based off of the Unit Cost and Unit Price. See "Pricing Options" below.
Markup
Markup = (Selling Price - Product Cost) / Product Cost * 100%. This field calculates automatically for you based off of the Unit Cost and Unit Price. See "Pricing Options" below
Variable
"Variable" charges labor based on a rate times the number of Hours.
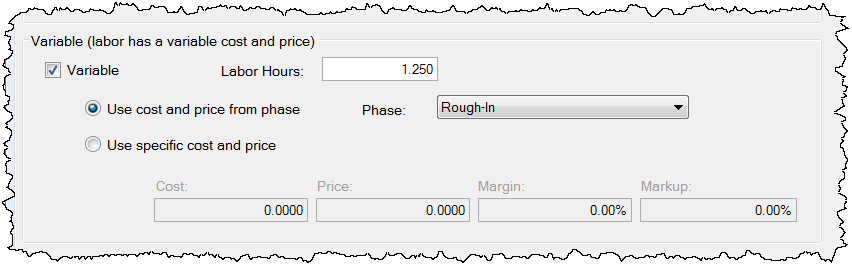
Phase
Here you can assign a Phase to a Labor Item, generally something like: Programming, Rough-In, Trim, or Finish. Phases can determine what labor rate should be applied to the Product multiplied by the Hours (see below). By default, Labor is not charged for a Labor Item using the Phase's labor rates. There are settings for this:
Use cost and price from phase
This option uses labor rates for the Phase will be multiplied by the Hours to determine the pricing for the Labor Item.
Use specific cost and price
This option allows you to enter specific rates for the Labor Item, once again the fields are:
Cost
Enter how much the labor costs you
Price
Enter how much you sell the labor for
Margin
Margin =(1 - (Unit Cost / Unit Price)) x 100. This field calculates automatically for you based off of the Unit Cost and Unit Price. See "Pricing Options" below.
Markup
Markup = (Selling Price - Product Cost) / Product Cost * 100%. This field calculates automatically for you based off of the Unit Cost and Unit Price. See "Pricing Options" below
See Labor Considerations for more information regarding charging for labor this way. See Phases for labor rate settings.
Hours
Here can add the number of hours you estimate (or know) that it will take to install a Labor Item. When used in conjunction with the Phase field, labor may be calculated depending on how you have chosen to charge for labor in SI 2015. See Labor Considerations for more information.
Fixed + Variable
You can also use a combination of Fixed and Variable for your Labor Items by checking both boxes.
Common Fields
Taxable
Determines whether a Product is taxable. See Tax Settings.
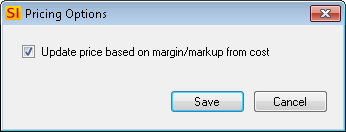
Pricing Options
This option is checked by default. This will automatically change your Unit Price based on the existing Margin and Markup when you change the Unit Cost for a Product.
Price Rules
Clicking this link will allow you to use Price Rules to set the pricing fields for the Product. See Price Rules.
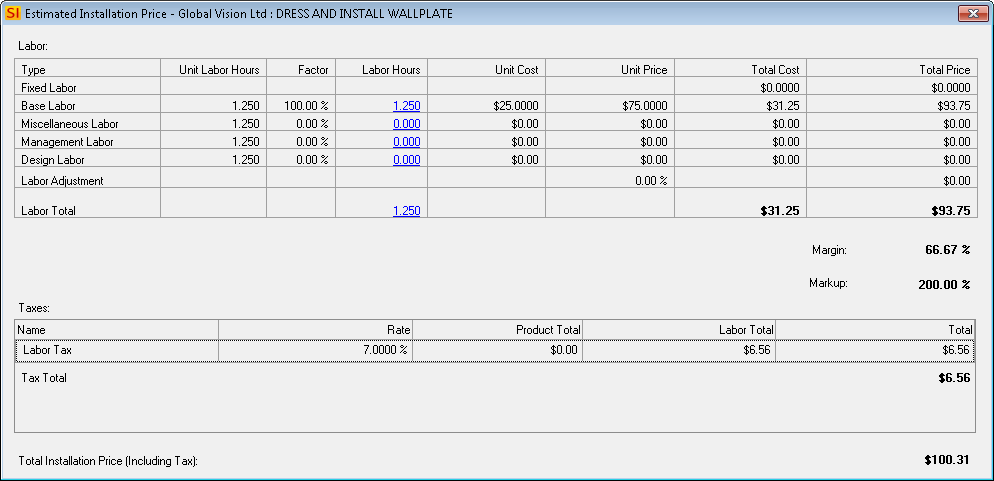
Estimated Installation Price
This will show you the estimated installation price for the Product which will include labor, taxes, and price adjustments if applicable.
Accounting Tab
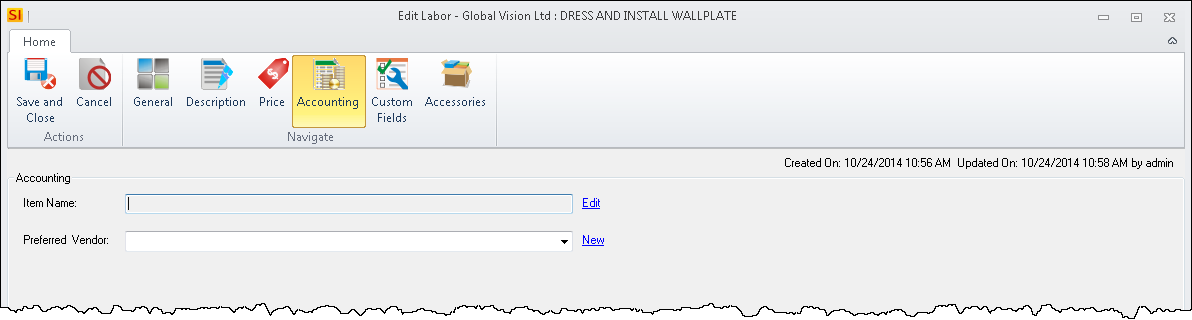
Item
This field will display the QuickBooks Item Number when using our QuickBooks Integration. You can also manually enter an "accounting ID" from your own accounting software.
Vendor
This field will display the QuickBooks Vendor when using our QuickBooks Integration. You can also manually enter a vendor from your own accounting software.
Custom Fields Tab
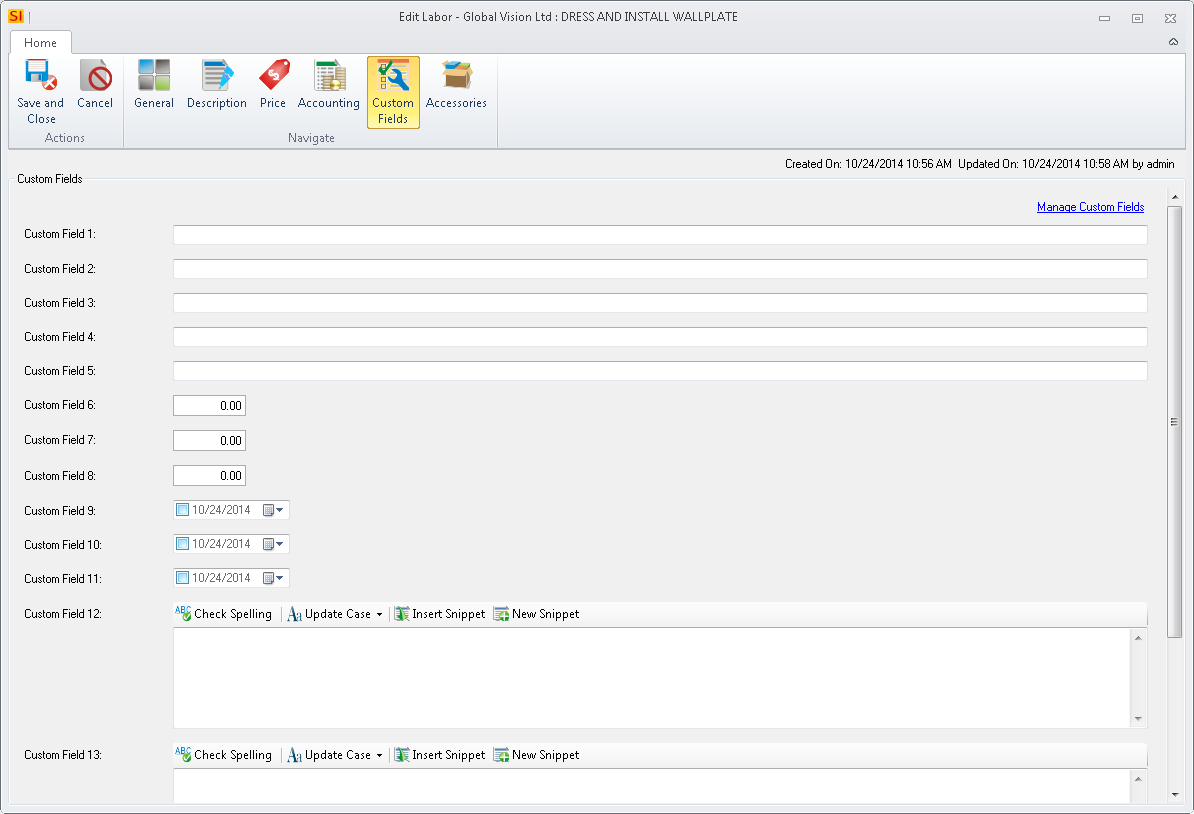
Here you can set Custom Fields for a Labor Item. There are five Short Text fields, three number fields, three date fields, and three long text fields. Click here to see how to name your Custom Fields.
Accessories Tab
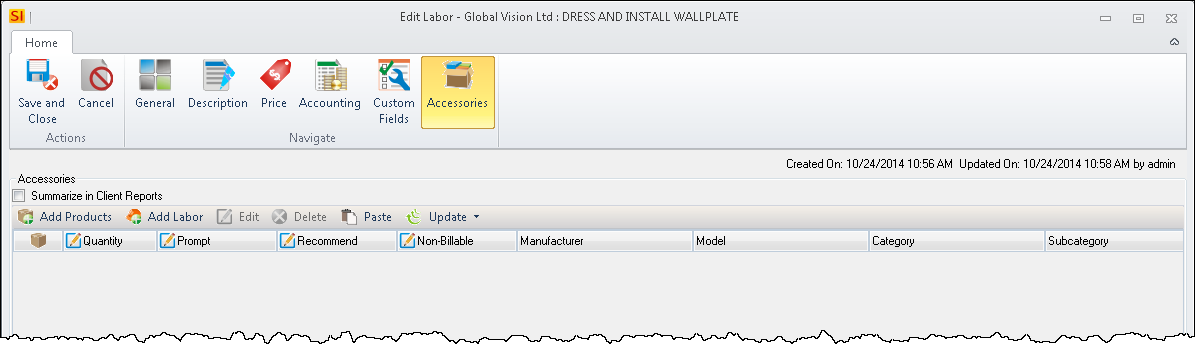
Here you can add Products and/or Labor Items to a Product. Click here to learn about Accessories.
Additional Fields Within Projects
When a Product has been added to a Project, there are additional fields added.
General Tab
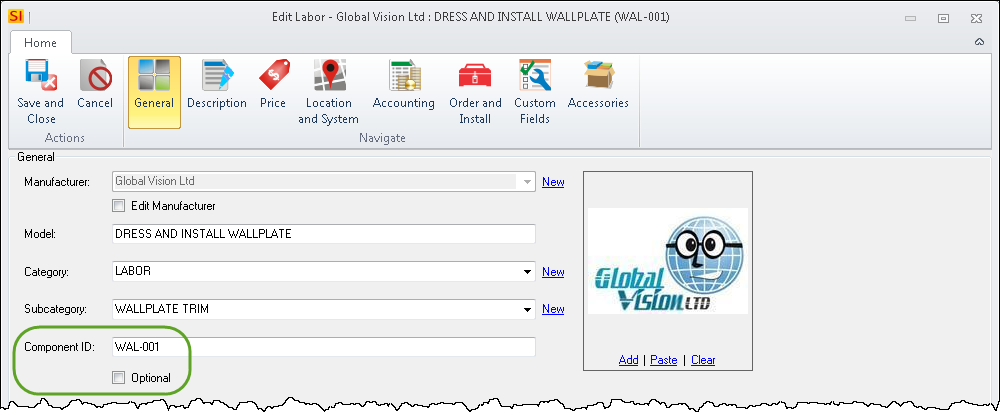
Component ID
This will display the auto-generated Component ID for the Product. This is a unique number given to every Product and Labor Item added to a Project. Click here to see how to set your Component ID. You can override this number by typing in the field.
Optional
This will mark the Product as Optional. Click here for details.
Locations and Systems Tab
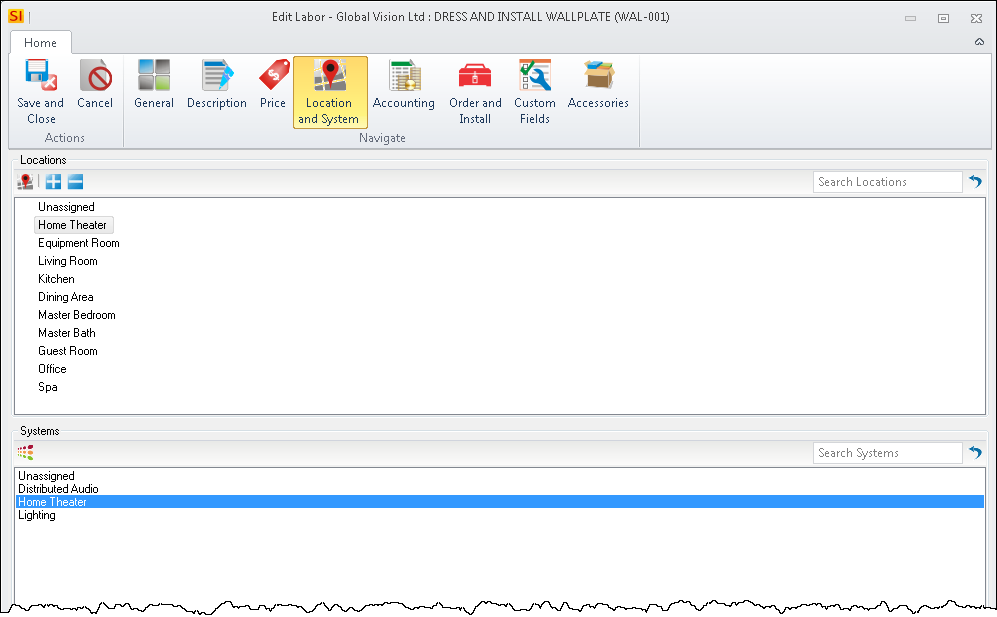
This displays the Location and/or System that the Product is assigned to within the Project. You can edit your Locations and Systems here via the buttons. See Location and System Settings.
Accounting Tab
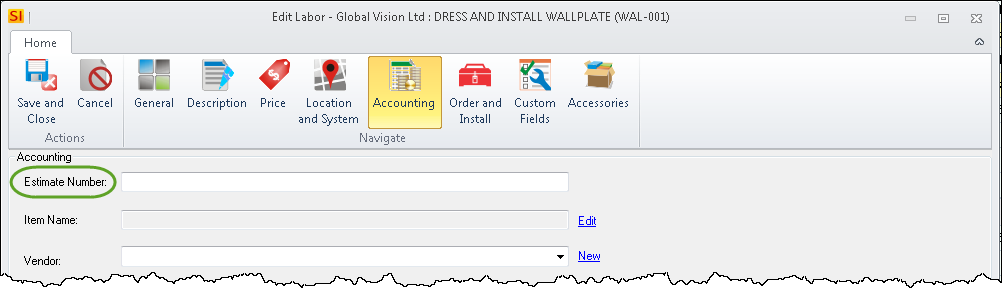
Estimate Number
This field will display the QuickBooks Estimate number when using our QuickBooks Integration. This field is editable.
Order and Install Tab
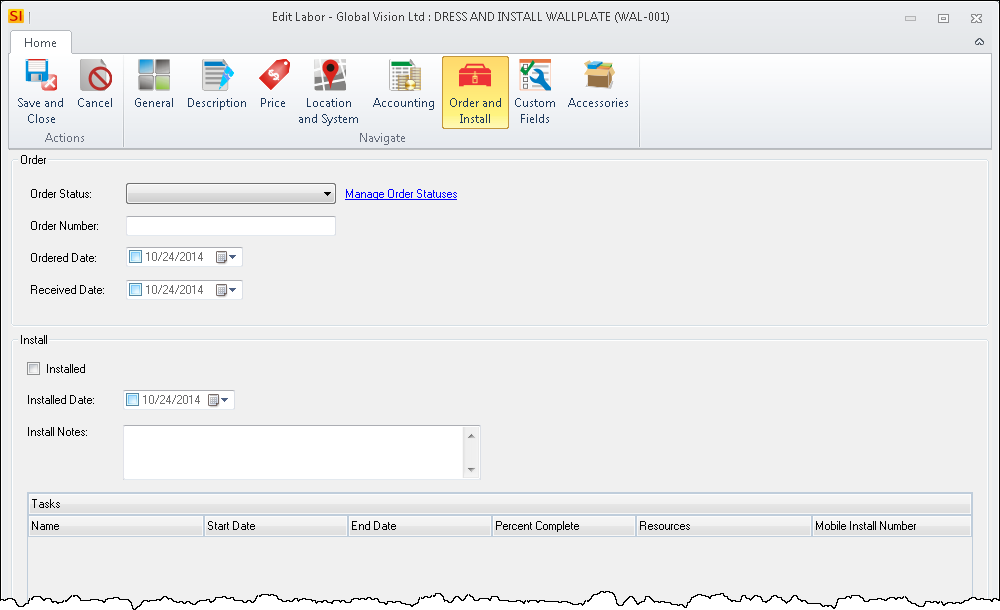
Order Status
Here you can set the order status of the Product choosing from: Not Ordered, Ordered, and In Stock/Received
Ordered Date
Here you can set the order date of the Product.
Received Date
Here you can set the received date of the Product.
Installed
Checking this box will mark the Product as "Installed" on in the Project and on any Task this Product is a part of.
Installed Date
Here you can set the install date of the Product.
Installed Date
Here you can set the install date of the Product.
Installed Notes
Here you can enter any installation notes for the Product.
Tasks
This will list the Task to which the Product has been assigned.
Remarks
Order Status, Ordered Date, and Received Date don't really apply to Labor Items but if you find a use case for them, wonderful.
- © Copyright 2024 D-Tools