Package Shapes
![]()
Details
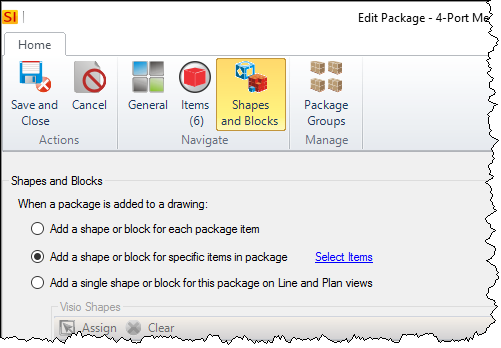
Visio shapes and AutoCAD blocks can now be assigned to Packages when editing a Package in the Package Explorer via the Shapes and Blocks tab.
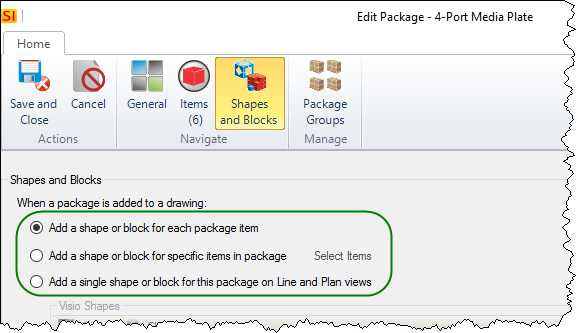
Three are three options for assigning shapes/blocks:
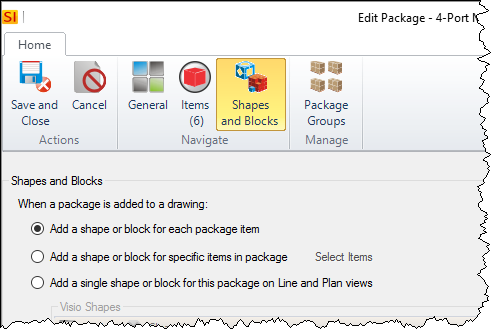
Add a shape or block for each package item
When a Package is added to a drawing page in Visio or AutoCAD, a shape/block will drop for every Product within the Package.
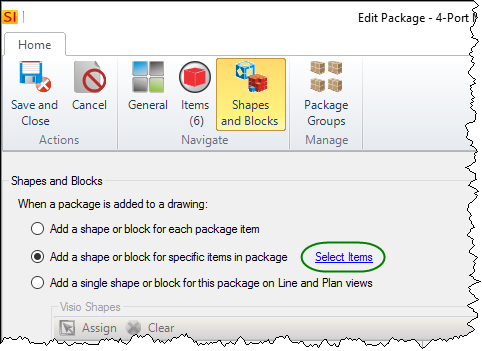
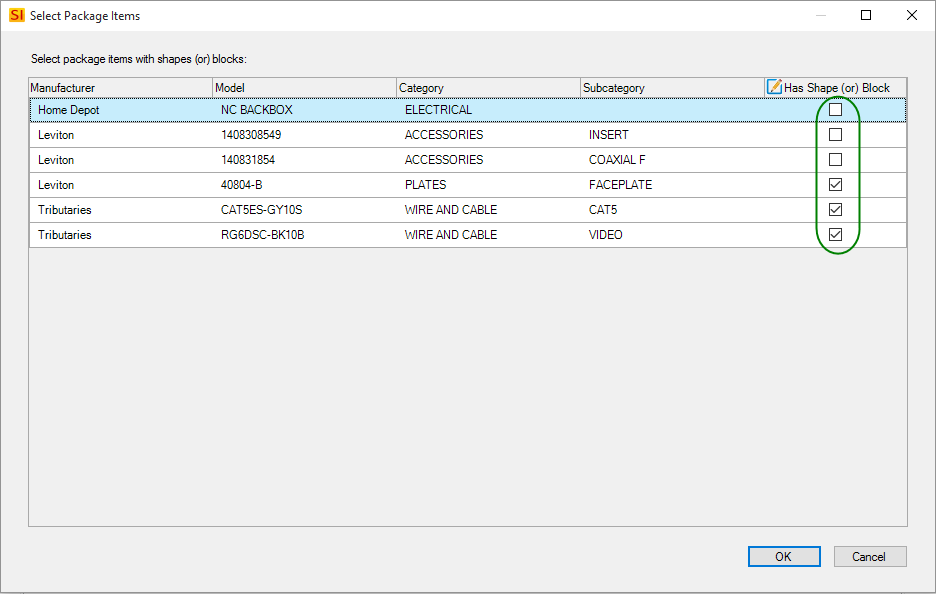
Add a shape or block for specific items in package
With this option you will then click the "Select Items" link which will then open a form where you can uncheck the box next to any Product that you don't want a shape/block to drop for when a Package is added to a drawing page.
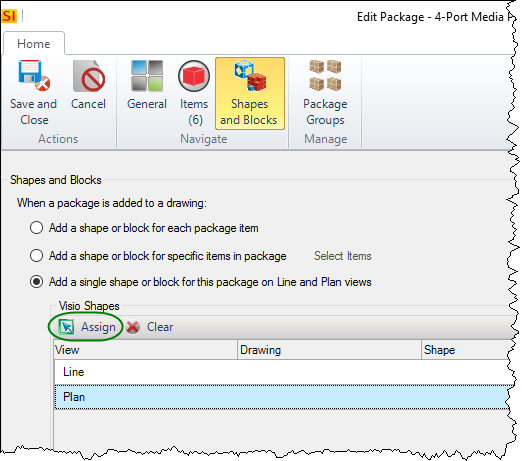
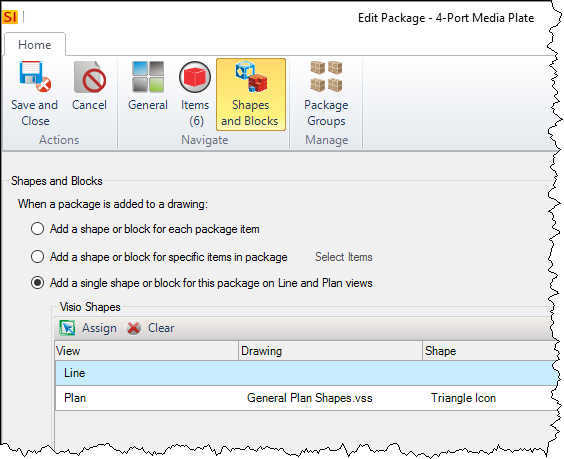
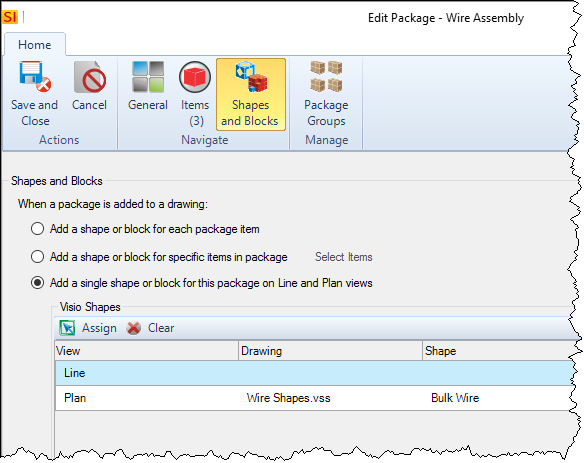
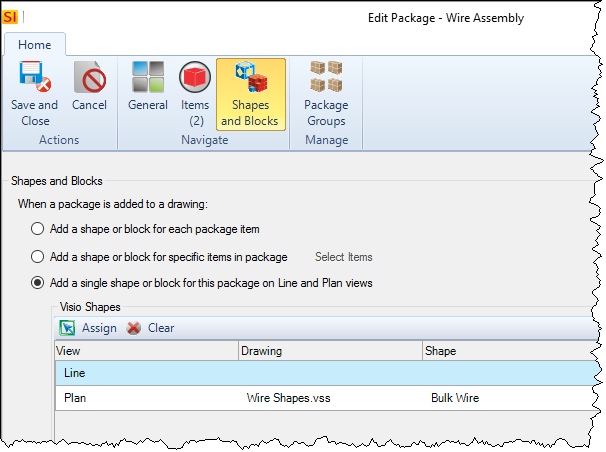
Add a single shape or block for this package on Line and Plan views
With this option you will assign a single shape/block to the Package so that only this shape/block will drop in Visio/AutoCAD on either the Line or Plan style pages/sheets. These shapes will display a Package ID vs. a Component ID since a Package shape represents multiple products. See Component ID Format.
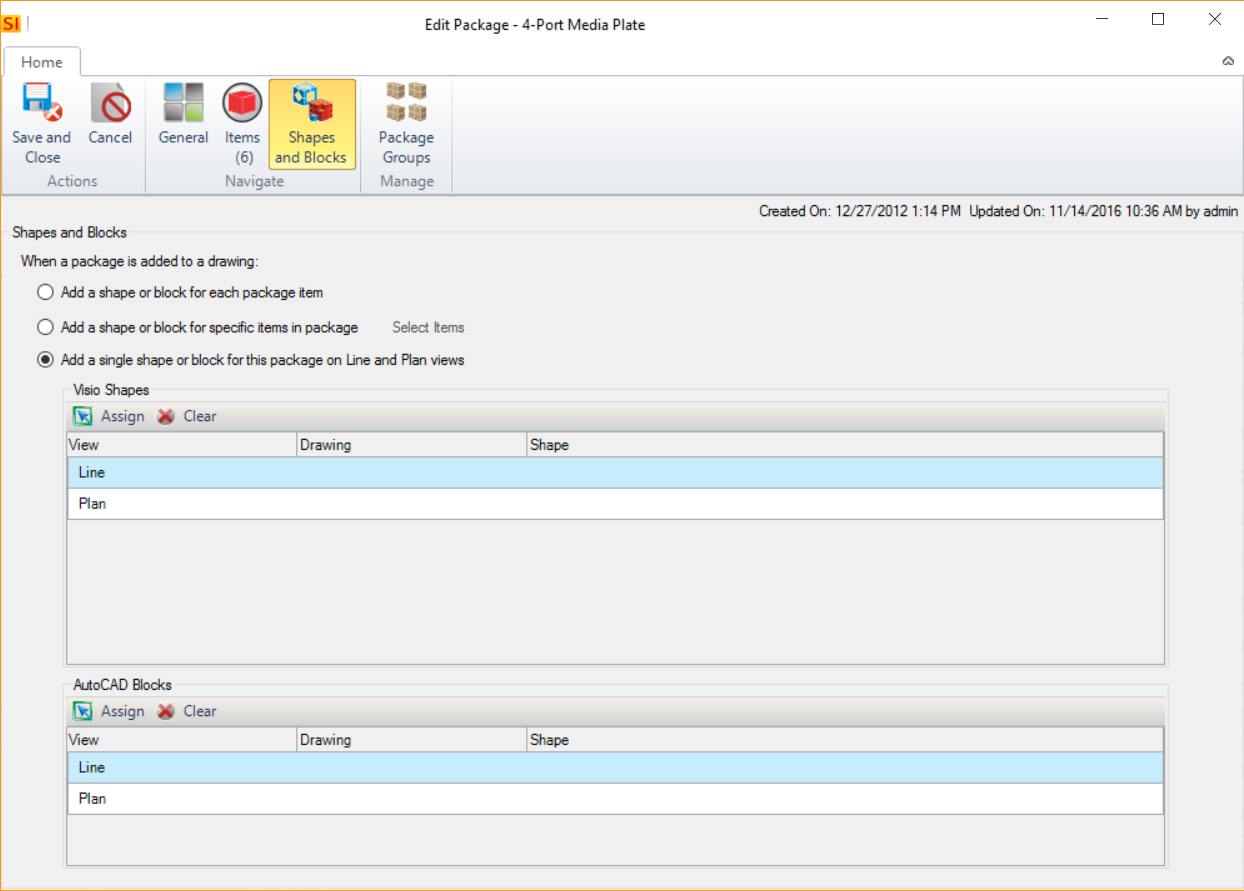
Here you would select either the Line or Plan options for Visio/AutoCAD and then click the [Assign] button:
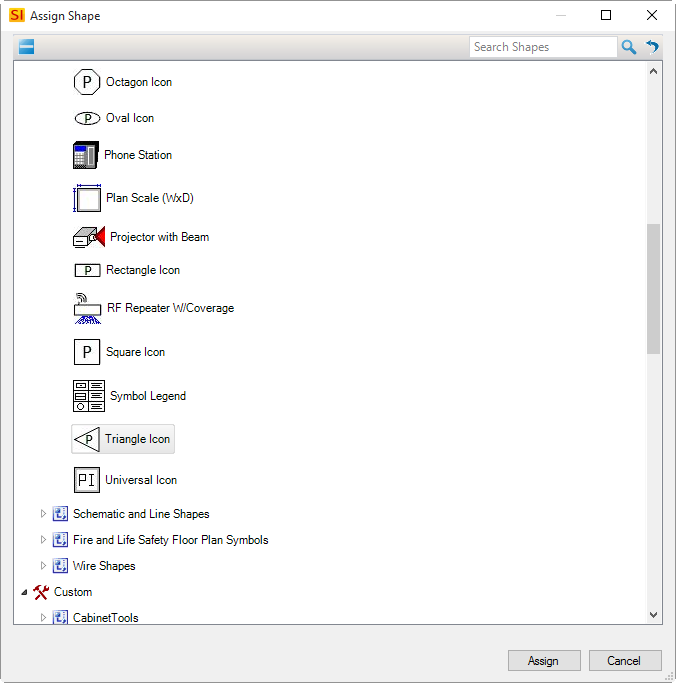
You then select a shape/block to represent the Package in Visio/AutoCAD:
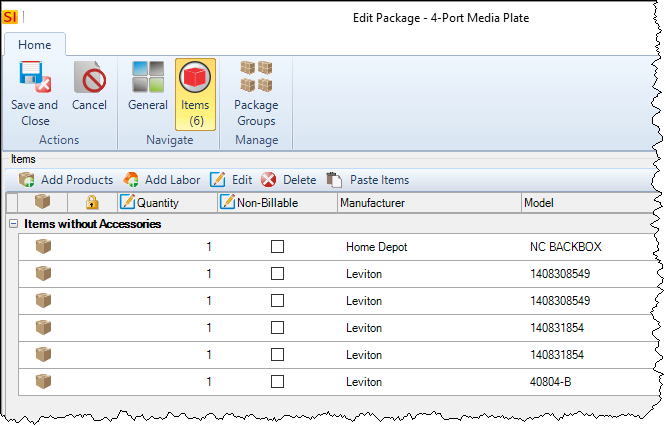
Examples
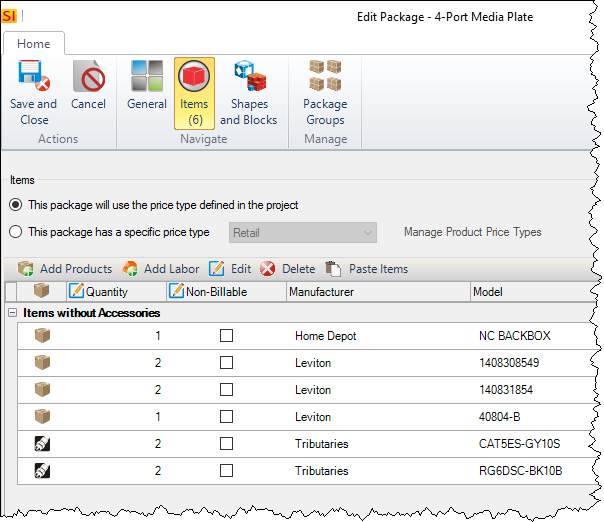
The examples below will be based off a Package consisting of the following Products:
With the first option above selected, a shape/block will drop for every item in the Package when a Package is dragged to a page in Visio/AutoCAD:

With the second option above and the following products selected, you will only get shapes for those products:


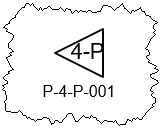
And with the third option selected, and Triangle shape selected to drop for the Package, this is the result:
Wire Shapes for Packages
You can use Wire Shapes for Packages in three different ways.
- You can connect a single wire shape to a Package of Products
- You can connect a wire Package shape to a single Product shape
- You can connect a wire Package shape to a Product package
Single Wire connected to a Product Package
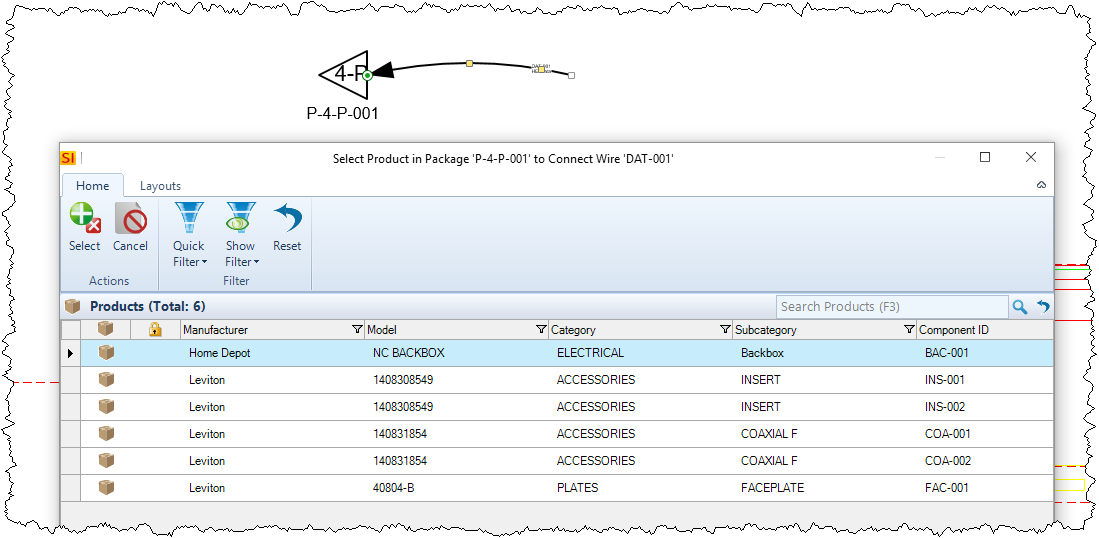
In this example a single wire is added to a Project and then connected to a single Package Shape. Here are the contents of the Package:
And this Package has been set up to drop one shape to represent the Package:
When the wire is connected to the Package Shape, you are then prompted to choose which Product within the Package this wire is connecting to:
Wire Package Connected to a Single Product
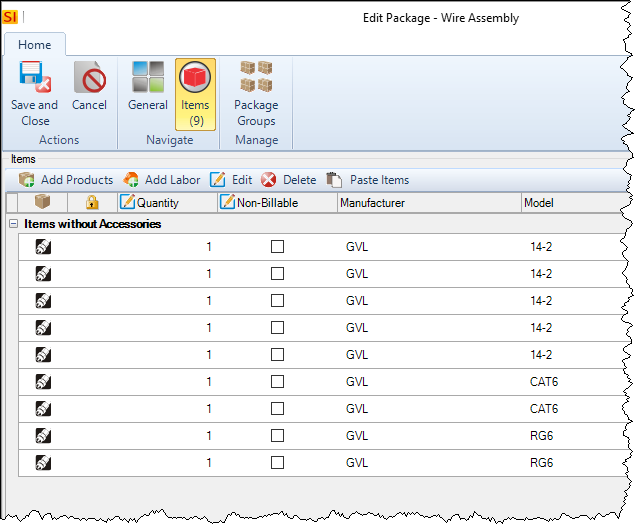
In this example I have a Package that consists of nine wires as shown below:
This Package has been set to drop a single wire shape for the Package:
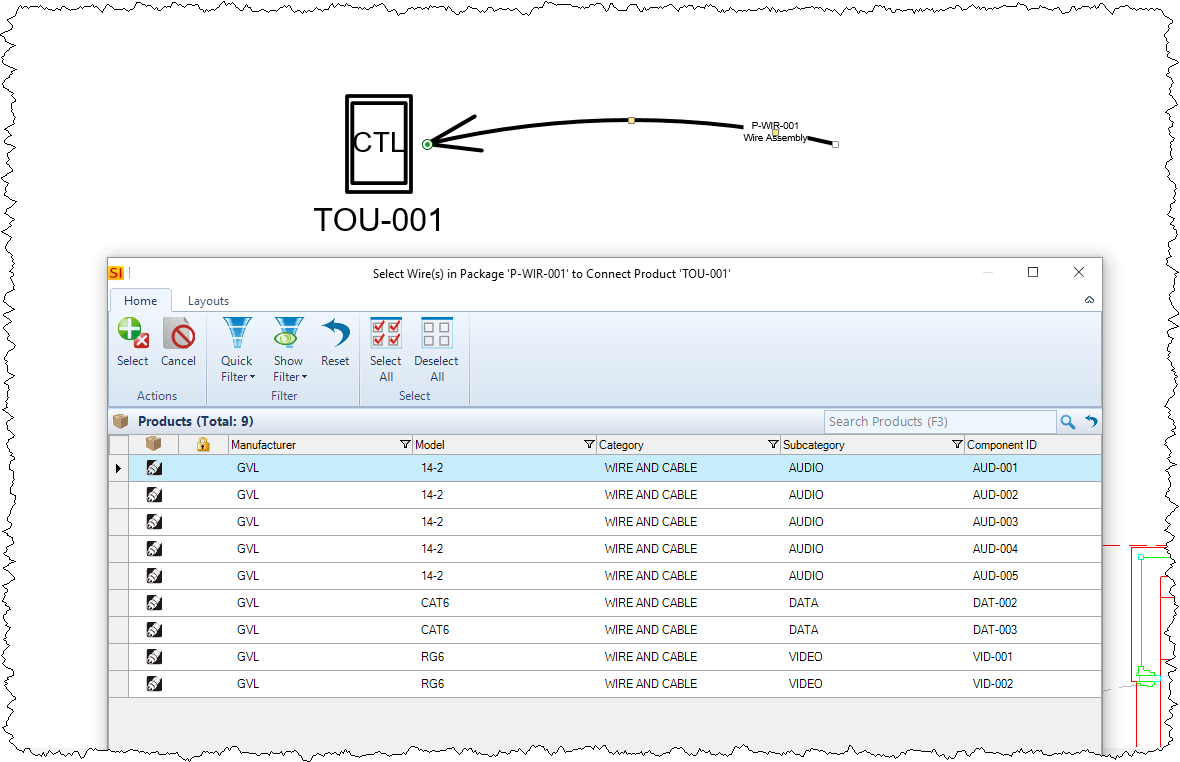
When this Package Wire Shape is connected to a Product shape, in this case a touchpanel, you will be prompted to select which wire from the Package is being connected to the Product:
Wire Package Shape Connected to a Product Package Shape
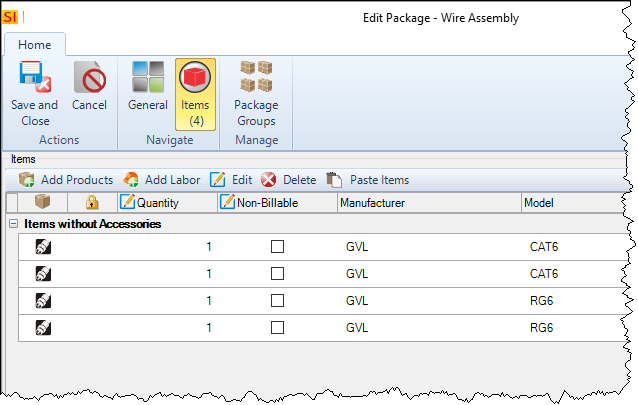
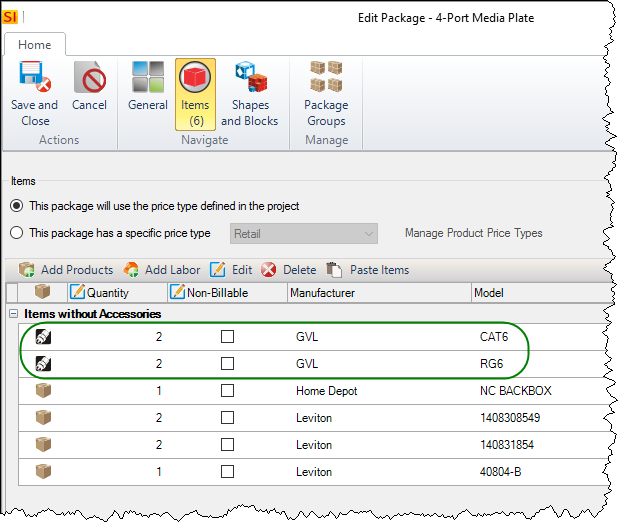
In this example I have a Package that consists of four wires as shown below:
This Package has been set to drop a single wire shape for the Package:
I have another Package with the following Products for contents:
This Package has been set up to drop one shape to represent the Package:
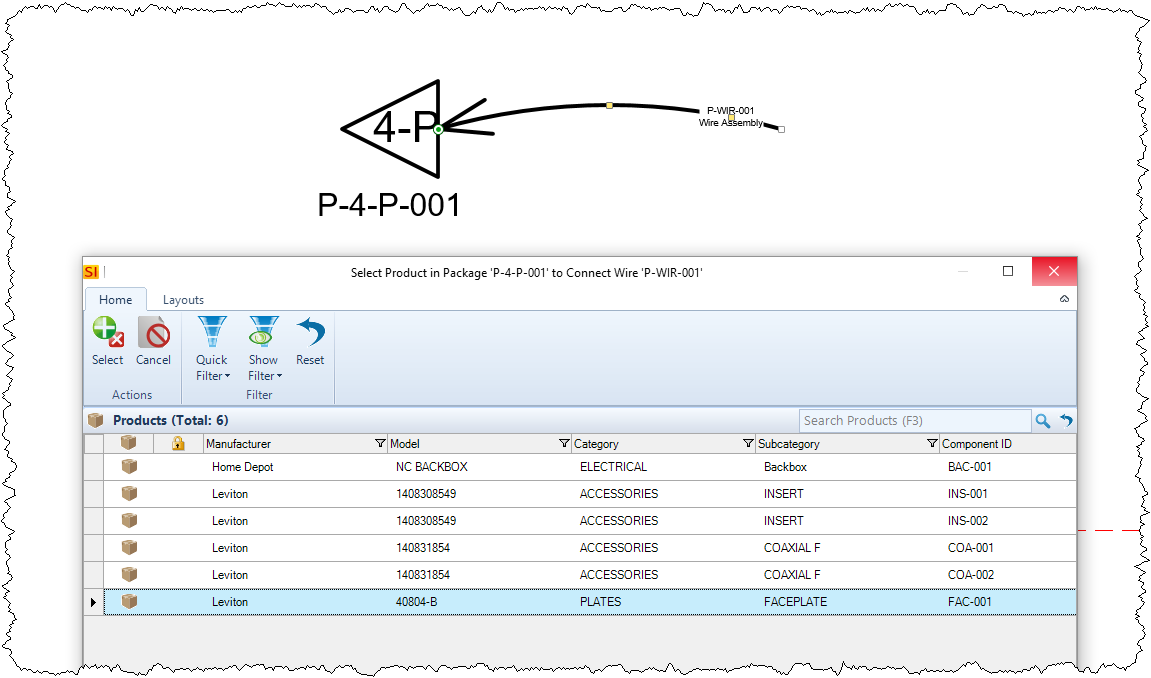
When you then connect the Wire Package Shape to the Product Package Shape you are first prompted to select a Product that the wire is attaching to:
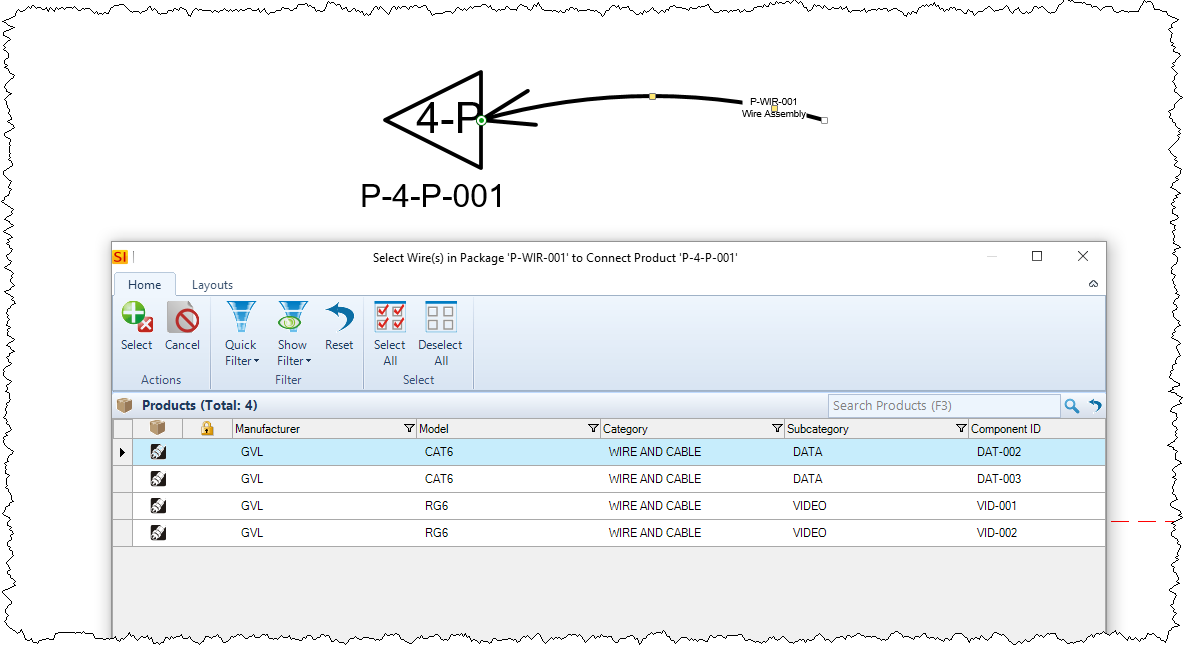
You will then be prompted to choose which wire(s) you are attaching to the Product selected in the last prompt:
Reports
There is a specific report named "Wire Checklist With Package Info (Connected Only)" that was created specifically for when you are using wire shapes for Packages. Click here for info.
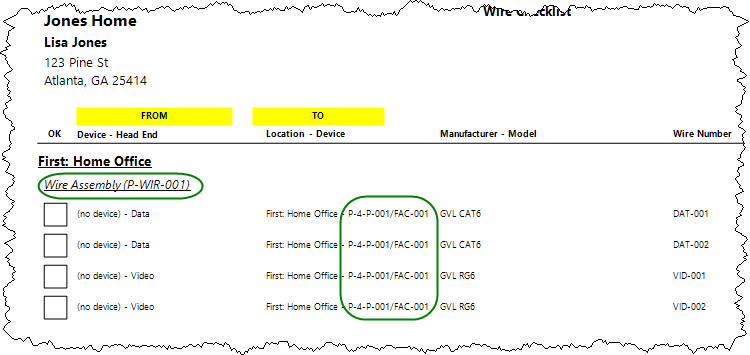
Labor for Wires in a Package
When there are multiple wires in a Package, you may want to make some considerations regarding labor, especially when using "Phase labor" on each product. In the example below, there are four wires in the package:
Each of these wires have labor associated with them, in this example .005 hours per foot:
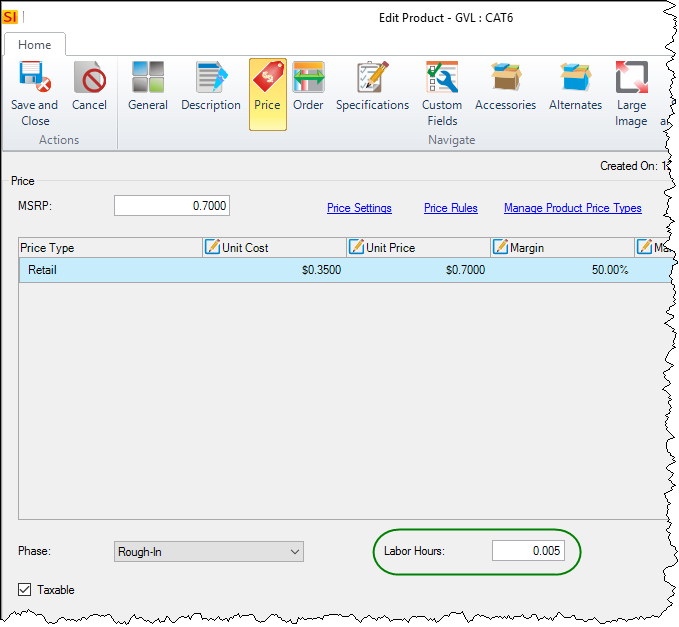
This means that for a 100 foot drop of this wire, .5 hours of labor will be charged. This time would be appropriate for running a single wire. When you have four wires in a Package, all at 100 feet and set to .005 hours per foot, 2 hours (4 wires x .5 hours) of labor would be charged for these wires. This might be too much labor being charged for the Package, especially if some or all of the wires are being pulled at the same time.
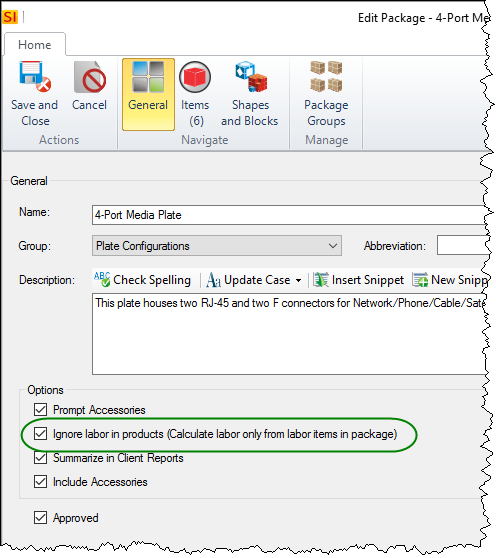
Packages have the following setting that will ignore all of the labor hours assigned to the Products within the Package and allow you to charge for labor in the Package via a Labor Item.
- © Copyright 2024 D-Tools