Inserting a Floor Plan
Details
There are various methods for inserting a floor plan into Visio. You can insert directly on the Visio page where you will be dropping your shapes or you can use a background page.
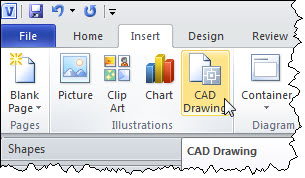
AutoCAD Files (.DWG)
AutoCAD files are ideal because they are vector drawings and scale nicely. Visio has a built-in function for inserting CAD files:
Once you browse to your CAD file, the following form will open:
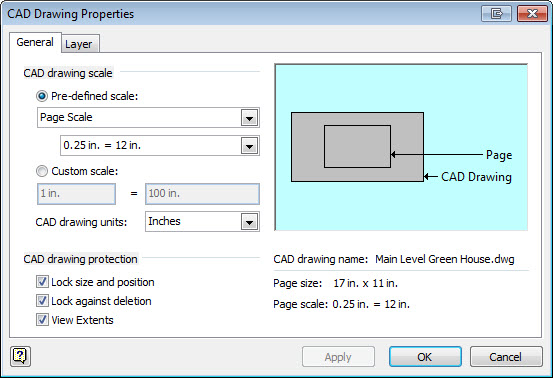
Notice the preview area of the form, this shows the size of the floor plan relative to the page size. You can adjust the scale to get the floor plan to fit. You can also uncheck the "Lock size and position" option so you can move it to the desired position on the page:
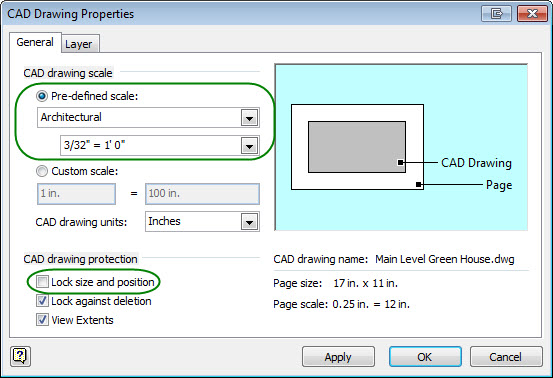
Once you are happy with the position, double-click the floor plan in Visio to re-open this form and re-check that option.
PDF Files
PDF files are not ideal because they are not vector files. The image quality can also degrade once inserted into Visio. There is software available that will convert your PDF files into .dwg or .jpg files to help improve the quality of the floor plan.
PDF to DWG
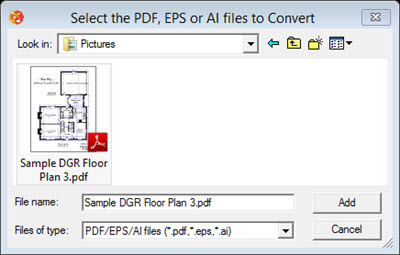
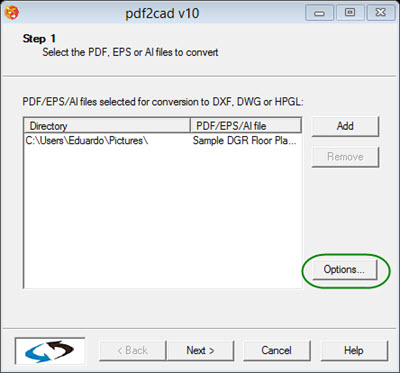
Download and install the free trial of pdf2cad. When you run the software you will be prompted to browse to the .pdf file:
Click the [Options...] button:
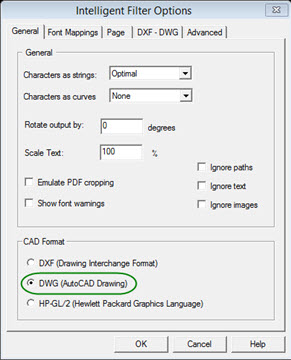
Under General Tab change the CAD Format to DWG. Click [OK]:
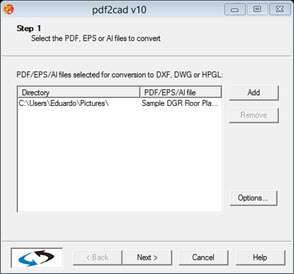
Click [Next>]:
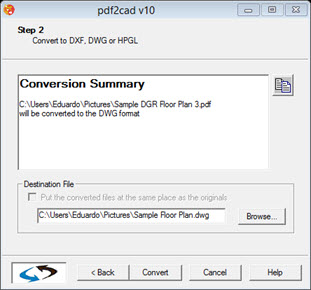
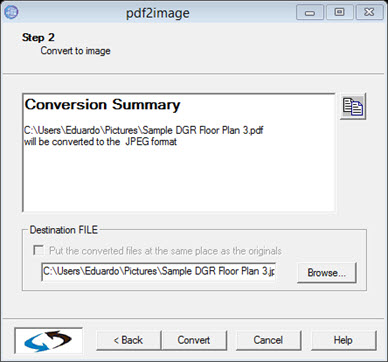
On the Conversion Summary Window, verify the file name and its path, then click [Convert]:
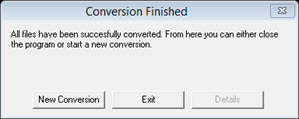
The conversion should take just few seconds, but it can vary depending on the size and complexity of the cad file. Click [Exit]:
Now insert the CAD file following the instructions above.
PDF to JPG
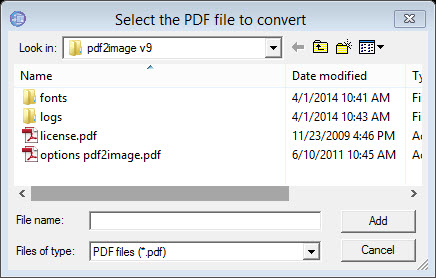
Download and install the free trial of pdf2image. When you run the software you will be prompted to browse to the .pdf file:
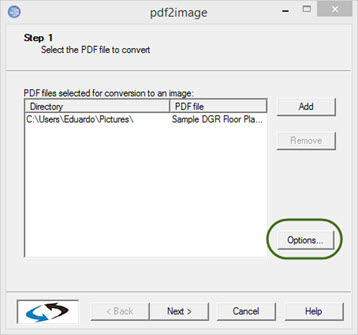
Click the [Options] button:
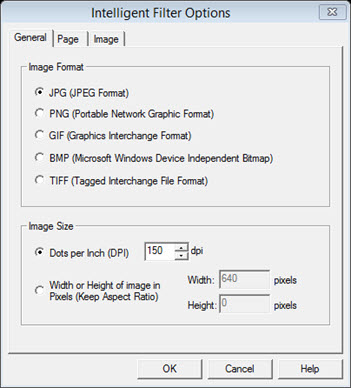
Verify the settings. Here you can change the Image Format, Image Size, Page Size, and additional Image settings such color balance and transparency. When you are finished with those settings, click [OK]:
Click [Next] and then [Convert]:
When done, click [Exit].
Open the project in Visio and on the Insert tab click “Picture”:
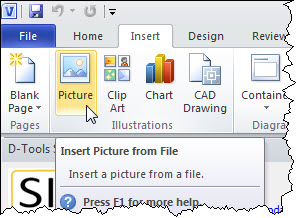
Browse the Floor Plan image (e.g. jpg) and click the [Open] button:

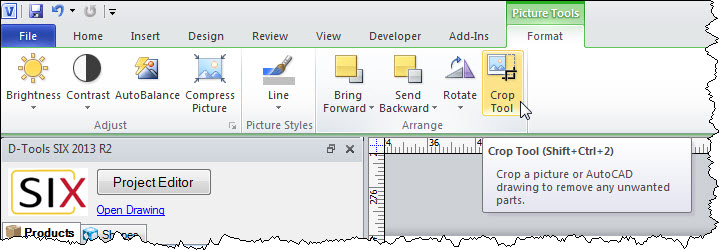
Your background page is now inserted in Visio. The next step is to reduce the amount of “white space” from the image. I recommend you using crop function within Visio as shown below:
Inserting a PDF
If you do not wish to convert your PDF to another format, you can insert the PDF directly into Visio. Keep in mind that Visio often degrades the quality of the PDF file once inserted so your floor plan may be blurry.
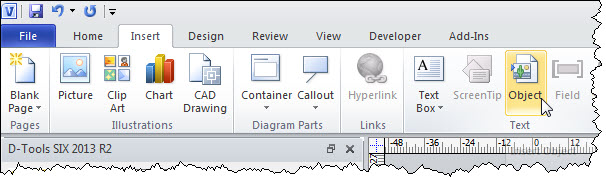
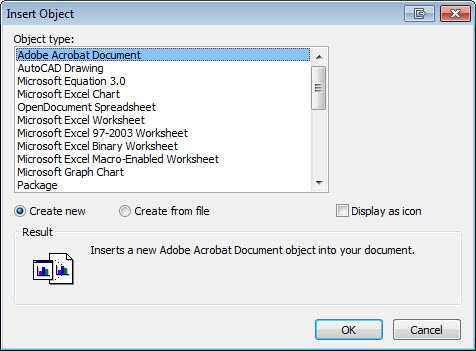
Click the Insert tab than the [Object] button:
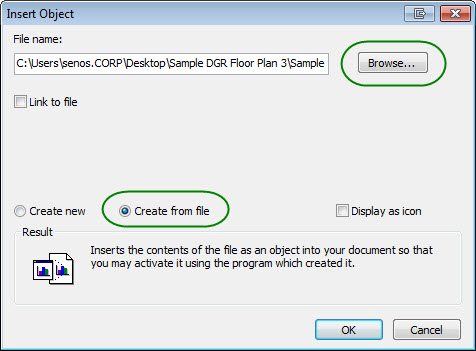
Select "Adobe Acrobat Document" then click the "Create from file" radio button:
Browse to your PDF file then click [OK]:
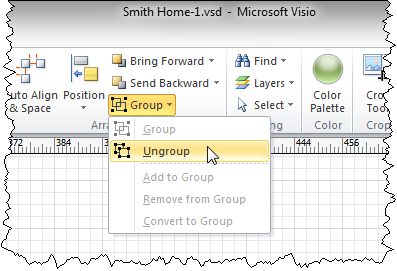
Note: After the PDF is inserted into Visio, Save the Visio file to make sure that it will save. Sometimes you may get the following message when attempting to save:
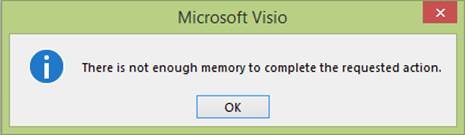
If this happens, click on the inserted PDF to select it and from the ribbon in Visio select Group->Ungroup.
Locking Down the Floor Plan
It is important that you "lock down" your floor plan so that you don't accidentally move it while you are dropping shapes on it. Even if you use a background page, you may still want to lock the floor plan using layers.
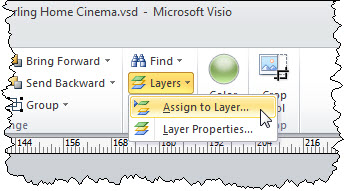
Select the floor plan and then from the Home tab click Layers->Assign to Layer...:
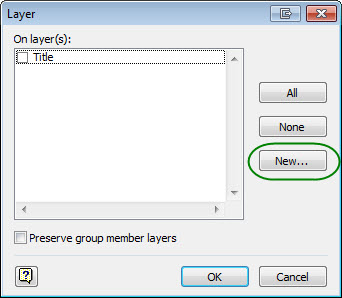
Click [New]:
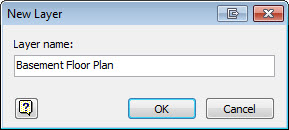
Enter a name then click [OK] to close this window, then [OK] again to close the Layer window:
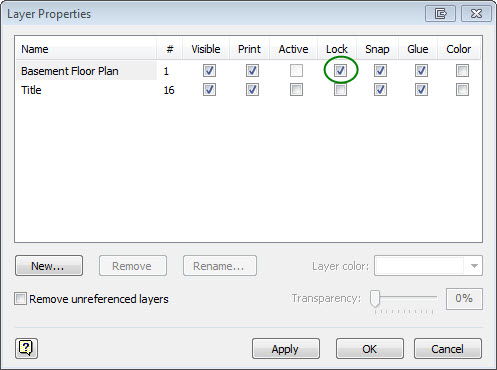
From the Home tab, click Layers->Layer Properties...:

Click the Lock check box for your floor plan layer then click [OK]:
- © Copyright 2024 D-Tools