Installing the SI 2018 Server
Table of contents
![]()
Remarks
Review the supported environments for SI 2018.
Check out our hardware/software requirements.
Check out the SI 2018 Release Notes.
Info/Rules
The SI 2018 Server houses your licensing/user information, Catalog, Projects, and any other shared data like Custom Reports, Queries, etc.
The SI 2018 Server will be installed on one machine on your network (or on the cloud).
The SI 2018 Server must be installed on Windows, there is no Mac version of SI 2018. If using a Mac, you will need to install on Windows in either in Bootcamp, Parallels, or VMWare.
The SI 2018 Client can be installed on the same machine as your SI 2018 Server.
Video
Note: Old video, still valid. Updated video coming soon.
Steps
Insert your CD or double-click the installer you downloaded from D-Tools. The D-Tools SI 2018 Installer will open.
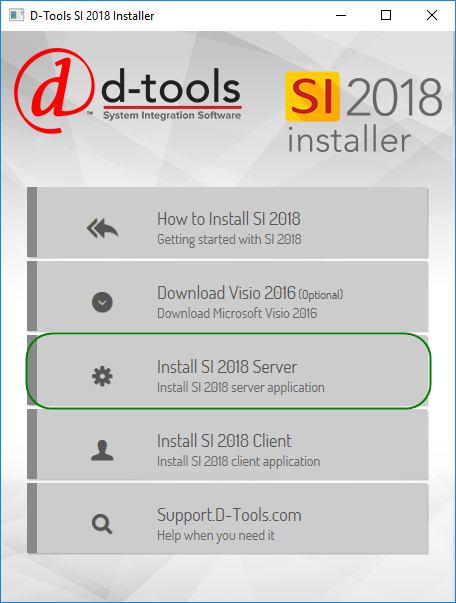
Click the [Install SI 2018 Server] button. If any pre-requisite software is required, you will be prompted to install them, do this. Your SI 2018 Server machine must have an internet connection for this as the pre-reqs will be downloaded from D-Tools.
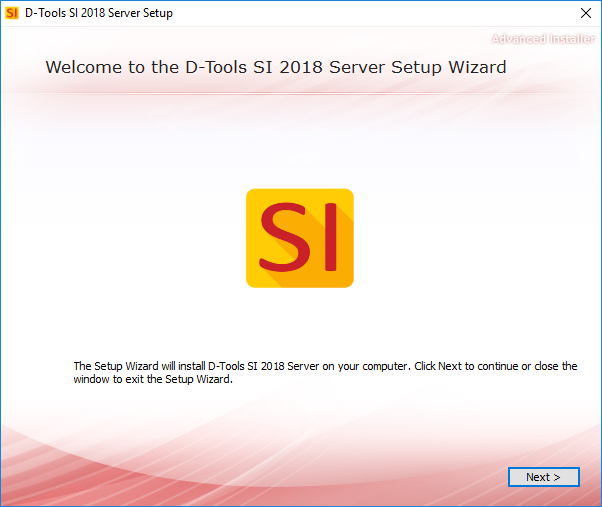
Once the pre-reqs are installed, the D-Tools SI 2018 Server Setup wizard will open, click [Next >]:
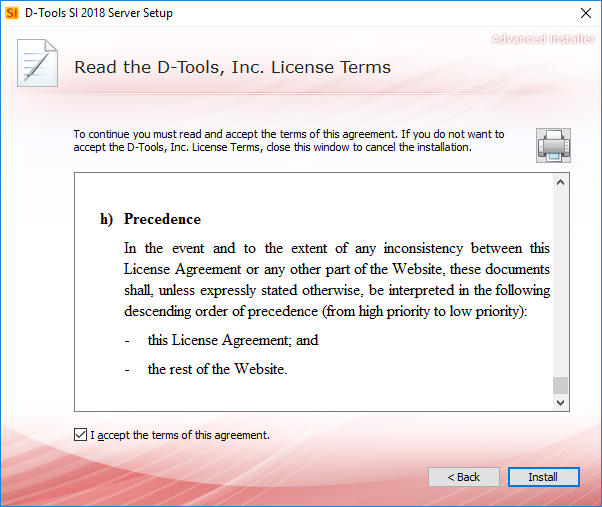
Scroll down and read the SLA, click the "I accept..." box and click [Install]:
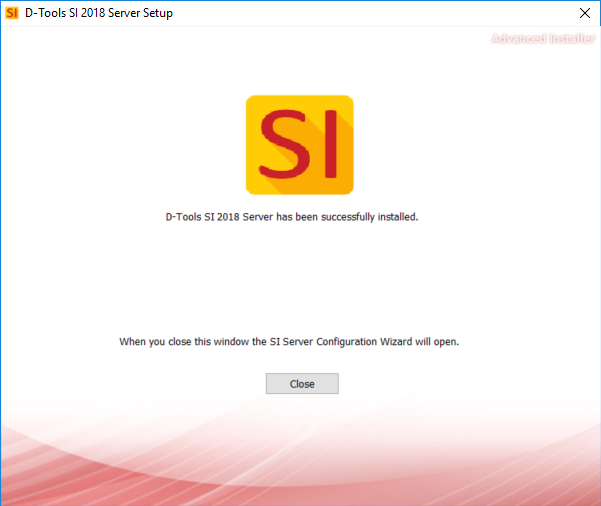
When finished installing, click [Close] and the Server Configuration Wizard will open:
Server Configuration
You must also configure your SI 2018 Server. You have two options when configuring your SI 2018 Server: Express and Custom. We recommend using the Express option which is detailed below, for details on the Custom configuration click here.
Express Configuration
The Express configuration option will automatically install SQL Server 2012 Express and create the default instance DTOOLSSIX.
Note: If you cancel the SI Server Configuration Wizard at any time, SI will not function. To re-initiate the SI Server Configuration you can manually run the following file: C:\Program Files (x86)\D-Tools\SIX\Server\SIServerConfigurationWizard.exe
Steps
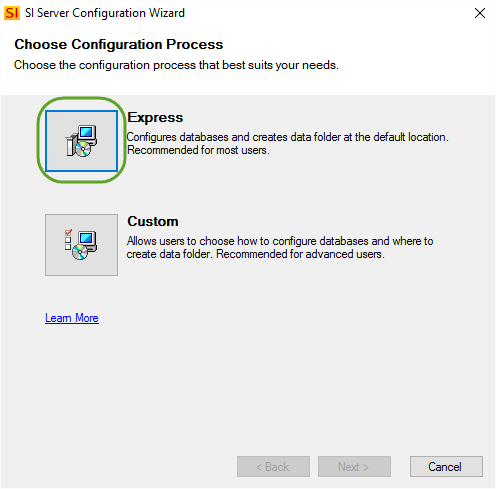
- When the SCW opens, click the [Express] button:
- You will be shown a summary of the default settings, including the built-in Admin User Name, change if you wish. Set a password and enter your email address. Passwords must be 12 characters in length and contain at least one uppercase character, one lowercase letter, a number, and a funky symbol. Click [Next>]:
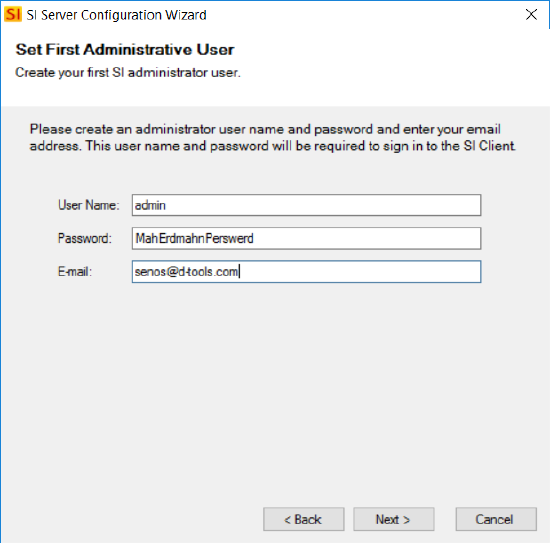
You will be sent an email to the email address provided with your administrator login credentials once the SCW has completed.
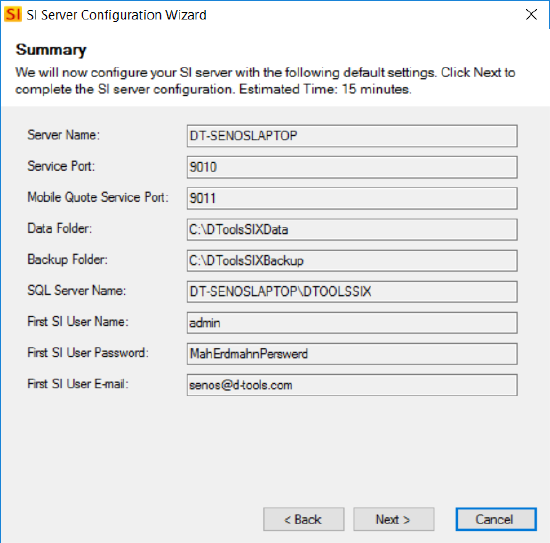
- You will now see a summary of your configuration information. Click [Next>]:
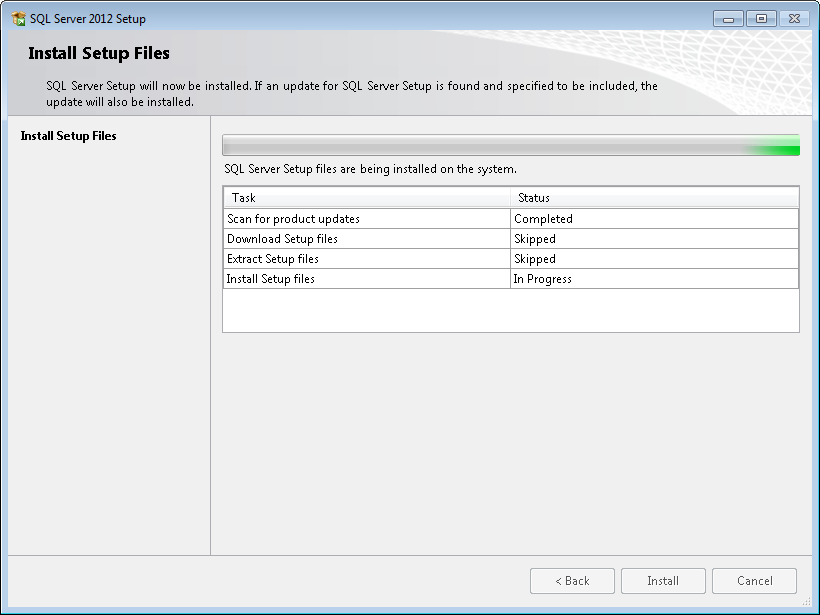
SQL Server 2012 Express will download and install. When finished, click the Finish button:
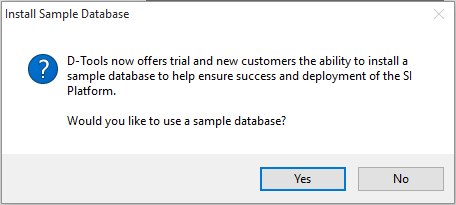
If this is your first time configuring the SI Server, you will be prompted whether or not you would like to download a sample database. This is optional.
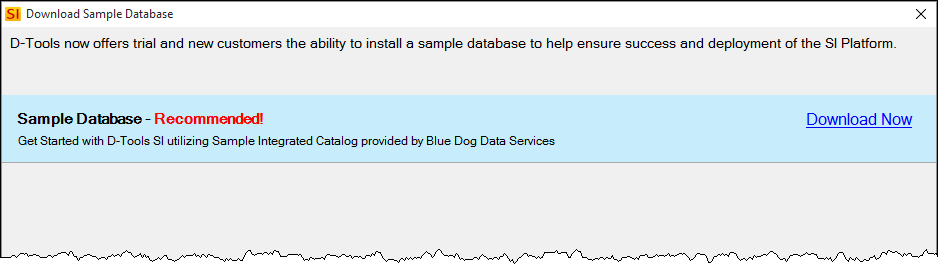
If you decide to download the sample database, you will then be prompted to choose which database to install (only one option shown below). Click the "Download Now" link:
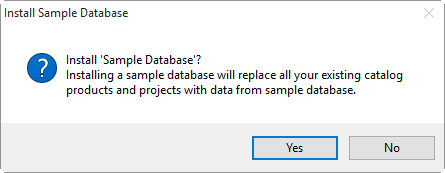
In the event that a previous database is detected, you will see the following prompt. When configuring for the first time you won't see this warning. This is just here to protect existing users from overwriting their existing data.
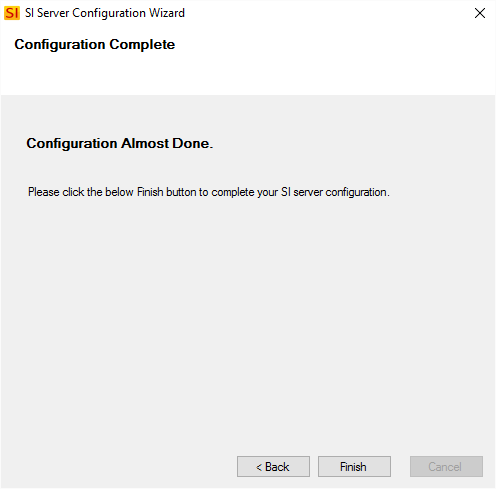
Once configuration has completed, click [Finish]:
Now you can install SI Clients on all machines where you will want to use SI.
- © Copyright 2024 D-Tools