Company Information
Setting
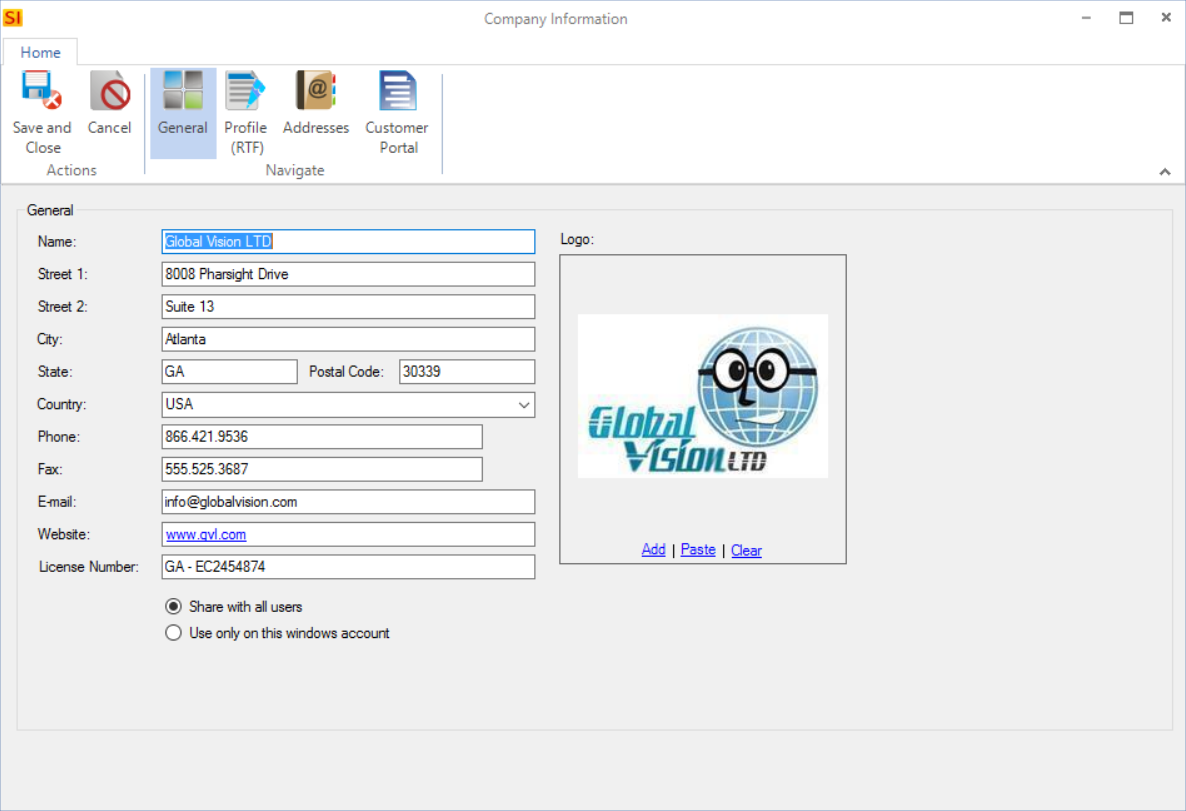
Company Information allows you to enter your information as well as your company logo. Your company information and logo will display on SI reports. The address will also display on the stock Visio files and AutoCAD frames in paper space. These Templates will need additional modification to display your company logo. Click here to see how to set your company logo in Visio.
Details
Logo
![]()
You can drag and drop your company logo image file into the window. You can also add your company logo from a saved file using the "Add" link to browse for your file or the "Paste" link to paste from your clipboard. The "Clear" link will clear the current logo.
Please note: The image that you select for your logo will be resized to 200 px by 200 px with aspect ratio maintained. If you use a .png, the resulting file will be maintained as a .png. Any other image format is converted to jpeg.
Options
There are two options on this form: "Share with all users" and "Use only on this windows account"
The default is "Share with all users". This will copy this information to your SI Server to be used by all other users. If you want specific company information on your machine, use the "Use only on this windows account" option.
Profile (RTF)
On this tab you can create or attach an existing Rich Text Format (RTF) file for the purpose of creating a "company profile". This is where you can explain who you are and what your company does. This is used on the Company Profile report.
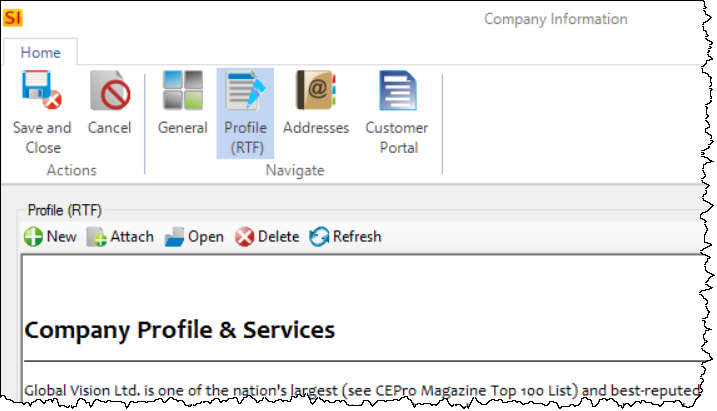
If you click the [New] button, WordPad will open a new file for you to create your profile. If you click [Attach] you will be prompted to browse to an existing RTF file. Once the file is loaded/created the data will display in the window (you may need to click the [Refresh] button). This file will be stored in the following location: C:\DToolsSIXData\Profiles
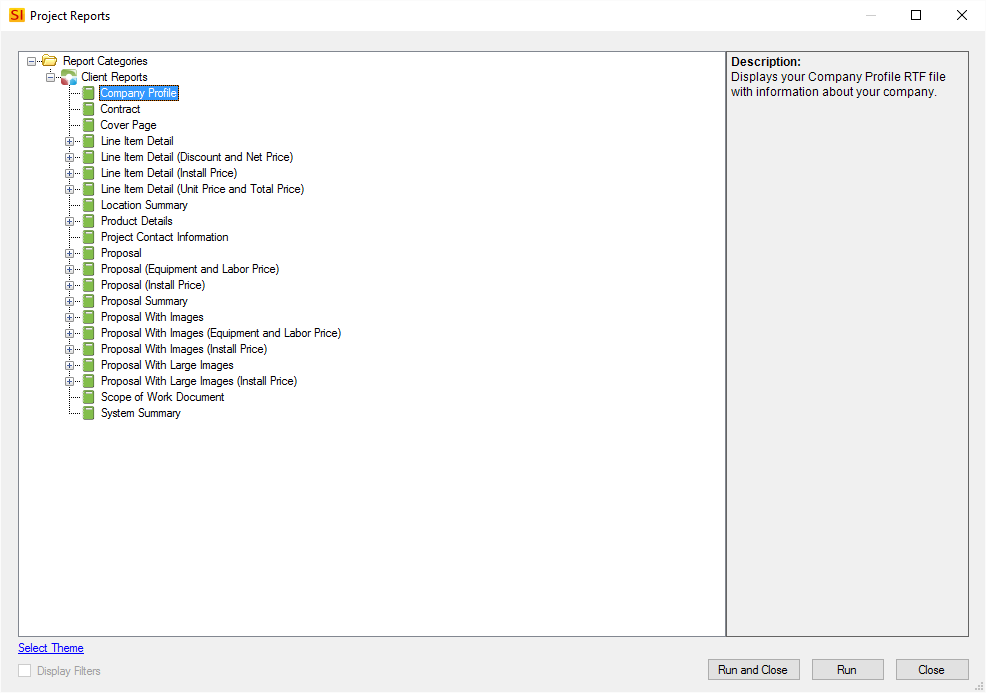
This RTF document will be used if you generate the Company Profile report for a Project:
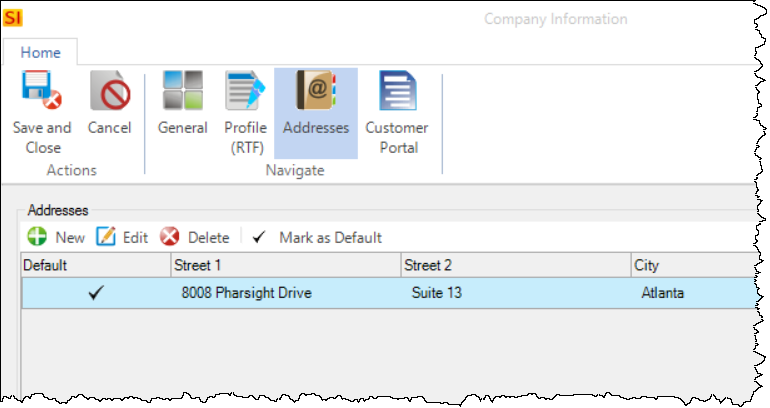
Addresses
This tab allows you to enter multiple addresses for your company.These can be used within the Project Editor to print a specific address if you have more than one site. They can also be used on Purchase Orders to have shipments delivered to an alternate address other than your primary, e.g. offsite warehouse.
Customer Portal
This tab is where you can create your custom URL for the Customer Portal.
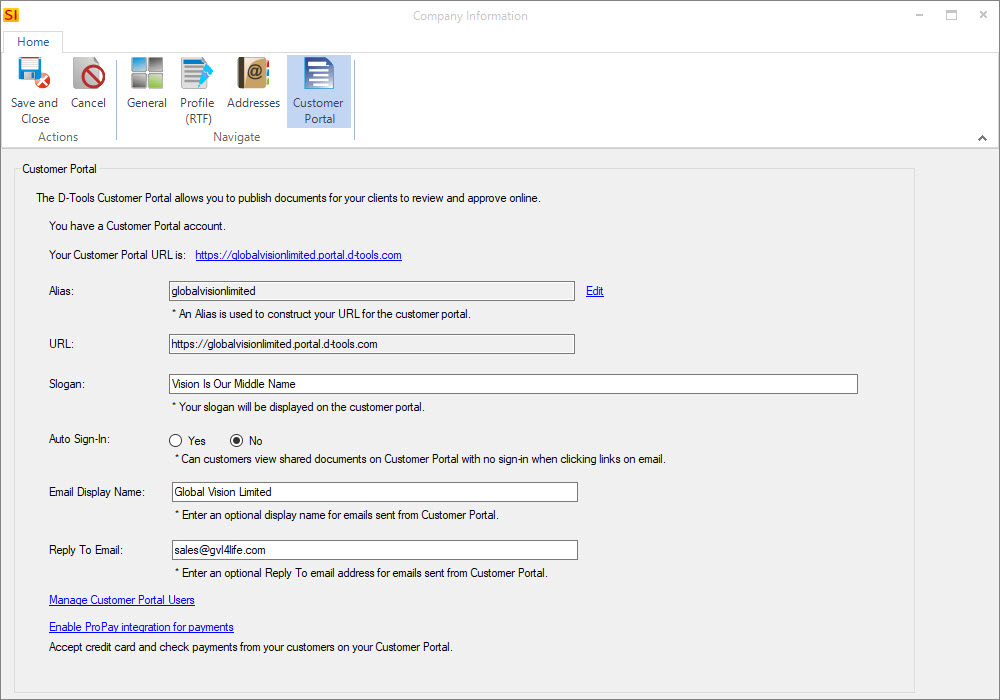
Alias
Click the "Edit" link and enter an alias. We recommend using your company's existing URL here (minus the .com or dot whatever). The alias will be used to create a custom URL for the Customer Portal.
Slogan
The slogan is optional. This will appear on the login page for the Customer Portal beneath your company logo.
Auto Sign-In
The Auto-Sign-In option will allow your clients to click the link in the email receive to view the document(s) you've shared with them without requiring them to log in to the Customer Portal.
Email Display Name
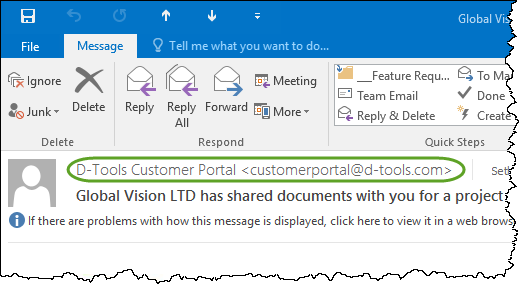
Emails sent from the Customer Portal are sent via the following email address, customerportal@d-tools.com, and we display the name "D-Tools Customer Portal" by default as shown below:
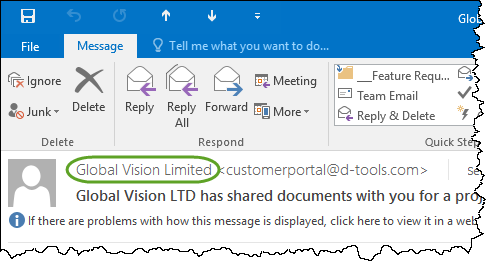
You cannot change the from email address but you can enter the email display name to change the default to your company name, for example:
Reply To Email
Here you can enter an email address that will be used as the "reply to" email if your customer replies to emails sent to them via the D-Tools Customer Portal. This field can be used for a "broad" address, e.g. sales@yourdomain.com or you may leave this blank. You can also choose to have the "reply to' email be any email of the "users to notify" when sharing documents.
Note: You will receive your login information for the Customer Portal once you share your first document.
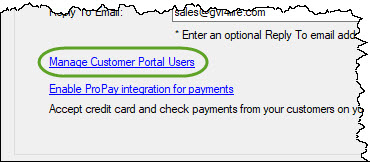
Managing Customer Portal Users
To manage your Customer Portal users, click the link on Customer Portal tab:
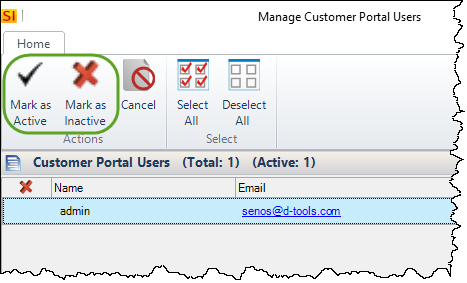
This will open the following form where you can mark users as inactive (or as active if you are reversing the process):
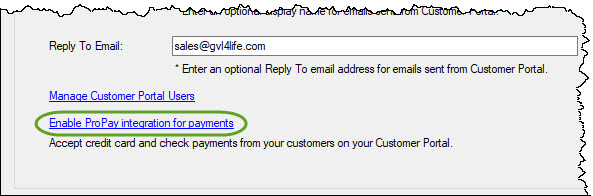
ProPay Integration
If you are a ProPay customer, you can link your account to SI to request an initial down payment when you publish documents to the Customer Portal. ProPay offers online payment processing solutions. To link SI to ProPay, click the "Enable ProPay integration for payments".
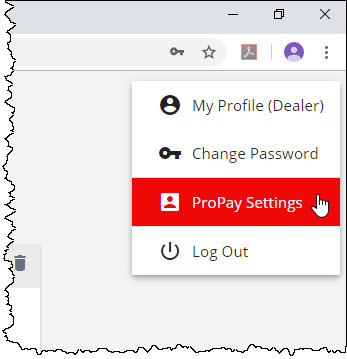
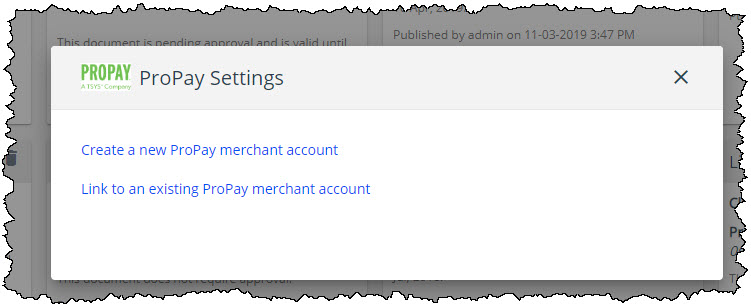
This will take you to the login screen for Customer Portal (if you are not already logged in). Once logged in, click the icon with your initials in the upper right corner of the interface and choose ProPay Settings:
You will be prompted to create a new ProPay merchant account or to link to an existing account:
If you are linking to an existing account, you will be prompted to enter your email address and account number:

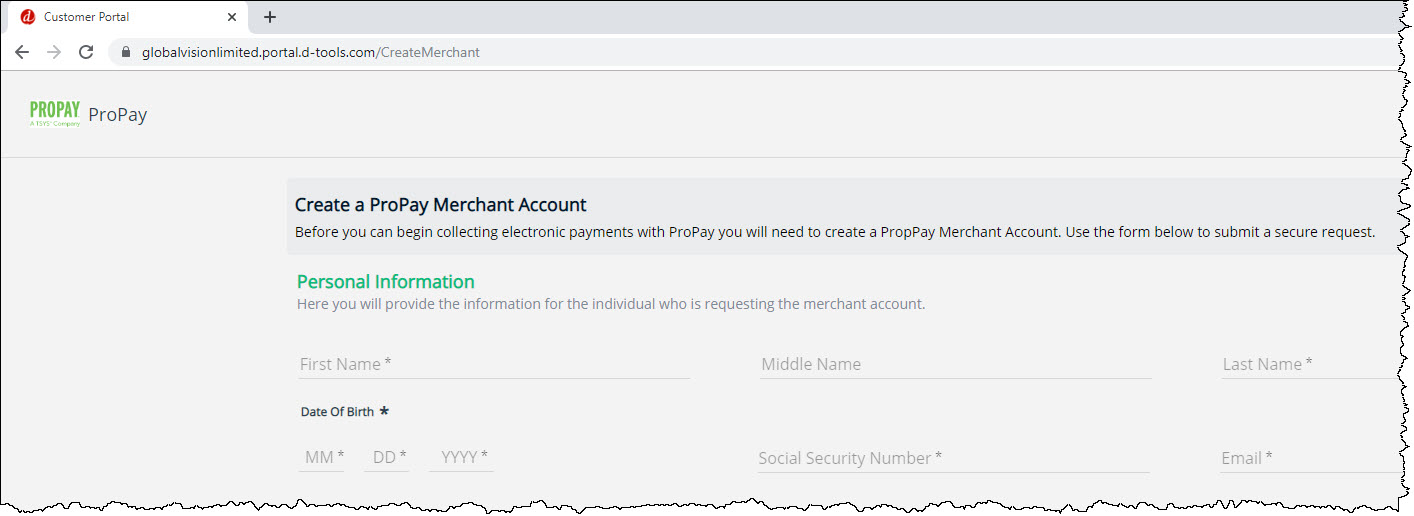
If you choose to create a new account you will be directed to a page to fill in your information and submit a request to ProPay for approval:
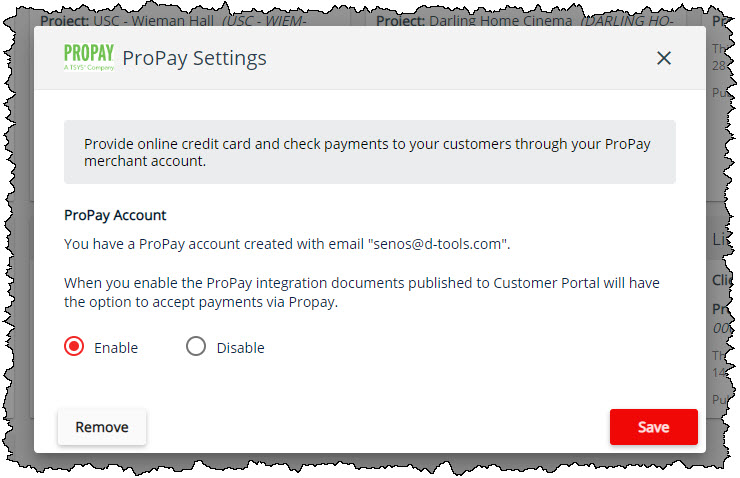
Once you receive your account number from ProPay you can choose to link to an existing account and enter your email and account number. When enabled you will see the following message, click the Save button.
Once you save and re-open Company Information and click the Customer Portal tab you will see that you have enabled the ProPay integration. You can disable the integration at any point from the Customer Portal tab.
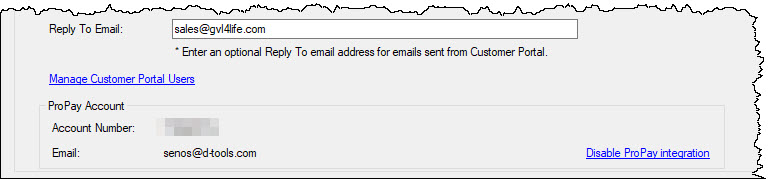
You can also disable the ProPay integration from your ProPay Settings within the Customer Portal.
Now that ProPay is enabled, you will have the option to request a payment when publishing documents to the Customer Portal. Click here for details.
- © Copyright 2024 D-Tools