QuickBooks Settings
Settings
Here you can configure your QuickBooks Settings.

The QuickBooks Settings form allows you to configure your settings for QuickBooks integration.
Details
General
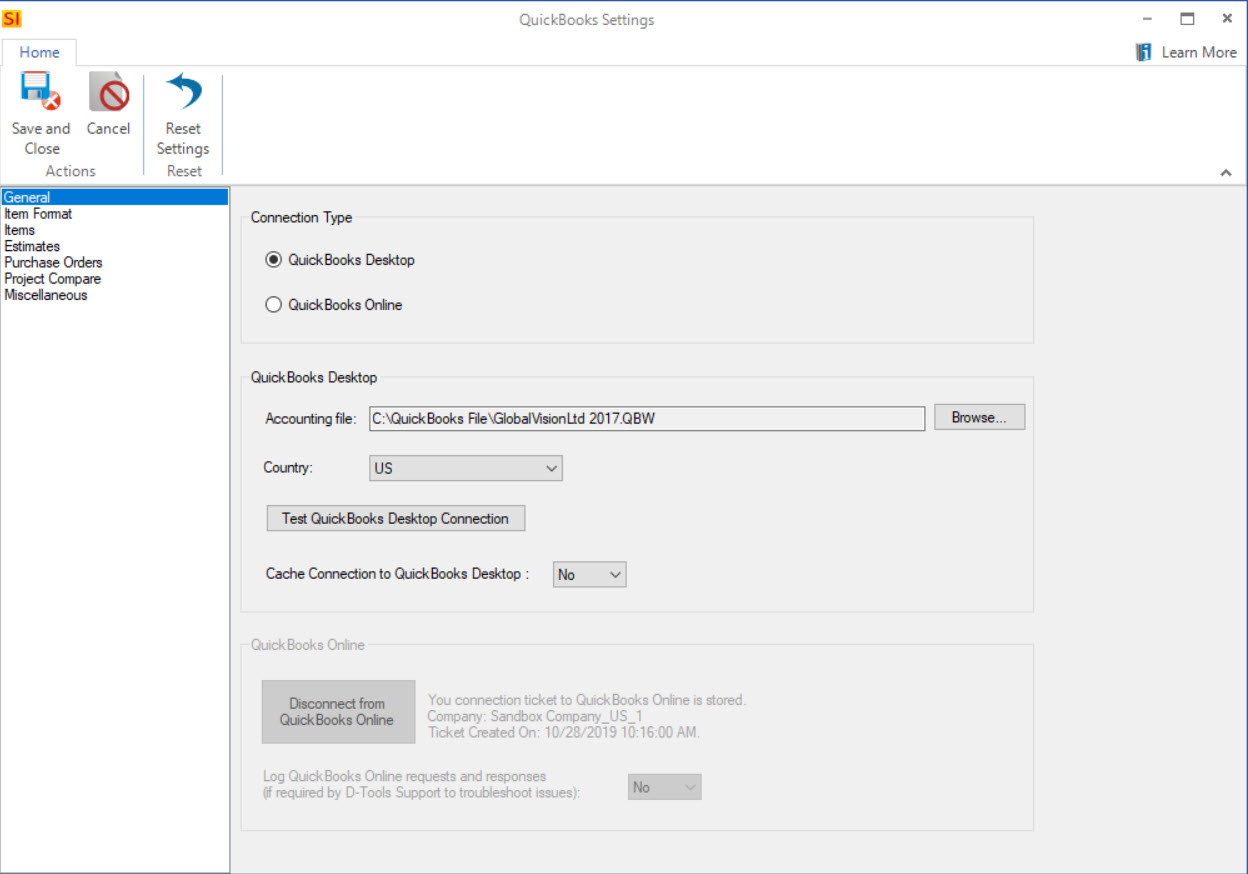
Connection Type
You can choose whether to work with the Desktop version of QuickBooks or the Online version of QuickBooks.
Desktop
Here you have two options, either connect to a QuickBooks file on your local network, or
Connect to QuickBooks file on local machine
Accounting file
Here you will browse to the path where your QuickBooks Company File (.QBW) is located.
Country
Here you will choose between US, Canada, and UK.
Test QuickBooks Desktop Connection
This button will let you know if the connection is made between SI and QuickBooks.
Cache Connection to QuickBooks Desktop
Default = No. When set to "Yes", this will cache your connection to QuickBooks Desktop if your QBW file is on a remote server to improve speed of transfers from SI to QuickBooks. You will need to close SI before you can close SI on your machine or switch from Multi-user Mode to Single-user Mode (and vice versa).
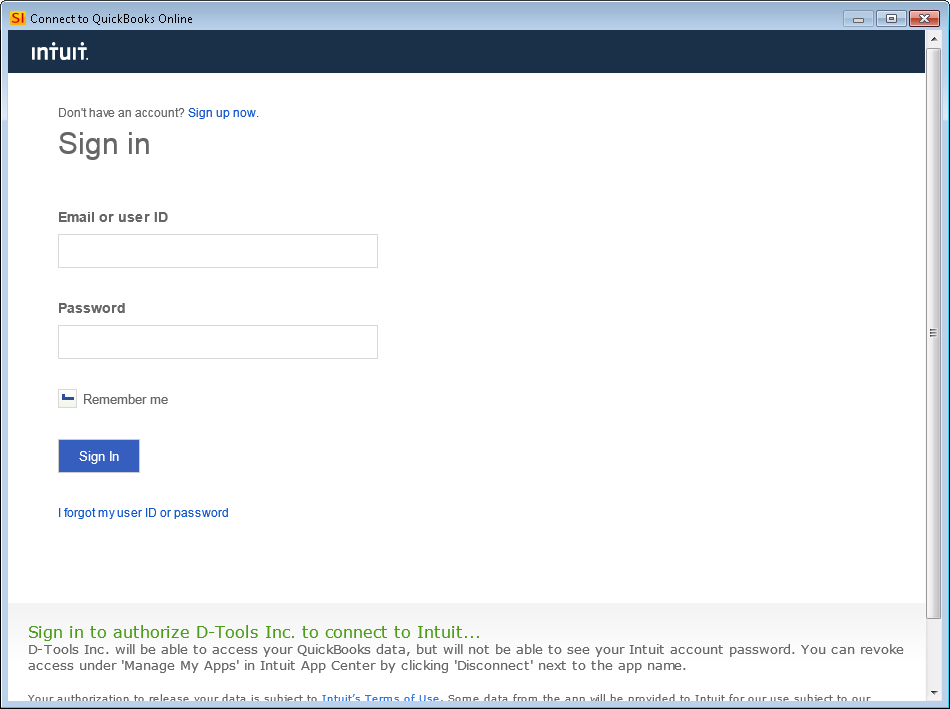
Online
If you are using the online version of QuickBooks then you will click the [Connect with QuickBooks Online] button and then log in to your account:
Item Format
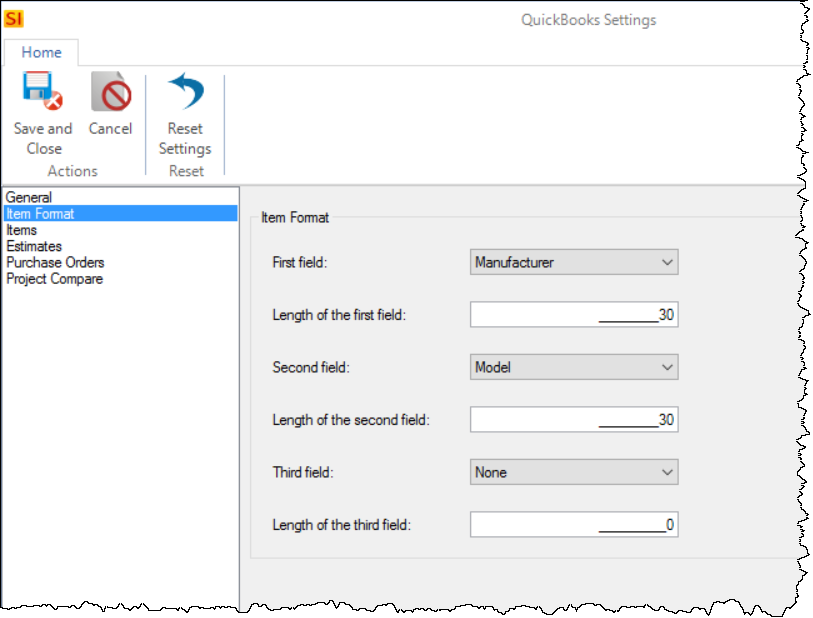
Here you will select your Item Format for Items that will be created in QuickBooks vian SI. You can use up to three fields for this format and choose the length of each field (maximum of 31 characters per field). There are four fields that you can choose from: Manufacturer, Model, Category, Part Number.
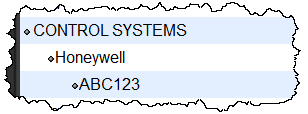
Example: You set your Item Format as shown below:
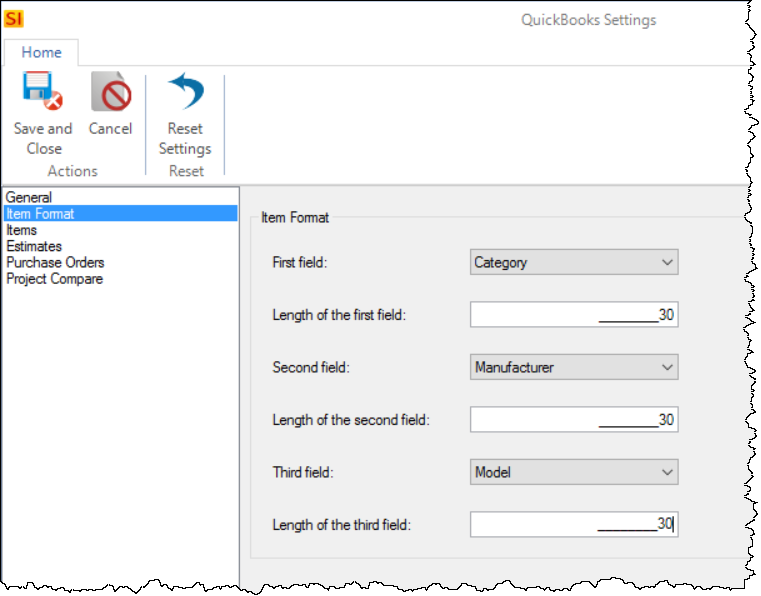
When Items are created over in QuickBooks, they will display with three levels. If I were to transfer a Honeywell ABC123 Control System from SI to QuickBooks, the QuickBooks Item number that would be created would look like this:
Items
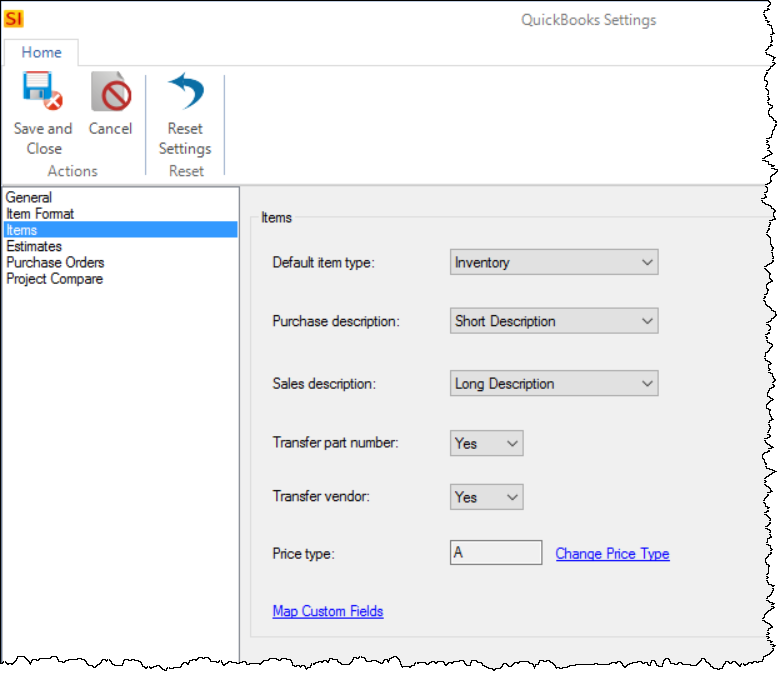
Default Item Type
Here you can choose what the default Item Type will be for items in SI that get created in QuickBooks. Choose from: Inventory, Non-Inventory, and Service.
Purchase Description
Here you can decide if you would like the Short Description field or the Long Description field from SI to transfer to the Purchase Description field in QuickBooks.
Sales Description
Here you can decide if you would like the Short Description field or the Long Description field from SI to transfer to the Sales Description field in QuickBooks.
Transfer Part Number
Here you can decide if you would like the Part Number field from SI to transfer to the Manufacturer's Part Number field in QuickBooks.
Transfer Vendor
Here you can decide if you would like the Vendor field from SI to transfer to the Preferred Vendor field in QuickBooks.
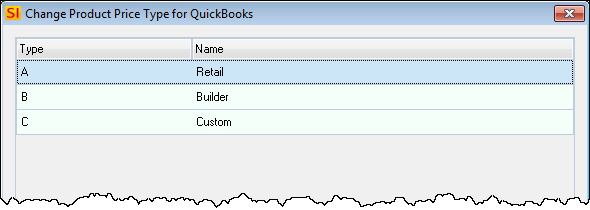
Price type
When creating QuickBooks Items or when using the Sync feature for QuickBooks, you can set which Product Price Type you want to use to sync with QuickBooks. When you click the "Change Price Type" link, the following form will open where you can select your Price Type:
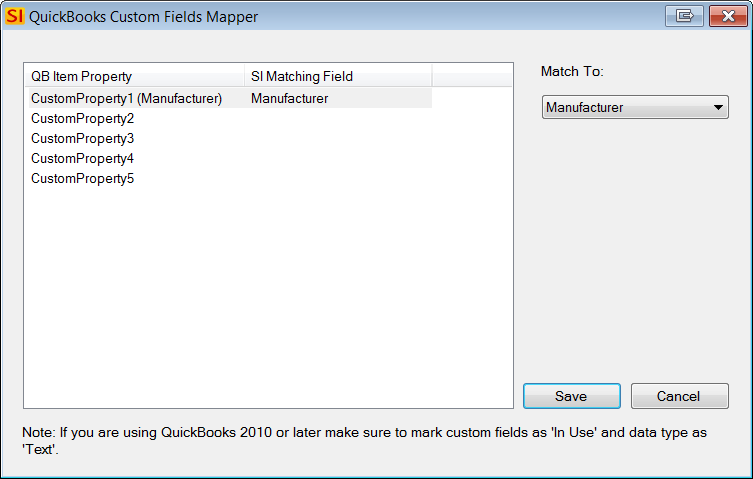
"Map Custom Fields" link
If you have defined any of your five available Custom Fields in QuickBooks, you can use the "Map Custom Fields" link to map them to SI fields:
Estimates
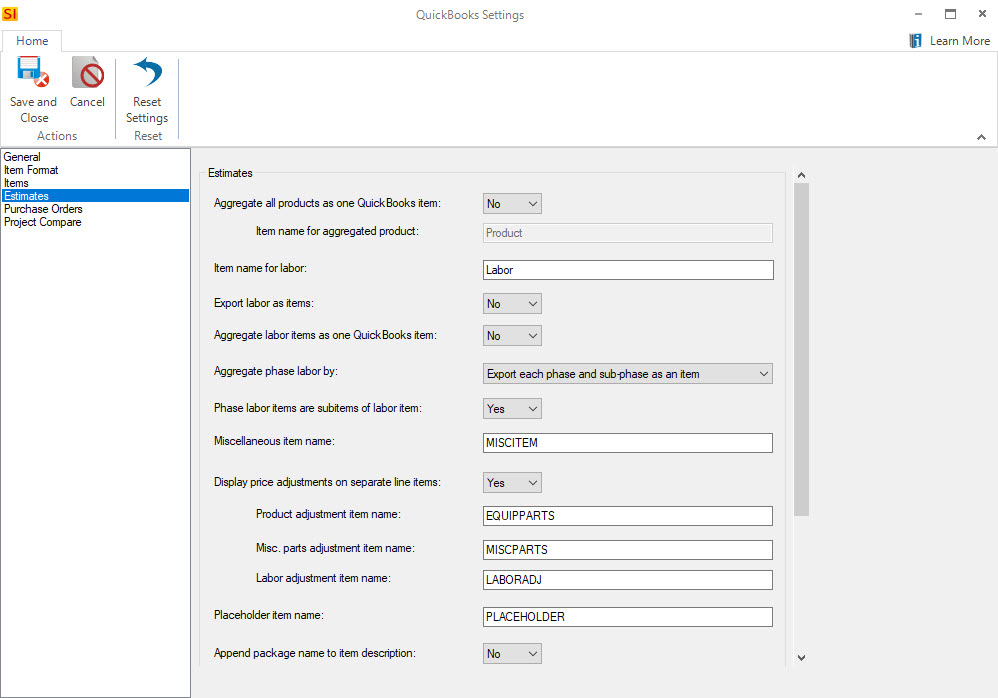
Aggregate all products as one QuickBooks item
Default value = Unchecked. When checked, every Product in the Project will be combined into one Item to transfer over to QuickBooks.
Item name for aggregated product
Default value = "Product". This allows you to change the name of the QuickBooks Item that will be created when you have the "Aggregate all products as one QuickBooks item" option checked, e.g. you might it to be named "Equipment".
Item name for labor
Default value = "Labor". This allows you to change the name of the QuickBooks Item that will be created when you have the "Aggregate labor items as one QuickBooks item" setting checked and/or "Export labor as items" setting checked (see below), e.g. you might it to be named "Labour".
Export labor as items
Default value = No. If you want your Labor Items not to be combined into the Phase Labor Item(s) and want them to be their own separate Items in QuickBooks, set this to "True". This setting "wins" when using the "Aggregate labor items as one QuickBooks item" setting below.
Aggregate labor items as one QuickBooks item
Default value = No. When this is checked, and the "Export labor as items" option above is checked, all Labor Items in the Project will be combined into one Item to transfer over to QuickBooks.
Aggregate phase labor by
Default value = "Export each phase and sub-phase as an item". You can change this to "Export each Phase as an item" or "Export as one item". See Phases.
Phase labor items are subitems of labor item
Default value = Yes. This means that there will be the text "Labor:" in front of the QuickBooks Items created for Phase labor in SI. Example: If you use the "Rough-In" Phase in SI for labor, when this item is created as a QuickBooks Item it will transfer as Labor:Rough-In:Base. The "Base" text is due to subphase labor in SI. If you would prefer this to QB Item to be created as Rough-In:Base then set this to "No".
Miscellaneous item name
Default Value = "MISCITEM". This allows you to change the name of the QuickBooks Item that will be created if using Misc Items.
Display price adjustments on separate line items
Default Value = Checked. When using Price Adjustments, the values for the Price Adjustments will be separate line items in the QuickBooks Estimate vs. being included with each Item in the Estimate.
Product adjustment item name
Default Value = "EQUIPPARTS". This allows you to change the name of the QuickBooks Item that will be created if using Price Adjustments AND have chosen to use the "Display price adjustments on separate line items" option above.
Misc parts adjustment item name
Default Value = "MISCPARTS". This allows you to change the name of the QuickBooks Item that will be created if using Price Adjustments AND have chosen to use the "Display price adjustments on separate line items" option above.
Labor adjustment item name
Default Value = "LABORADJ". This allows you to change the name of the QuickBooks Item that will be created if using Price Adjustments AND have chosen to use the "Display price adjustments on separate line items" option above.
Placeholder item name
Default Value = "PLACEHOLDER". This allows you to change the name of the QuickBooks Item that will be created when transferring Change Order Placeholders.
Append package name to item description
Default value = No. Packages do not export to QuickBooks Estimates, the individual items in a package export. If you want the package name to be added to the end of the description of each item then check this option.
Export OFE items
Default value = No. Products marked as "Owner Furnished Equipment" (OFE) will not be exported to your QuickBooks Estimate but if there is any labor associated with the OFE Products, the labor will be transferred to the Estimate.
Include Project Number in Job Name
Default value = No. This will add the Project Number automatically to the Job name when creating a new Customer:Job or Job.
Create phase labor items as hierarchical items (QuickBooks Online only)
Default value = No. This will add a colon between the fields for labor when creating the items in QuickBooks Online.
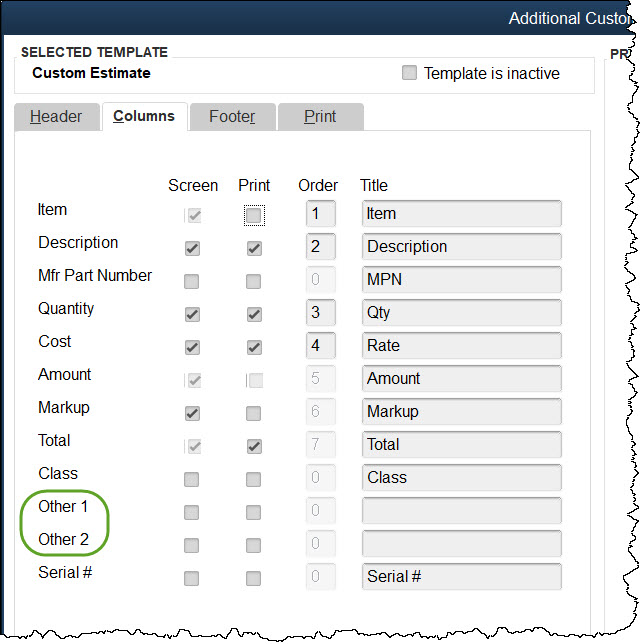
Other 1 field on Estimate Line Item (QuickBooks Desktop only)
Default value = Null. Here you can choose to map the following SI fields to the "Other 1" field for items on QuickBooks Estimates: Location, System, Phase, or Change Order Number.
Other 2 field on Estimate Line Item (QuickBooks Desktop only)
Default value = Null. Here you can choose to map the following SI fields to the "Other 2" field for items on QuickBooks Estimates: Location, System, Phase, or Change Order Number.
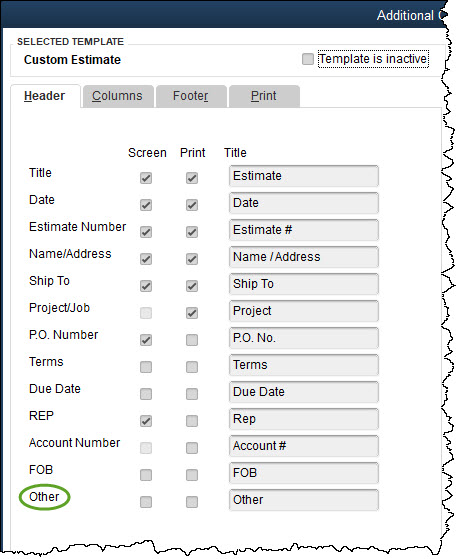
Transfer Project Number to Estimate Other Field (QuickBooks Desktop only)
Default value = No. This will allow you to transfer the Project Number to the Other field that available on the Headers section for QuickBooks Estimates.
Purchase Orders
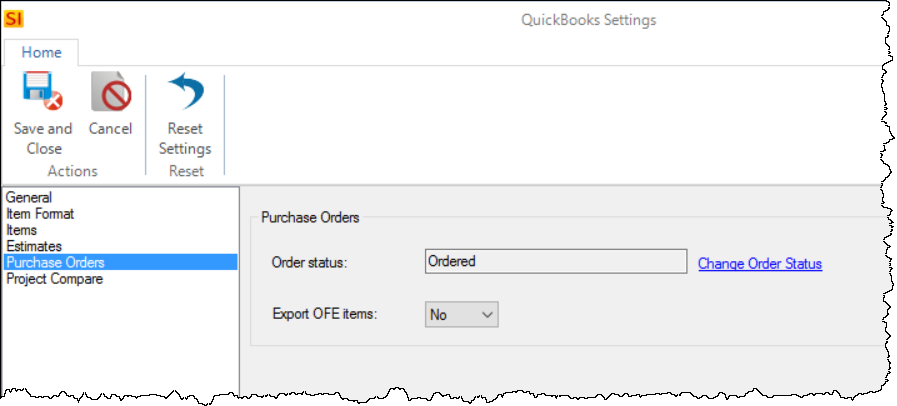
Order Status
Default value = "Ordered". This will automatically set the Order Status field for Items that have been added to a Purchase Order that has been exported to QuickBooks to whatever Order Status you choose.
Export OFE items
Default value = Unchecked. If for some reason you wish to push Products marked as "Owner Furnished Equipment" (OFE) to your QuickBooks Purchase Order, you can check this option.
Project Compare
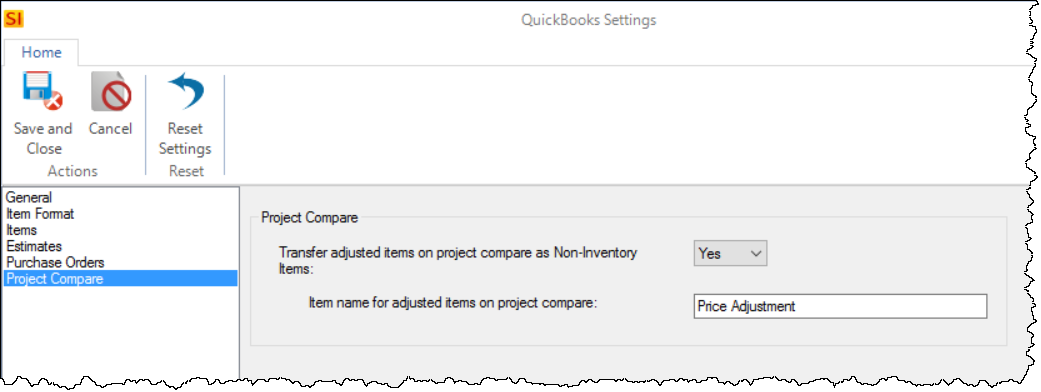
Note: These settings are for when you are comparing Revisions.
Transfer adjusted items on project compare as Non-Inventory Item in QuickBooks
Default value = "Yes". You will likely leave this setting set to yes to avoid items being displaying with negative quantities when a Change Order is appended to an existing Estimate in QuickBooks.
Item name for adjusted items on project compare
Here you can choose what the Item name will be that gets created in QuickBooks for these adjusted items
Miscellaneous
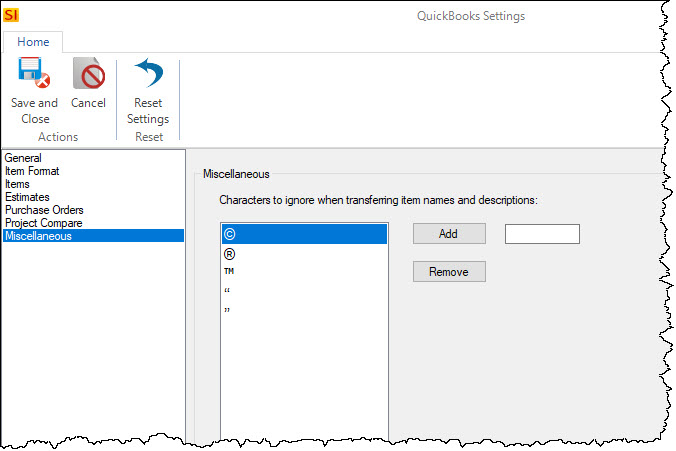
Here you can choose which special characters you would like to ignore in your Model Number and Description fields from SI when transferring to QuickBooks. Many of the Products downloaded from D-Tools may have the reserved or trademark symbol in a description field.
- © Copyright 2024 D-Tools