Setup and Maintenance
Table of contents
Setup and Maintenance
Clicking the [Options…] button on the main QuickLinks form will open the following interface:
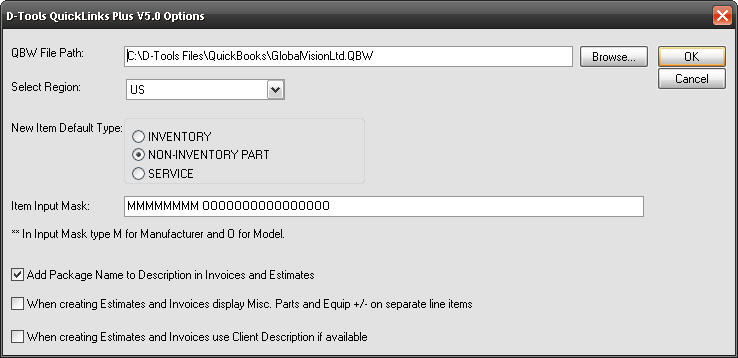
QBW File path
This is the path to where your QuickBooks company file is stored.
Select Region
Choose between US, Canada, or UK.
New Item Default Type
Set your default type for QuickBooks items that are created through QuickLinks: Inventory, Non-Inventory, or Service
Item Input Mask
Set a mask for how QuickBooks item number will be created through QuickLinks. QuickBooks has a 30 character limit for Item numbers. An example mask is MMMMMMMMM OOOOOOOOOOOOOOOOOOOO, where the number of “M”s represented the number of characters of the Manufacturer name. The “O”s represent the number of characters of the Model number. It is recommended that a non-colon separator such as a space be used between the M's and O's. If a colon “:” is used as the separator character, all Model Numbers will show up as a sub-item of the Manufacturer in QuickLinks. While this provides a nice hierarchical view of the items in QuickBooks, it is very restrictive. In some accounting systems such as QuickBooks, all sub-items must be of the same type (Inventory or Non-Inventory) as the parent item. If you ever wish to mix Inventory and Non-Inventory parts within a vendor, use ANY separator other than a “:”, such as a space.
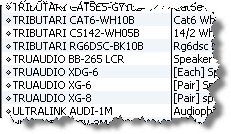
The image below shows how items will display in QuickBooks using the following mask: MMMMMMMMM OOOOOOOOOOOOOOOOOOOO (Nine M's followed by a space, then twenty O's). Notice that the manufacturer "Tributaries" displays as "TRIBUTARI" due to the mask:
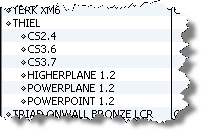
However, if you intend to code all Products as Inventory Parts, then the “:” as a separator is an option. To use this mask, enter thirty M's, a colon, then thirty O's: MMMMMMMMMMMMMMMMMMMMMMMMMMMMMM:OOOOOOOOOOOOOOOOOOOOOOOOOOOOOO
An example of how items display with this mask is shown below the manufacturer "Thiel" being the Item and all of the model numbers for my speakers listing as Sub-Items:
The above mask applies to all "equipment" or "parts" in your SI5 database. It also applies to how "Labor Products" will get created over as QuickBooks Items. However, for labor that is assigned directly to products (via Phase, see Labor Considerations), the format is slightly different. Since each Phase in SI5 has four parts to it (Base, Misc, Management, and Design), the QuickBooks Items that get created for this labor is in the hierarchy shown below.
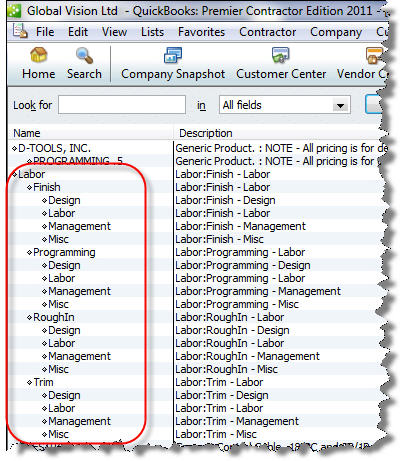
DO NOT change these QB Item numbers once they have been created. This will break the link between the labor in SI5 and QuickBooks and you will not be able to proceed transferring Estimates/Invoices/Purchase Orders to QuickBooks until you change the item numbers in QuickBooks back to the format above.
Add Package Name to Description in Invoices and Estimates?
Packages in SI 5 are broken out into the individual items when transferred to QuickBooks. This option will add the Package name from SI 5 to the descriptions for the items.
When creating Estimates and Invoices display Misc. Parts and Equip +/- on separate line items?
This option will add a single line item for the Misc. Parts % and a single line item for the Equip +/- % to Estimates and Invoices. Without this checked, each item’s price will reflect the %. See Misc Parts and Equipment +/- for details on how these fields are used in SI5.5.
When creating Estimates and Invoices use Client Description if available?
The default is to use the Product Description.
Connecting SI5 Products and QuickBooks Items
You must setup the connection between Products in your SI 5 database and Items in your QuickBooks database. This is an ongoing process since you will most likely be adding new Products to your SI 5 database all the time. However, you only have to make the connection one time for each Product in your SI 5 database.
You have two options: link Products from your SI 5 database to Items that already exist in your QuickBooks database or you can have SI 5 create the Items in your QuickBooks database. Either of these options can be done while creating an Estimate/Invoice/Purchase Order or independently via the [Item List] shown below.
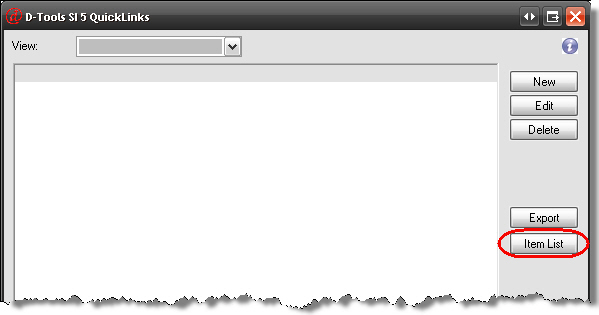
To link a Product from your SI 5 database to an existing Item in your QuickBooks database, click [Item List] on the main QuickLinks form:
The SI 5Master Table ProductsList form opens:
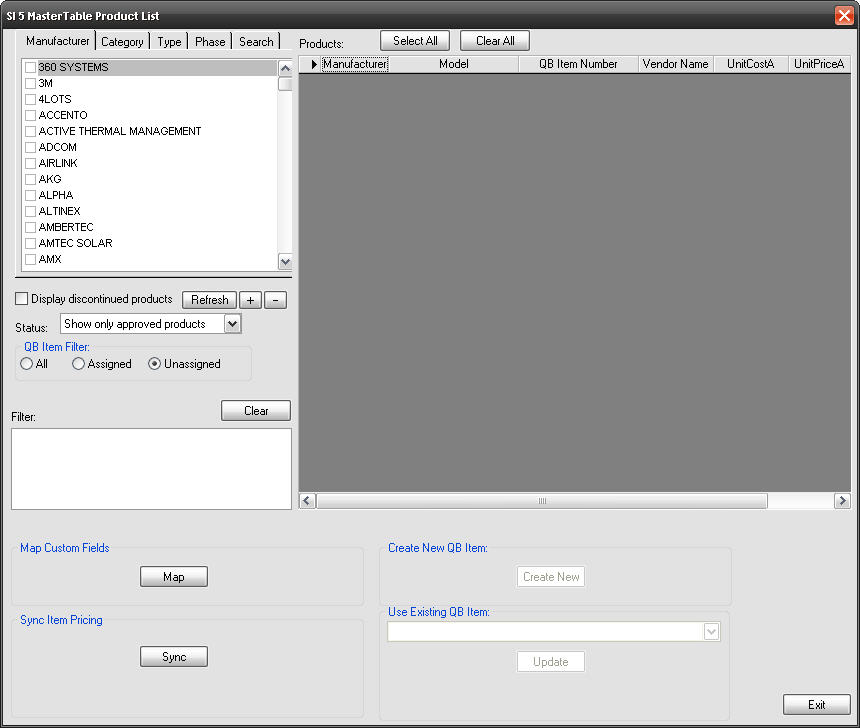
The left side of the form has tabs that allow you to filter the Products in your SI 5 database. You can assign products to existing QuickBooks Items using the dropdown in the “Use Existing QB Item” section to select an item from your QuickBooks database and then click [Update]. The SI 5 product and QuickBooks item are now linked.
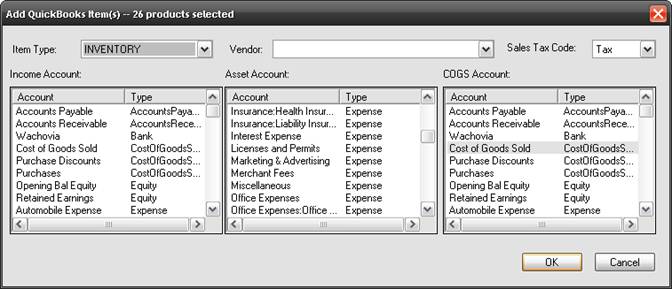
When you are creating new QuickBooks Items, you can assign products one at a time or you can select multiple products to do a bulk transfer by holding down the [Ctrl] and [Shift] keys when selecting in the grid. After selecting the products, click [Create New] and the following form will open where you will select your Item Type, Vendor, Sales Tax Code, and Accounts.
Although not shown in the form above, descriptions also transfer, see below for details.
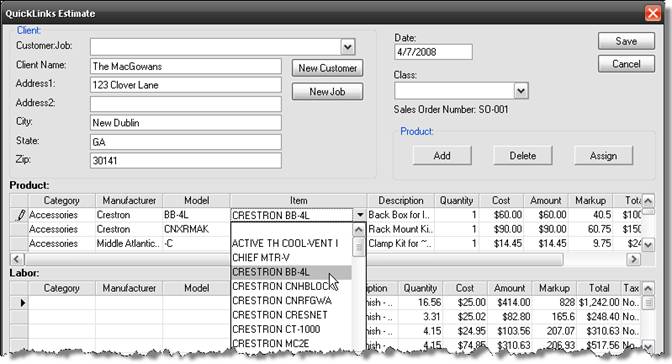
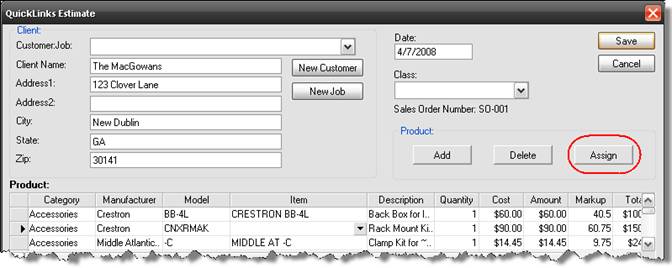
If you want to link an SI 5 Product to an existing QuickBooks Item from within an Estimate, Invoice, or Purchase Order, use the dropdown located the in the Item field on the form as shown below:
If you want to create a new QuickBooks Itemfrom an SI 5 Product from within an Estimate, Invoice, or Purchase Order, click [Assign] on the form to open the Add QuickBooks Item form.
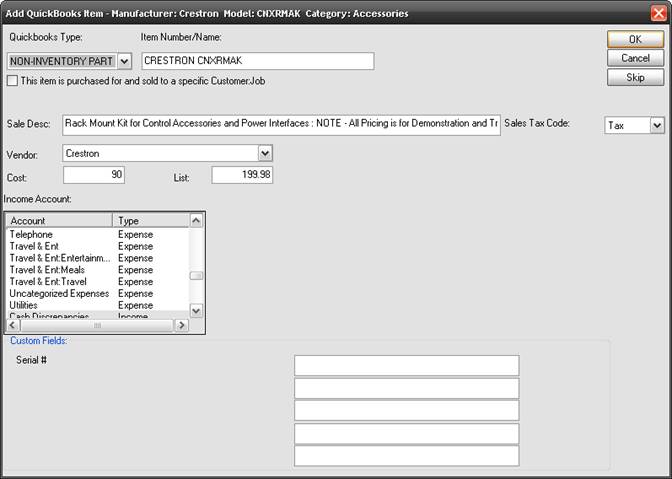
This form looks different than the form for doing a bulk transfer but the information transferred is the same.
The fields that populate from the SI 5 Product data are listed below:
| Add QuickLinks Form/QuickBooks Fields | SI 5 Product Fields |
| Description | Product Description |
| Sale Desc | Client Description |
| Cost | Unit Cost |
| List | Unit Price |
| Custom Fields 1-5 | Mapped fields. See below for details. |
The dropdown fields that populate with data from your QuickBooks company file are Sales Tax Code, Vendor, Income Account, Asset Account, and COGS Account.
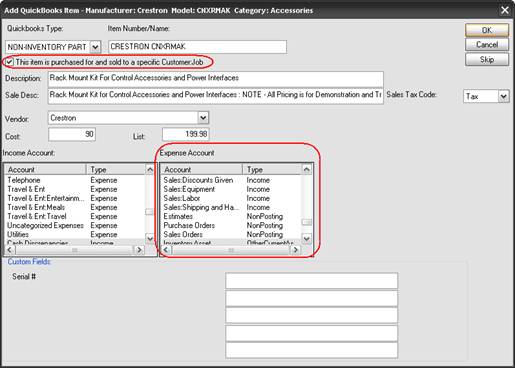
The fields on this form will vary depending on whether you are creating an Inventory, Non-Inventory, or Service Item. Remember, QuickBooks does not store a Cost for Non-Inventory parts, just a List. If you would like the Cost to be transferred to QuickBooks when you are creating an Item, make sure you check the “This item is purchased for and sold to a specific Customer:Job” option on the form. When this is checked, an Expense Account field is added to the form.
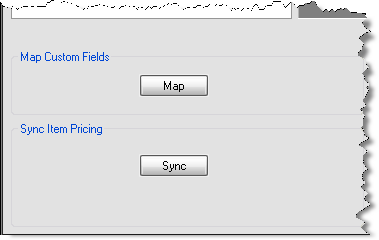
The Item Number/Name populates with data based on the Mask you set when you configured QuickLinks. Make all selections on this form and then click [OK]. The Item will be created in your QuickBooks database. Also on the SI 5Master Table Products List form there are two additional function buttons: [Map], and [Sync].
Clicking [Map] will open up the QuickLinks Match Item Custom Fields form:
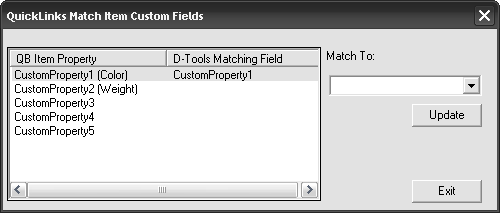
Highlight a QB Item Property on the left, select an SI 5 Product data field from the “Match To” dropdown, then click [Update]. This does not play a role in overall functionality, it is just an optional way to add more data to the QuickBooks Items that you create via the QuickLinks interface.
Clicking [Sync] will open the “Sync SI 5 and QuickBooks” form:
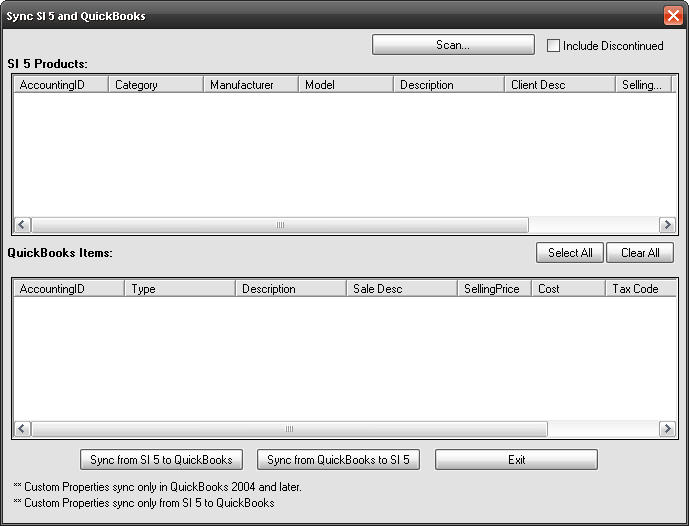
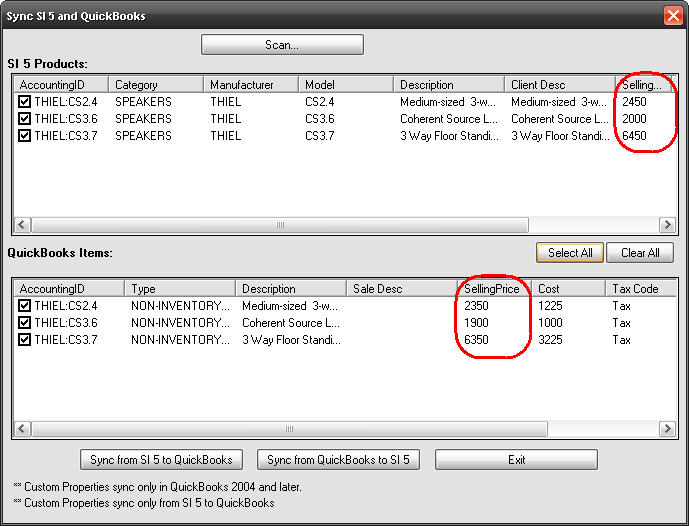
When you click [Scan…], a comparison takes place between all linked SI 5 Products and QuickBooks Items. If differences are found, the Products/Items will list in the appropriate fields. Use the [Select All] button or manually check the boxes next to the Products/Items that you want to synchronize and then choose either [Sync from SI 5 to QuickBooks] or [Sync from QuickBooks to SI 5]. In the example below, pricing differences were found between some speakers in my databases:
- © Copyright 2024 D-Tools