Revision Management
Table of contents
Revision Management
The Revision Management tab allows you to compare two revisions of a project to generate a Change Order report. Although you can create a Change Order report via the Reports tab, the functions under Revision Management add some flexibility to your output. For example, when you run a Change Order report for a Project Delta, all of the changes between the revisions will display on the report while running a Change Order report via the Revision Management tab allows you to pick what products display on the report. This can come in handy if you are making both "client requested" (client is responsible for paying for these) and "engineering" (client is not responsible for paying for these) changes in the same revision.
Note: You must leave the Orders and Accounting tab and then return to it between running multiple comparisons of revisions. This is a known bug where you will not get correct results when running more than one comparison.
Comparing Revisions
In this example, there are two revisions of the project. Rev 0 is the original project file that the client signed off on and Rev 1 has some changes made to it as requested by the client. The changes made were:
- Added three CEN-IDOCV-DSW-W-T units to the project
- Removed a TU-1500RDP
- Check out the project for which you want to compare revisions
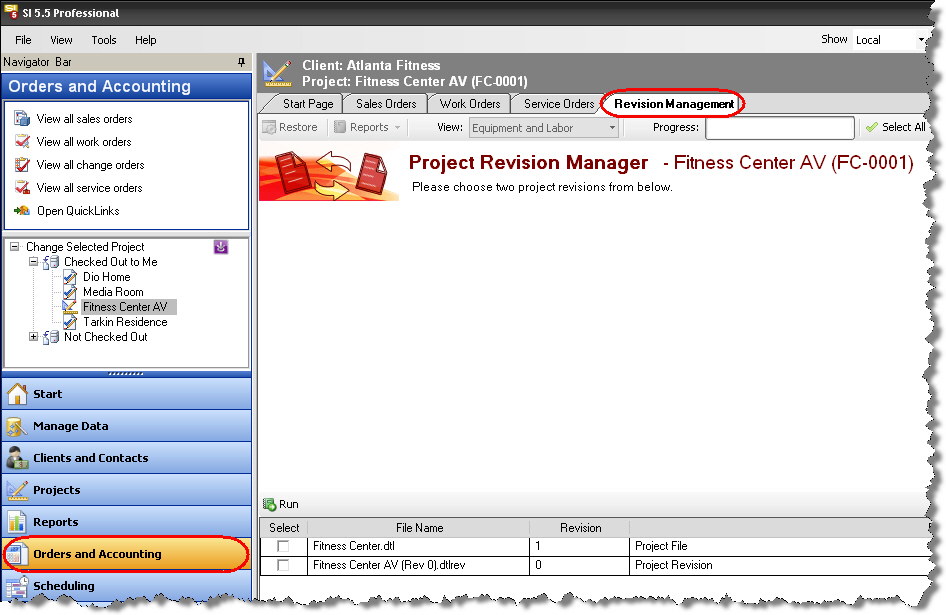
- Select the project in the Project Grid (it will highlight in blue) and then click the Orders and Accounting button followed by the Revision Management tab:
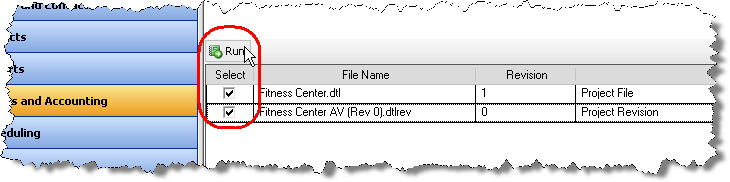
- Select the two revisions you wish to compare. Unlike when creating a Project Delta on the Reports tab, the order you select the revisions in does not matter. In this example, only two revisions exist for the project. Once selected, click the [Run] button:
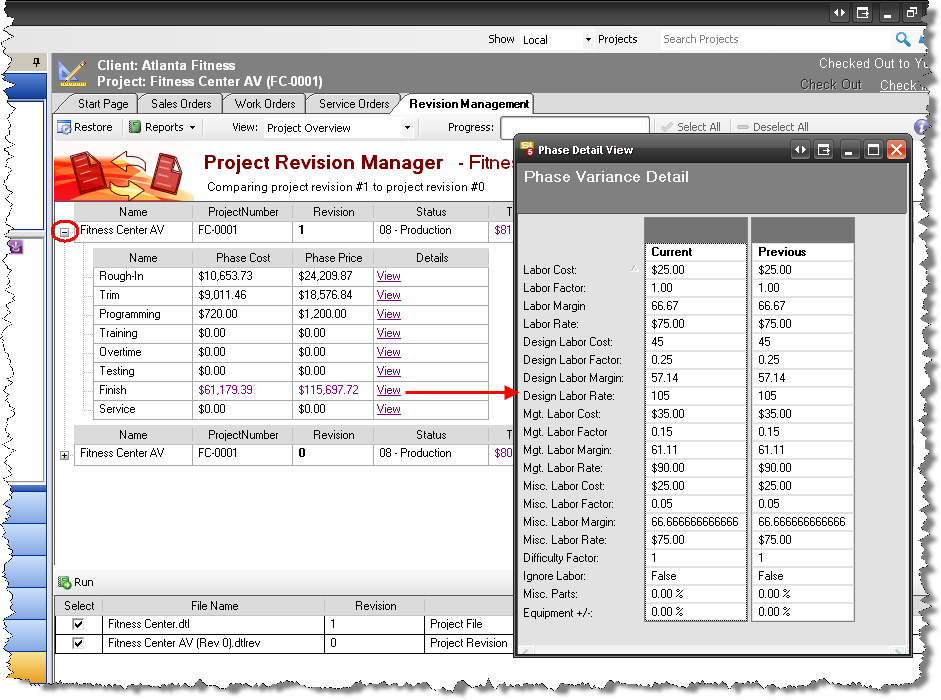
- The first View that will display will show you a Project overview:
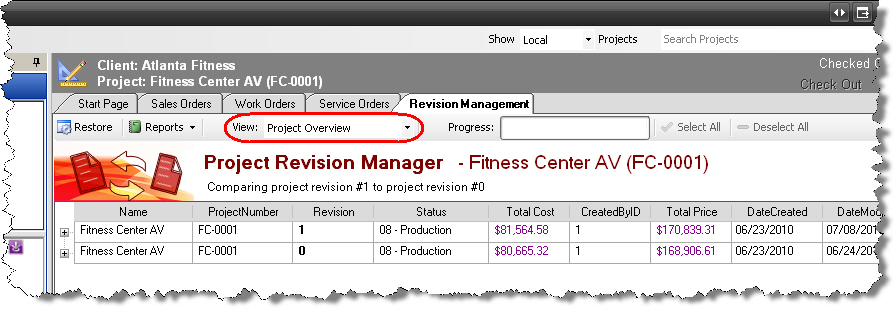
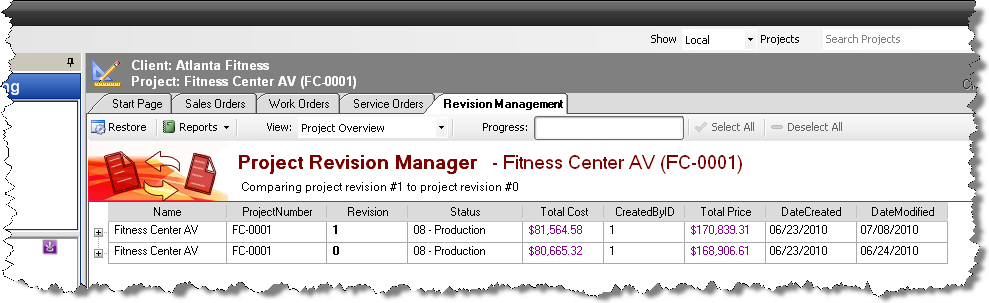
- You can expand the [+] next to each revision to view more detailed information about what changed on a per Phase basis and if you with to see even more detail, click the "View" link for any Phase:
- Besides Phase information, you can also choose to view the "Equipment and Labor" and "Package" detail of what changed between the compared revisions via the View drop down menu:
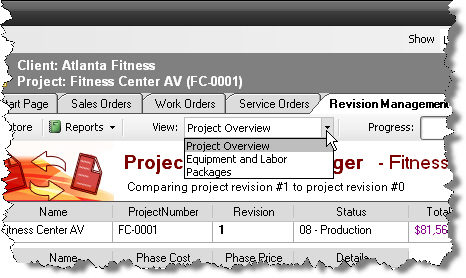
- In this example, no packages were addd/removed/modified from the project so we will view "Equipment and Labor":
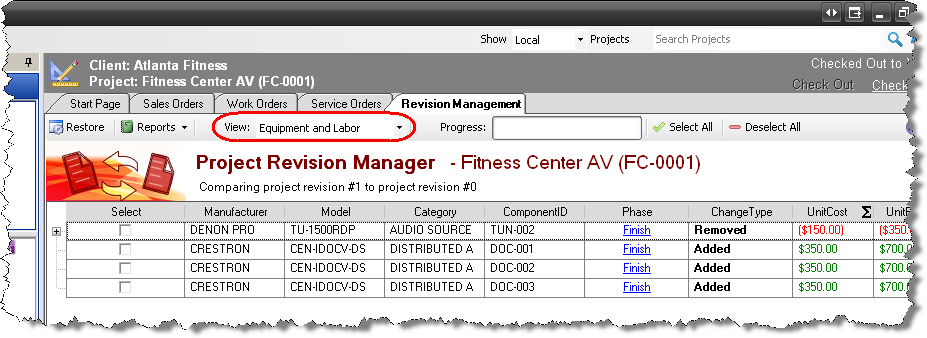
Here you can see what products were added/deleted/modified between the two revisions.
Now you really have two options of what to do with this information. You can either run a Change Order report or you can use the Restore function.
Change Orders
We will continue on with the example above to show how to run a Change Order report. In order to run a Change Order, you must select the products and/or packages that you wish to appear on the report using the check boxes next to each line item:
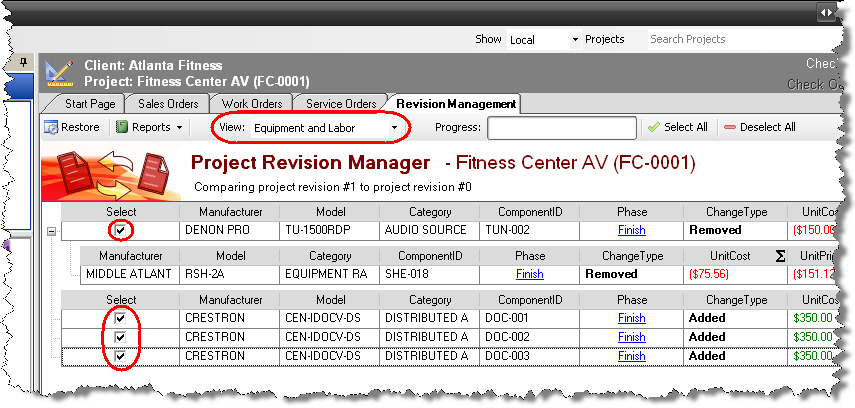
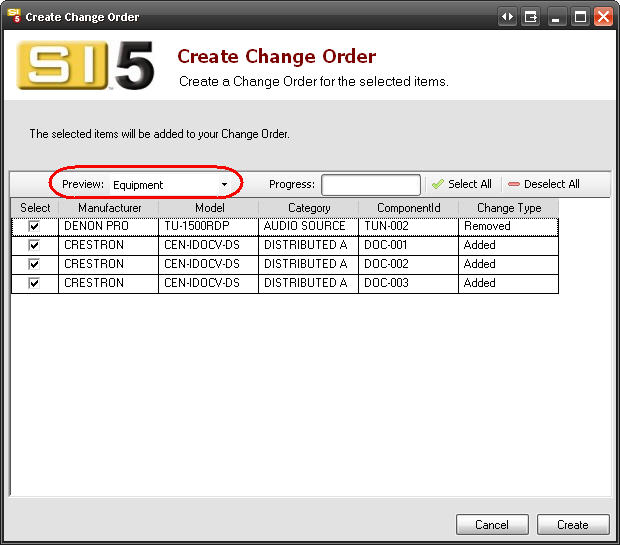
Note: In this example the TU-1500RDP had an RSH-2A as an accessory so it was also removed from the project.
If you have a combination of products and packages, make sure you use the View drop down to toggle between the two displays and select what you wish to appear on the report.
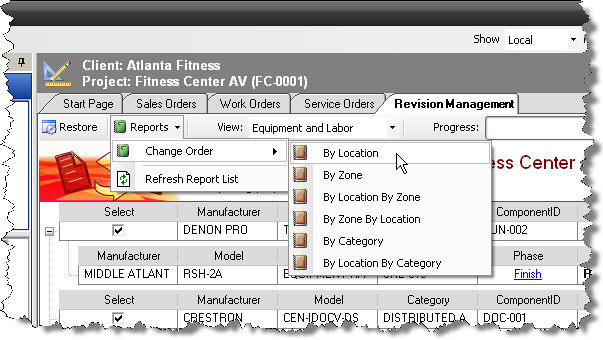
Once you've selected what you want to appear on the report, click the Reports button and choose the Change Order report you wish to run:
A preview/verification window will open. Review the selected products and packages if desired then click [Create]:
The report will display on a separate tab:

Note: You can choose to customize any of the Standard reports from the Reports tab to display here in the Revision Management interface via the "List as a Revision Management Report" function in the Report Designer. See here for more information.
Restore
Another function of Revision Management is Restore. This function allows you to restore products that were added/removed/modified to either of the selected revisions.
Continuing on with the example, let us assume that after reviewing the Change Order report above the client changed their mind and actually does want the TU-1500RDP that was removed.
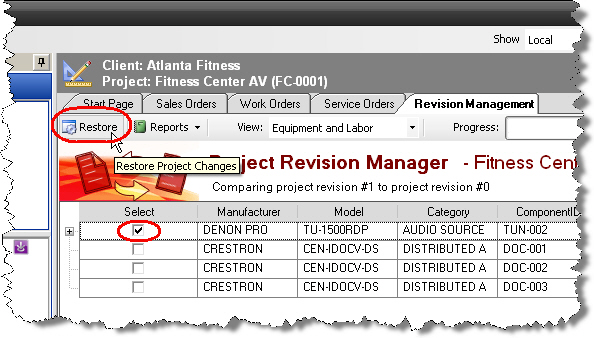
- In the "Equipment and Labor" view, check only the TU-1500RDP in the list then click the [Restore] button:
- Here all I want to do is to "Replace items removed the revision" for Rev 1 so I check the appropriate box and then click the [Restore] button.
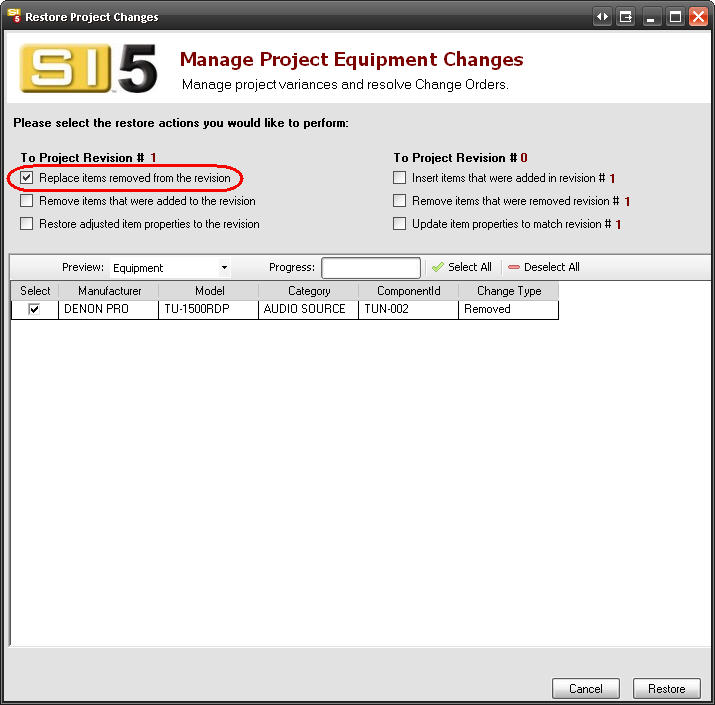
In the interface above, your more current revision will be listed on the left and your older revision will be listed on the right. There are three types of changes to products that can take place between revisions: products were added, products were deleted, products were modified. The options available to you on this form relate to those three types of changes.
For your more current revision you can:
- Replace items that were removed from the revision
- Remove items that were added to the revision
- Restore adjusted item properties to the revision
For your older revision you can:
- Insert items that were added in your more current revision
- Remove items that were removed from your more current revision
- Update item properties to match the changes made in your more current revision
Note: You will not likely use the options for the older revision in this Restore function since the older revision is always the basis for comparison to the changes made in the more current revision.
- The product (and its accessory, the RSH-2A) were restored to the "Current Revision" of the project.
- © Copyright 2024 D-Tools