Using Existing QuickBooks Data
Table of contents
Using Existing QuickBooks Data
Scenario:
- Prior to purchasing SI 5, you were creating your estimates and purchase orders in QuickBooks and you have a database of the products you sell
- You want to get your QB data into SI 5
- Your initial expectations for SI 5: Proposals, Line drawings, and ability to export Estimates/Invoices/Purchase Orders to QuickBooks for billing
- The software I used for this example: SI 5, QuickBooks 2006 Premiere, and Excel 2003
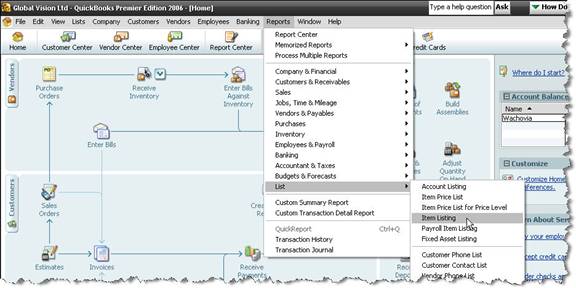
First start by running a report in QuickBooks that pulls the data you want to enter into SI 5. I selected Reports->List->Item Listing:
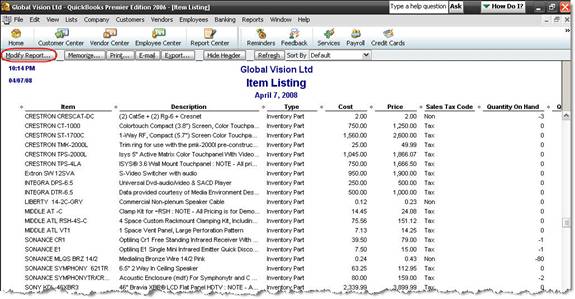
The report runs with your default settings:
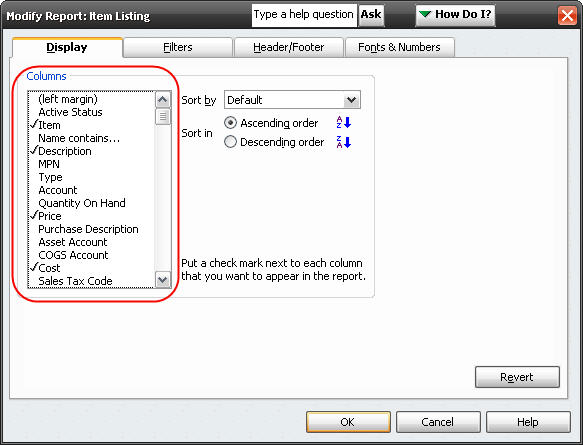
Click the [Modify Report] button to choose the columns that display in the report:
I chose Item, Description, Cost, Price, Sales Tax Code, and Preferred Vendor. That is about the only information in the QuickBooks database that is relevant to SI 5. Sales Tax Code is useful if you have some items that are not taxable. In this example, I made my rough-in wire non-taxable. The report now displays as shown:
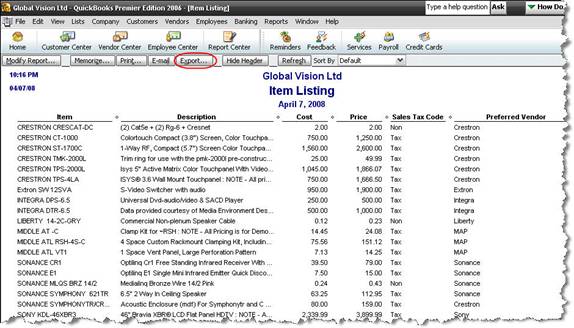
Click the [Export…] button and uncheck the “Include a new…” checkbox on the Export Report form. Save the excel spreadsheet that is created.

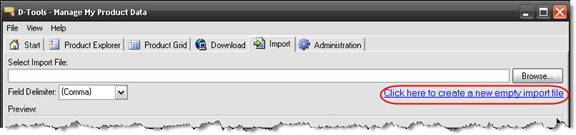
This file will come into play shortly. Launch the MMPD from the SI 5 Navigator and click the Import tab then the [Import CSV] file button. Click the “Click here to create a new empty import file”
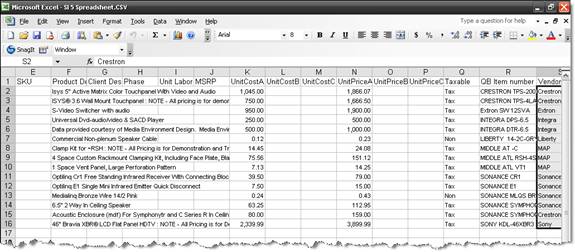
Name the file and choose a location. Excel will launch the template import file with column headings pre-mapped to your SI 5 database. Copy and paste the data from the QB excel spreadsheet into the SI 5 generated spreadsheet. The matching columns are:
| QB Spreadsheet | SI 5 Spreadsheet |
| N/A* | Manufacturer |
| N/A | Model |
| N/A | Category |
| Description | Product Description |
| N/A | Phase |
| N/A | Unit Labor |
| Cost | Unit Cost A |
| Price | Unit Price A |
| Sales Tax Code | Taxable* |
| Item | QB Item number |
| Preferred Vendor | Vendor Name |
N/A* - if you purchase products direct from the manufacturer, you could also copy and paste the Preferred Vendor field from the QB spreadsheet into the Manufacturer column in the SI 5 spreadsheet which I did in this example.
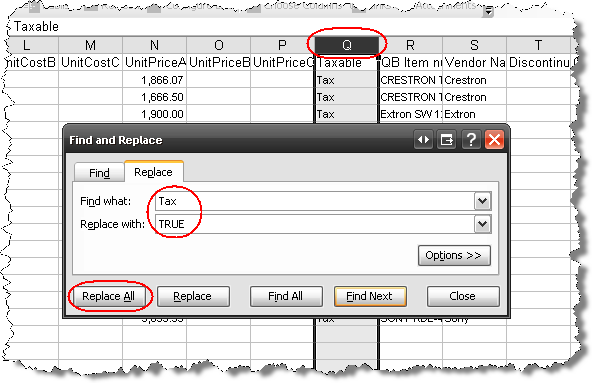
Taxable* - for import into SI 5, these values need to be “TRUE” or “FALSE”, not “Tax” and “Non”. The easiest way to do this to select the column in Excel and then click Ctrl + F (Find). Click the Replace tab and type in the values you want to find and replace then click [Replace All].
That leaves Model, Category, Phase, Unit Labor and an Image. For Model, you may try pulling it from the Item field in the QB spreadsheet or you can type it. Once you have the Model number, paste that into your favorite search engine and look for an image to download to a temporary folder. While you are on the web, why not look for additional specs for the device, like Height, Width, and Depth (for doing Elevation drawings down the road)…or maybe a better description for the Client Description field (this description will pull for Client Reports if populated)? If you are on the manufacturer’s website, maybe copy the URL into the Hyperlink column.
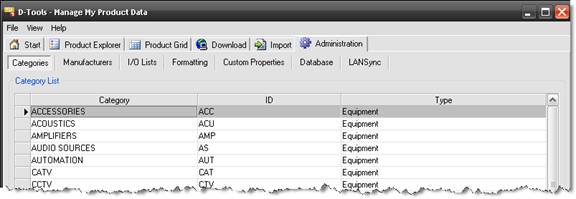
The Category field should be populated with an appropriate category to identify the equipment. SI 5 has a default list of Categories. You should choose from this list because the shapes and blocks for Visio and AutoCAD are grouped and coded to drop based on category. You can view the default list of SI 5 categories by opening the MMPD and clicking the Administration->Categories tab:
For the Unit Hours, this is all on you to determine these. Talk to your installers and ask them how long it takes them to install particular components. Detail at this level is important so you don’t underbid on your labor for a project and you will adjust the Unit Hours over time if you find discrepancies. Many pieces of equipment that are of the same Category will have similar install times but adjust when necessary. Remember, for bulk wire (of Phase Rough-In) that the Unit Hours is based on a per foot basis. To approach coming up with this number remember that .005 Unit Hours for a 100 foot wire drop would charge for half an hour (.5) of labor. If that is not accurate for your business, adjust up or down from here.
There are really only three Phases you need to be concerned with for equipment and they are: Rough-In, Trim, and Finish. Equipment like bulk wire and mud rings get assigned to Rough-In, plates and in-ceiling/wall speakers get assigned Trim, and pretty much everything else is Finish. Assign the proper Phase to the equipment in the spreadsheet. Spell the Phases exactly as they appear in SI 5. Your Phase list is under the Setup tab in the Navigator.
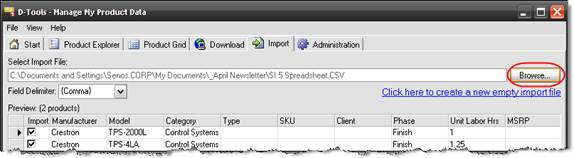
Once you’ve updated your spreadsheet, import it into SI 5 via the Import tab->[Import CSV] screen by browsing to your file and then clicking [Import]:
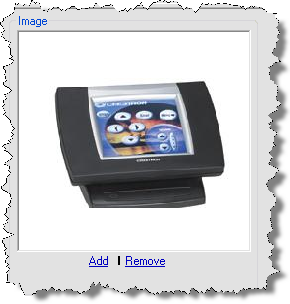
Once the data is imported you can manage it via the Product Explorer and Product Grid tabs in the MMPD interface. This is where you would Add the image to the products:
Now you are ready to begin creating projects in SI 5. This is just one approach to building to your SI 5 database. I used a small database for the example, yours will be much larger. Consider breaking it out into manageable pieces, perhaps by Manufacturer. Over time you will want to accessorize products and build Packages.
-Seth Enos
- © Copyright 2024 D-Tools