CSV
You can export, edit, then import a CSV file from within a Project.Exporting Project Items to a CSV file can be useful for importing into third-party software. You may also feel more comfortable editing Items from a Project in a CSV file, then importing the CSV file back into the Project to update the Items.
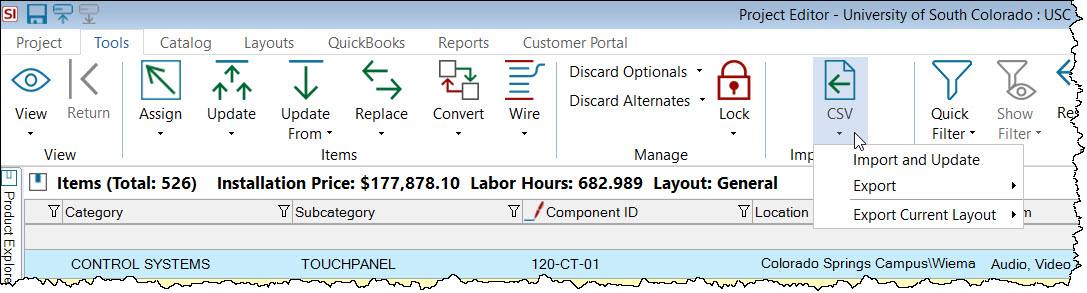
Export
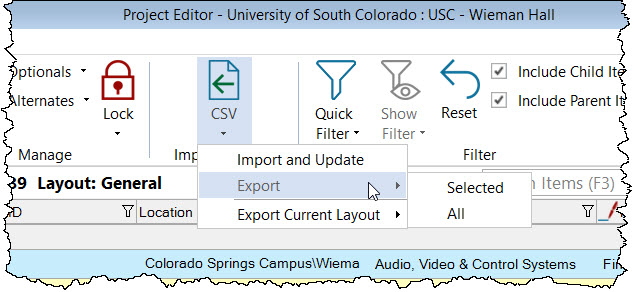
When exporting you will choose to export just whatever Items you have selected, or you can export all Items:
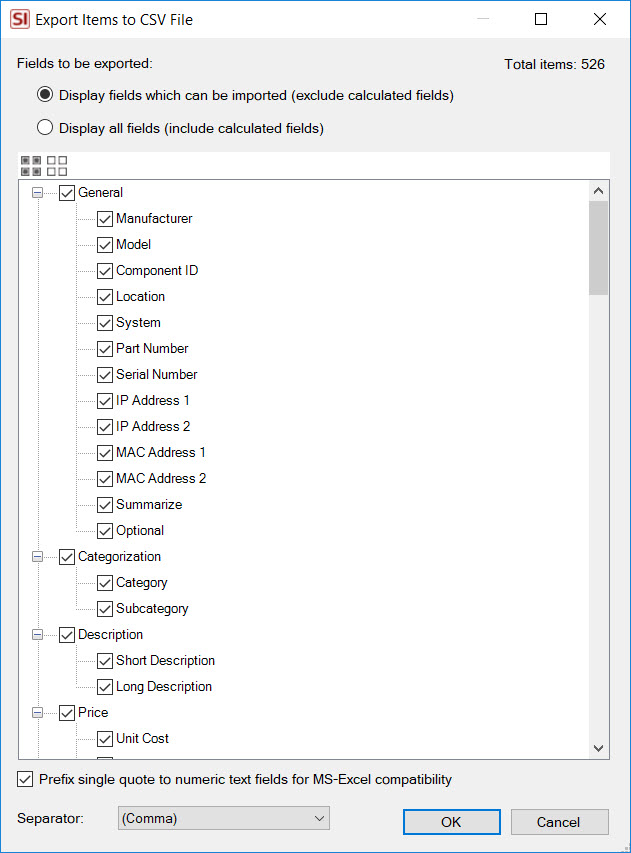
Here you can choose what field you wish to export. If you choose to include calculated fields in your export, just know that these fields cannot be re-imported, e.g. Installation Price.
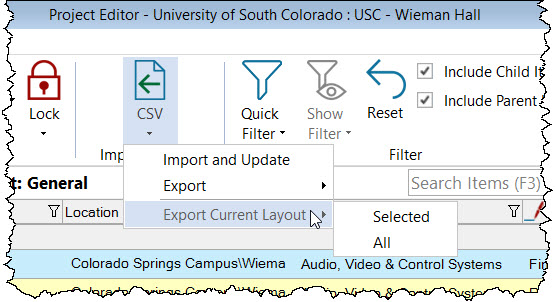
You also can choose to export your current layout (columns) in the Project Editor vs. having to choose your fields.
Import and Update
Once you have edited the items in the CSV file, you can re-import the file and update Items within the Project. This is pretty straightforward since all fields from the CSV are already mapped to the fields within the Project since the file was originally exported from the Project.
In addition to exporting and re-importing CSV files, you could also choose to import a CSV file to a Project to add new Products to a Project, e.g. you want to import a list of Products into an SI Project from some other source. This is not common.
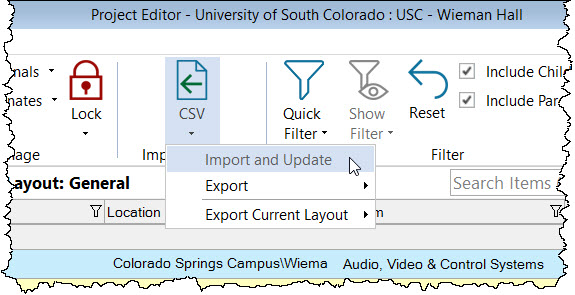
To import a CSV file to a Project, open the Project Editor and click the [Import and Update] button in the CSV section of the ribbon:
Once a CSV file has been selected, the Map CSV File interface will open. Depending on your spreadsheet, you may not see all of the steps shown below.
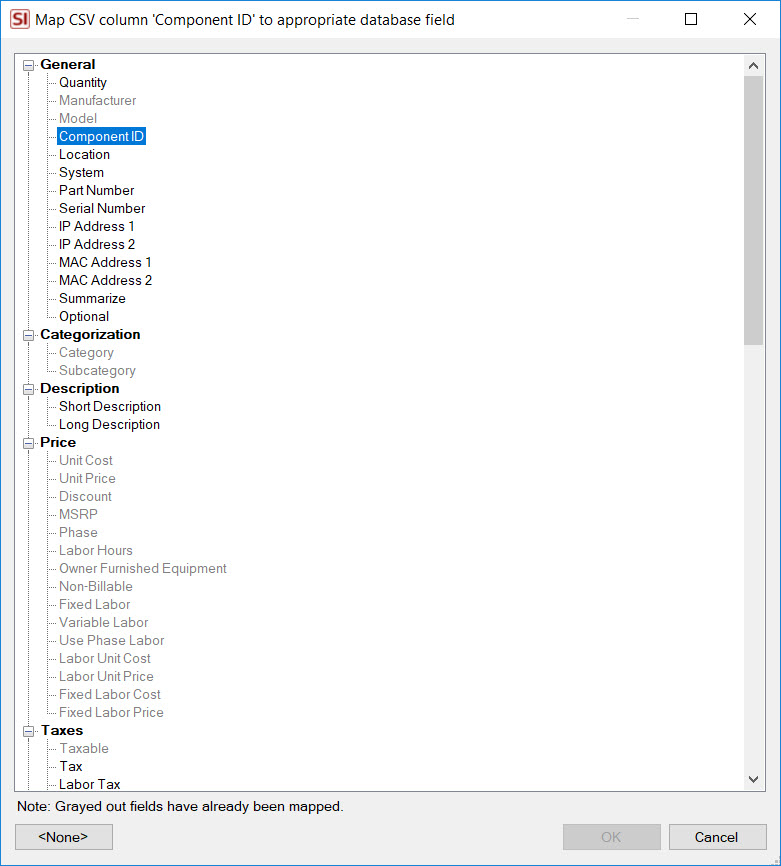
Step 1

You may need to map the columns in your CSV file to Database Fields in the SI Catalog. Some fields will be pre-mapped if they are an exact match or if they are a close match. There are two required columns that must be mapped: Manufacturer and Model.
Click the "Map" link next to any field you wish to map or re-map and the following form will open. Select you field (or the [None] button at the bottom if you wish to unmap a field) and then click [OK].
Step 2
You will only see step 2 if you are adding new items to the project via the spreadsheet and have new Manufacturer names that are not in your SI Catalog.
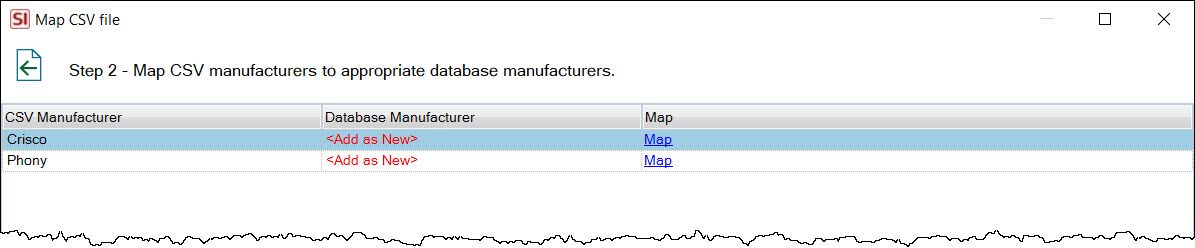
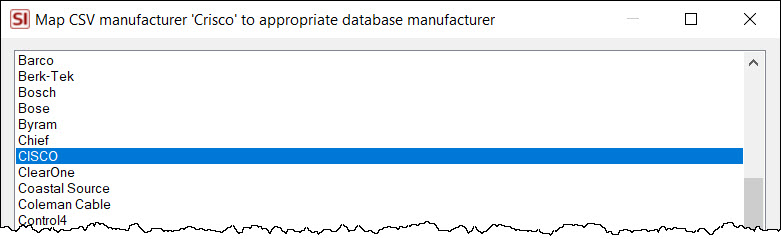
The default will be to add as a new manufacturer but if you can click the Map link if you want to map to an existing Manufacturer in your SI Catalog:
Step 3
You will only see step 3 if you are adding new items to the project via the spreadsheet and have new Category names that are not in your SI Catalog.

The default will be to add as a new manufacturer but if you can click the Map link if you want to map to an existing Manufacturer in your SI Catalog:
Step 4
This step is primarily a summary of what you have done on the previous steps. Here you can also choose whether to use the Part Number or Accounting Item Name fields, to match to SI Catalog Items. These options are useful if you do not have a Model field mapped in your CSV file.
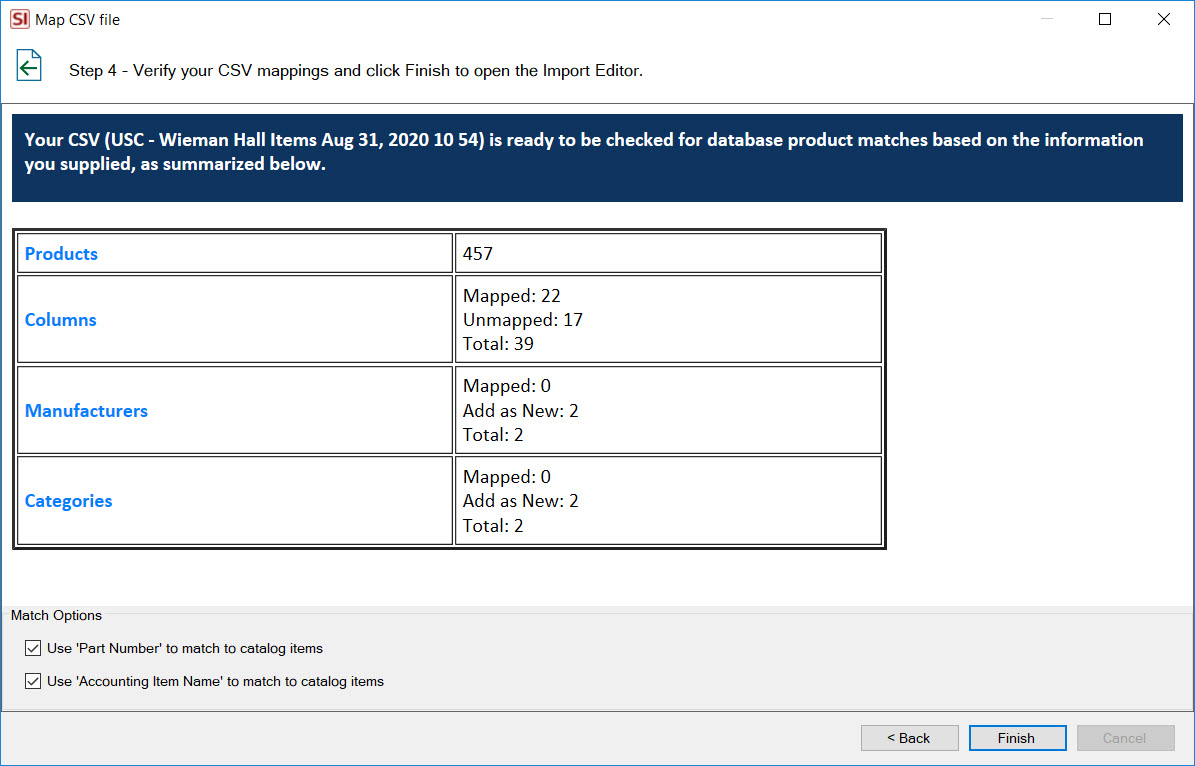
When you click Finish the following form will open:
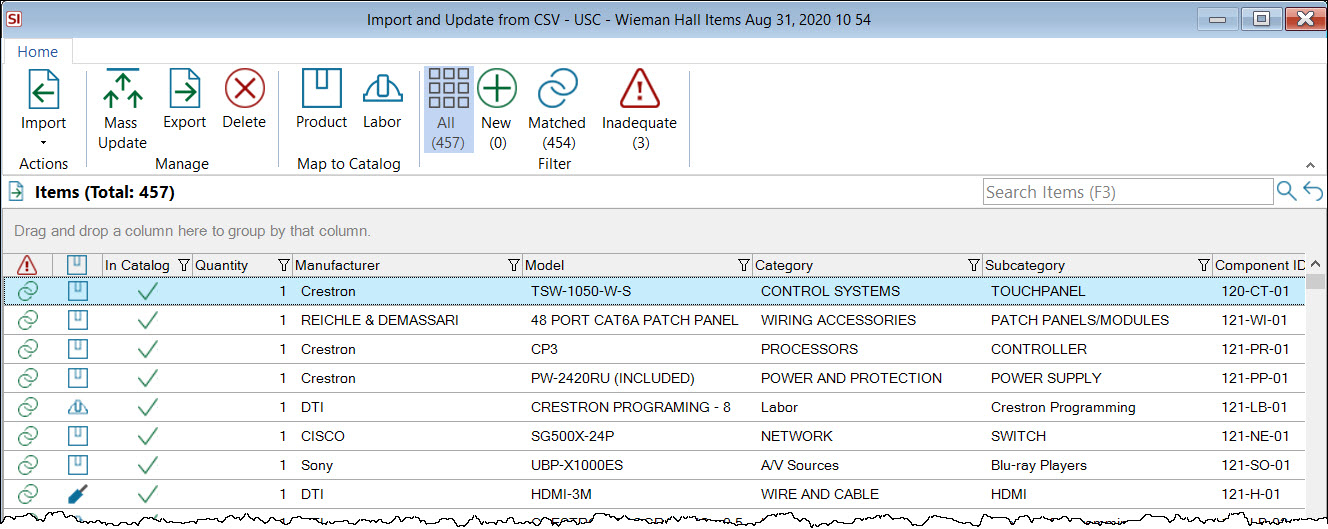
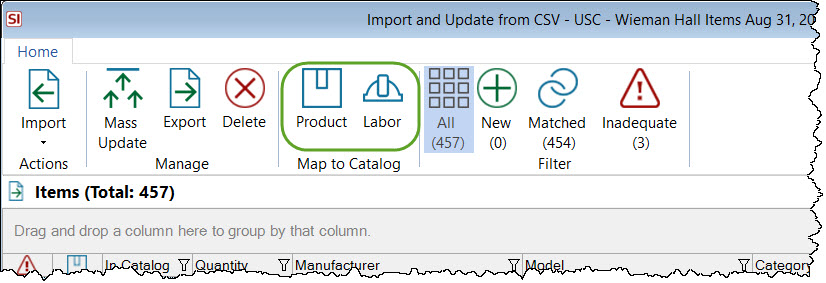
This will list all of the items in the CSV file. The "In Catalog" will indicate whether or not the items already exist in your SI Catalog. The Filter section of the ribbon allows you to filter between: All, New, Matched, and Inadequate.
New
Items not already in the Project.
Matched
Items that already exist within the Project.
Inadequate
Items with not enough information for importing into the Project. These would be products that have no Model, Item Number, or Accounting Item Name fields mapped. This could also be items not assigned to a Manufacturer.
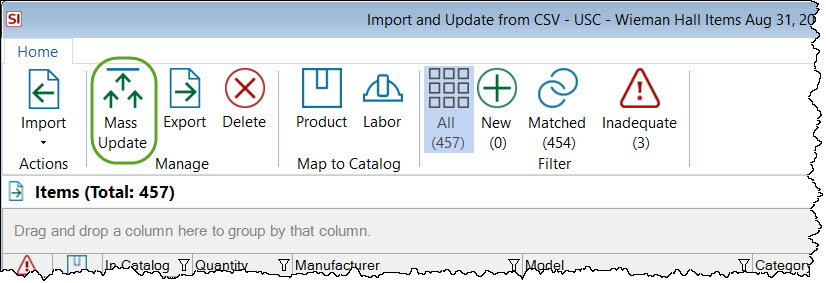
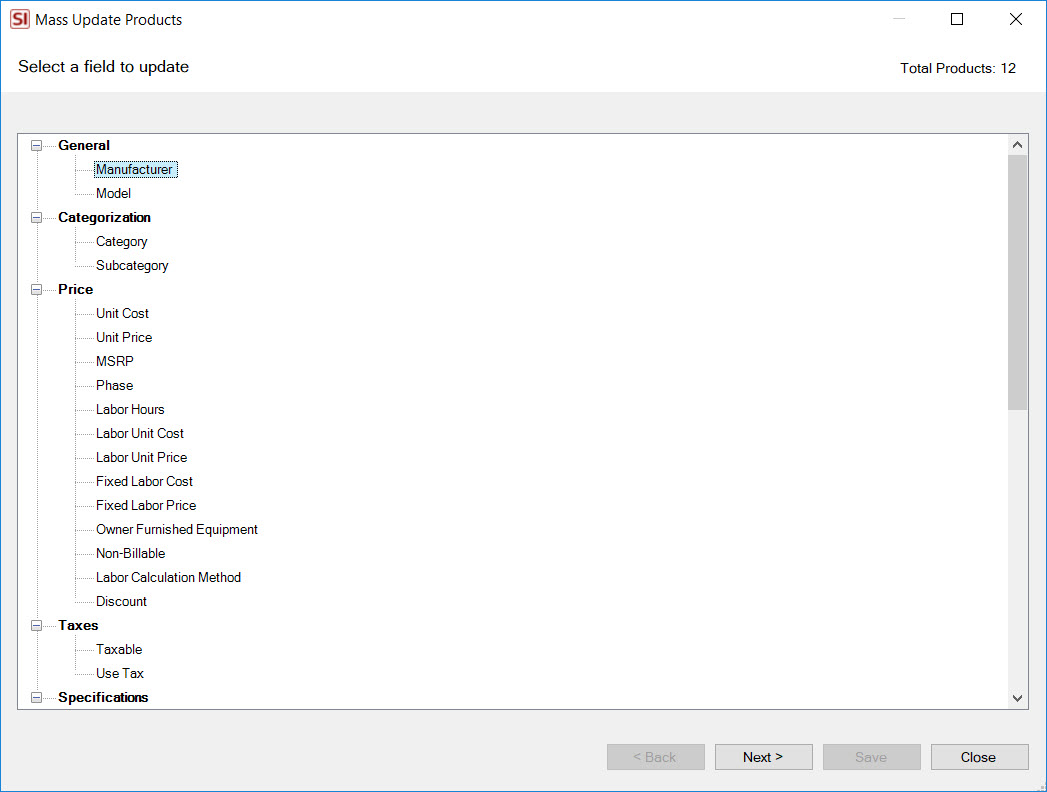
The Mass Update button will allow you to make modifications to the data being imported for fields shown below:
You also have the option to manually map any items in the CSV to Products or Labor Items in your Catalog:
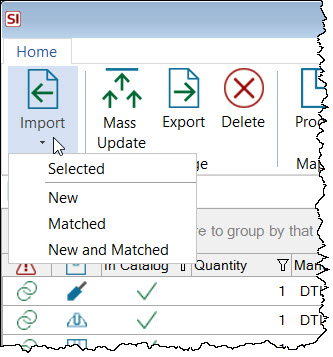
When you are ready, click the Import button and choose whether you are importing New, Matched, or New and Matched items:
The following form will open. Here you can choose your import options as well as verify what columns you wish to import.
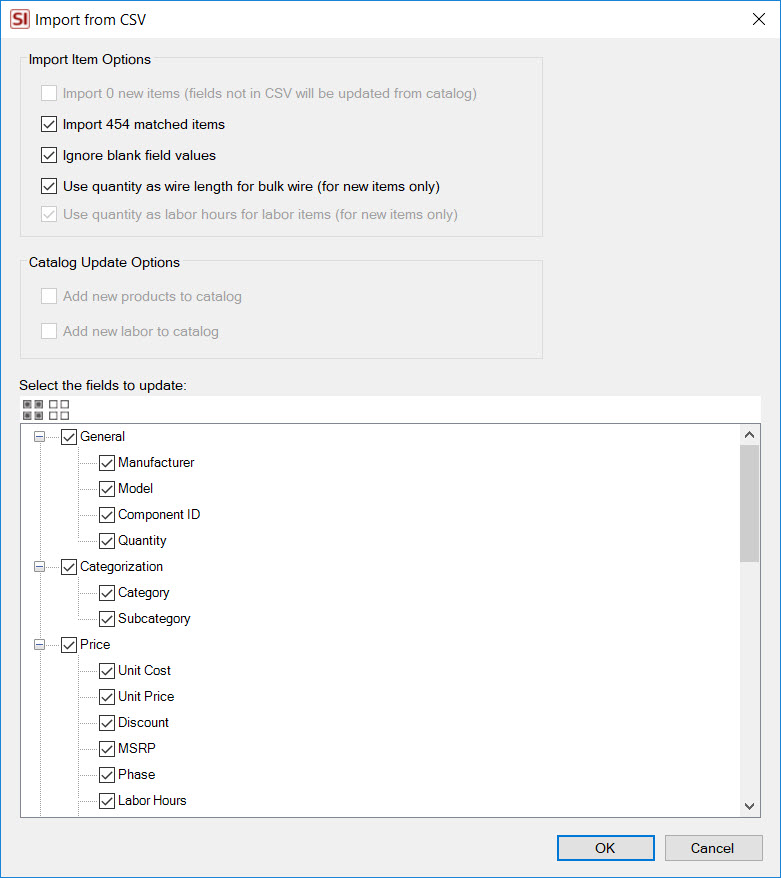
Click OK to import.
- © Copyright 2024 D-Tools