Component ID Format
Setting
Here you can set your Component ID Format.
The Manage Component ID Format form:

The Component ID uniquely identifies each Product/Labor Item/Package in a Project and is used mainly on drawings and installation reports. There are eight individual settings here:
Product - Applies to all non-Wire Products within a Project
Labor - Applies to all Labor Items within a Project
Finish Wire - Applies to all non-Bulk Wire Products within a Project
Bulk Wire - Applies to all Bulk Wire Products within a Project
Package - Applies to all Packages within a Project
Allowance - Applies to all Allowances within a Project
Bundled Cable - Applies to all Bundled Cables within a Project
Solution - Applies to all Solutions within a Project
Functions
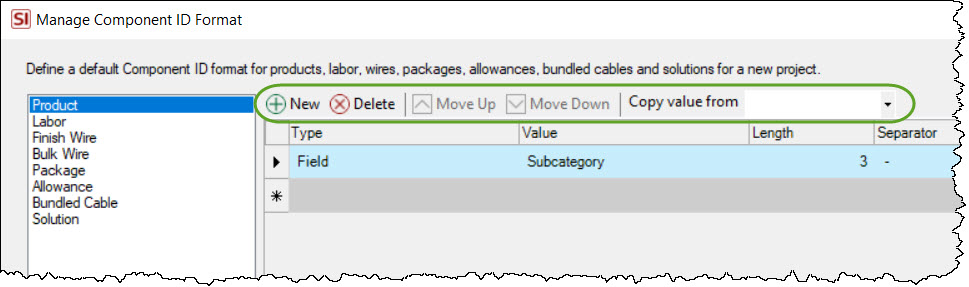
You can add/delete rows from your Component ID Format list. You can also use the Move Up/Down buttons to position the rows. You can also copy one format to the other.
Fields
Type
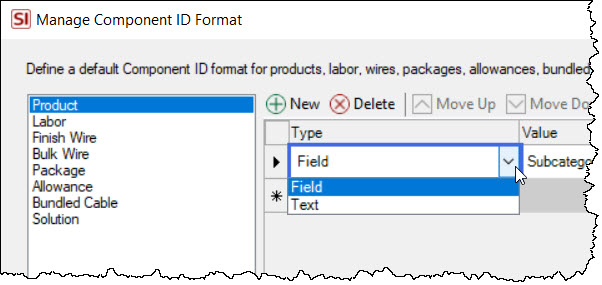
You can choose "Field" or "Text" for your Format Type. "Field" allows you to then select an item field in the Value column. "Text" allows you to type your own value in the Value column.
Value
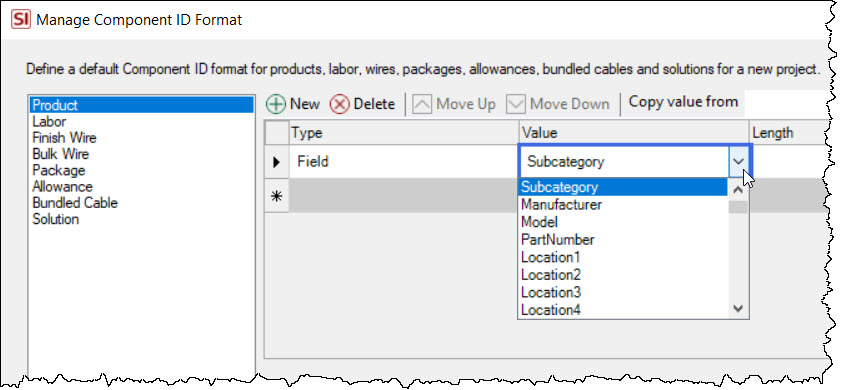
You can choose from a list of product fields when your Format Type is set to "Field". This list varies depending on whether you are creating the Component ID Format for Products, Wires, or Packages.
Note: Most of the fields listed are self-explanatory but a few need some clarification.
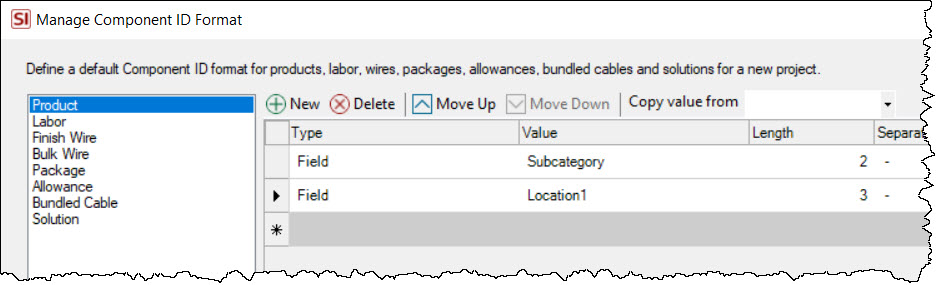
Location1-Location5
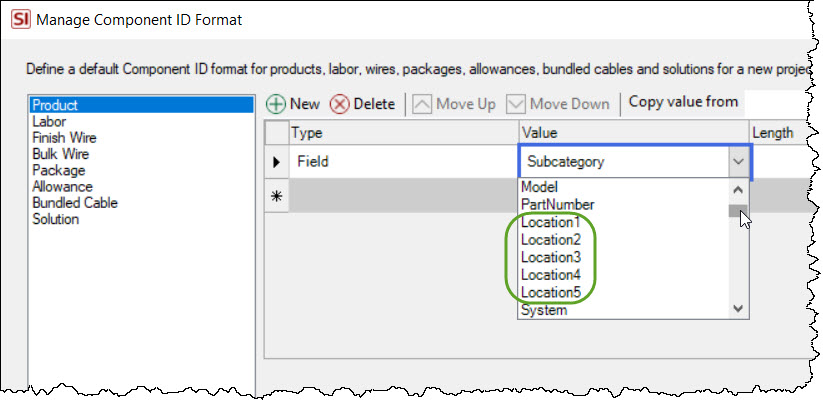
These fields do not pull the Location name, they pull the Location abbreviation:
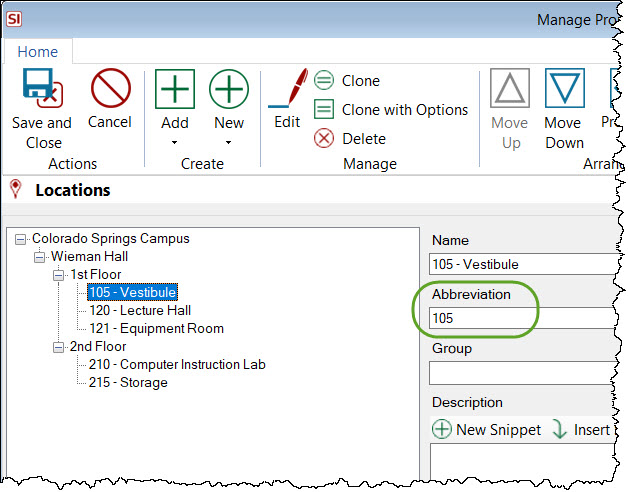
When using these fields, you will likely want to choose the Location that corresponds to your "Rooms" within your Location hierarchy. Keep in mind that this can change on a per project basis so you may need to adjust your Component ID Format within a Project. In the example above, that is a three level hierarchy (Building->Floor->Room) so you would choose "Location3" as your field. See Locations.
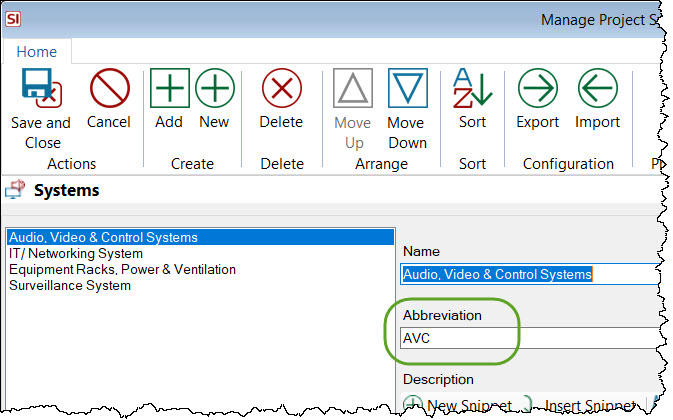
System
This field does not pull the System name, it pulls the System abbreviation. See Systems.
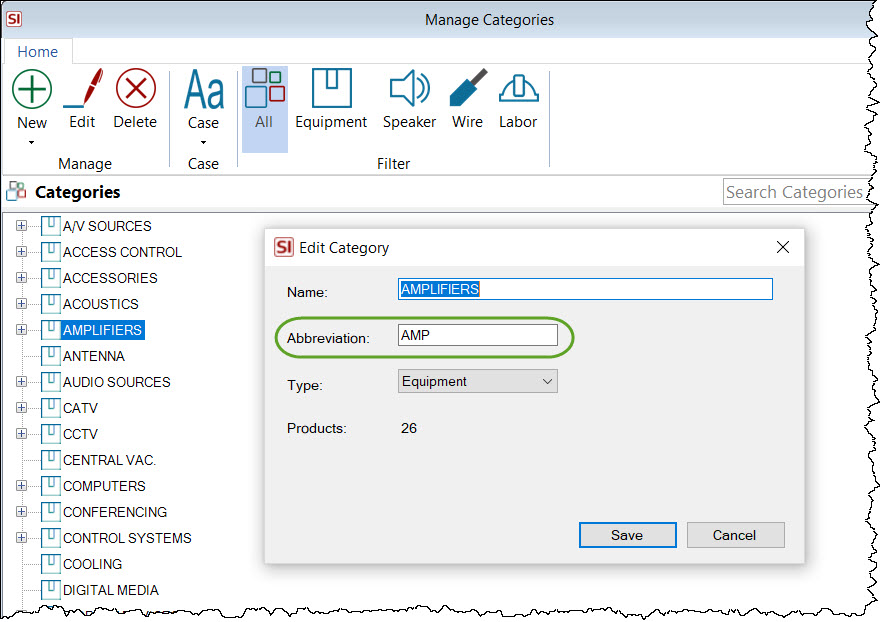
Category
This field does not pull the Category name, it pulls the Category abbreviation. See Categories.
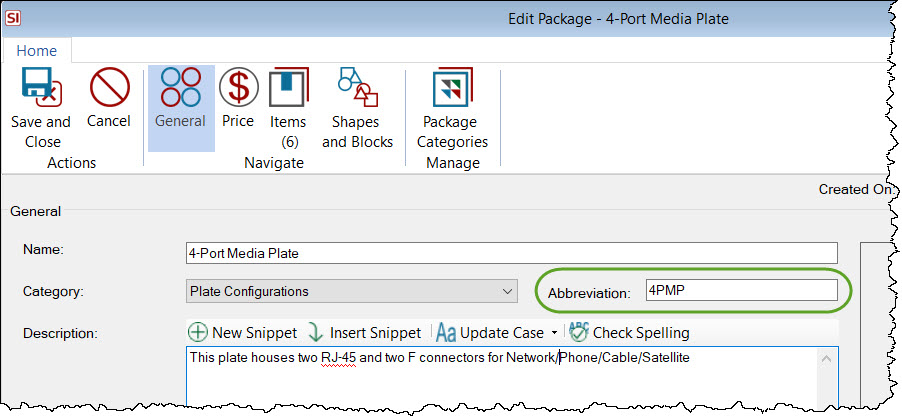
Package/Allowance/Bundled Cable/Solution Name
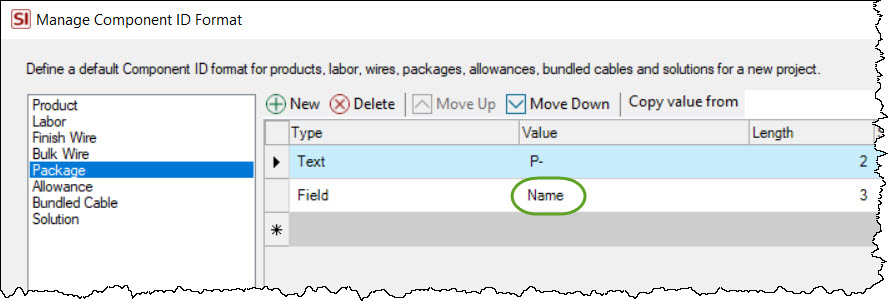
When setting up the Component ID format for Packages/Allowances/Bundled Cables/Solutions, if you choose the "Name" field, it does not pull the Package/Allowance/Bundled Cable/Solution name, it pulls the abbreviation See Packages. The Package/Allowance/Bundled Cable/Solution ID is used in Visio/AutoCAD for Line and Plan pages when you are using a single shape/block to represent the entity. See Package Shapes.
Length
Here you can type in the length of the string you want to pull from the "Value" column, e.g. how many characters.
Separator
Each row has it's own separator options and you will see a preview of your selection on the form:
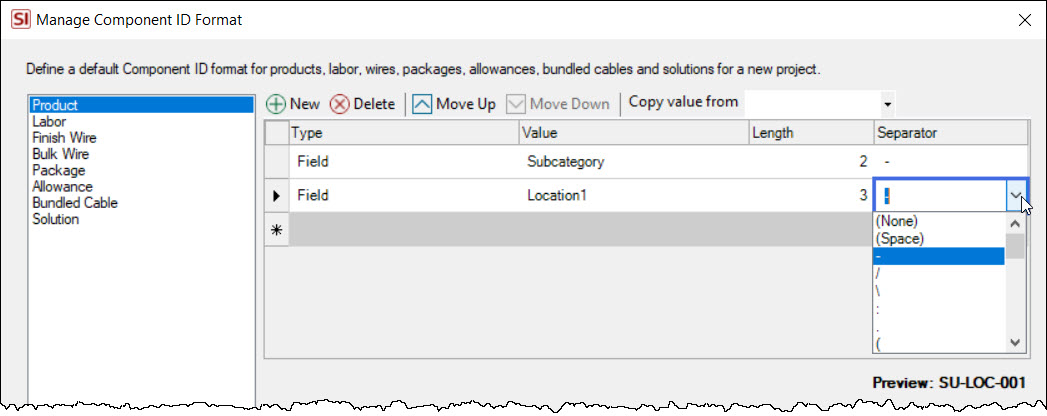
There is a dropdown with the following options for the separator, but you can also type in any character you want, up to four digits in length.
|
Symbol |
Description |
|
None |
No symbol or space |
|
Space |
Blank space |
|
- |
Minus or hyphen |
|
/ |
Forward slash |
|
\ |
Backslash |
|
: |
Colon |
|
. |
Period, or full stop |
|
( |
Open parenthesis |
|
) |
Close parenthesis |
|
> |
Greater than |
|
< |
Less than |
|
| |
Pipe |
|
+ |
Plus |
|
[ |
Open bracket |
|
] |
Close bracket |
|
, |
Comma |
|
; |
Semi-colon |
|
{ |
Open brace |
|
} |
Close brace |
|
‘ |
Apostrophe or single quote |
|
` |
Back quote |
|
“ |
Open quote |
|
” |
Close quote |
|
_ |
Underscore |
|
# |
Pound or hash |
|
@ |
At |
|
= |
Equal |
|
* |
Asterisk |
|
^ |
Carat |
|
~ |
Tilde |
|
& |
Ampersand |
|
% |
Percent |
|
x |
The letter X |
Other Options
The following options on the form are unique for each entity, e.g. Products, Labor Items, etc.
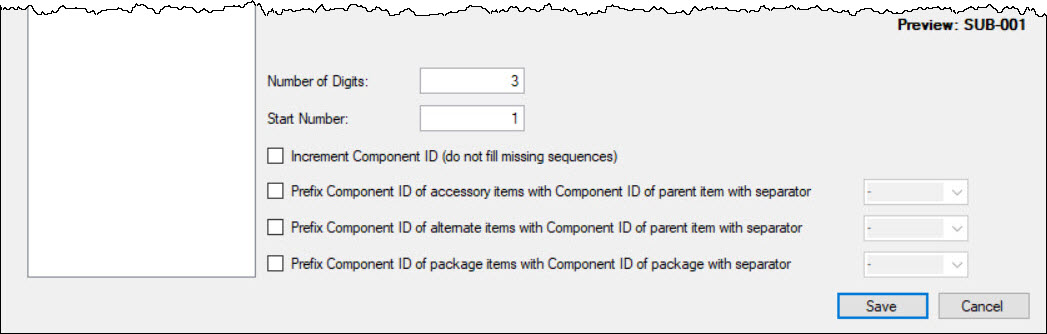
Number of Digits
Here you set the length of suffix digits for the Component ID Format.
Start Number
Here you can set the start number for the Component ID Format.
Increment Component ID (do not fill missing sequences)
By default this option is not checked. When checked this would not backfill missing numbers in your Component ID numbering.
Example: You have the following Component IDs in your Project: AUD-001, AUD-002, and AUD-005. When this option is unchecked the next identical item that is added to the Project would be assigned a Component ID of AUD-003. When this option is checked the item would be assigned a Component ID of AUD-006.
Prefix Component ID of accessory items with Component ID of parent item with separator
By default this option is not checked. You can choose your separator for this from the same options shown above.
Prefix Component ID of alternate items with Component ID of parent item with separator
By default this option is not checked. You can choose your separator for this from the same options shown above.
Prefix Component ID of package items with Component ID of package
By default this option is not checked. You can choose your separator for this from the same options shown above.
Note: For Package, Allowance, or Bundled Cable Component IDs this option will be "Prefix Component ID of [Entity Name] in solutions with Component ID of solution with separaor".
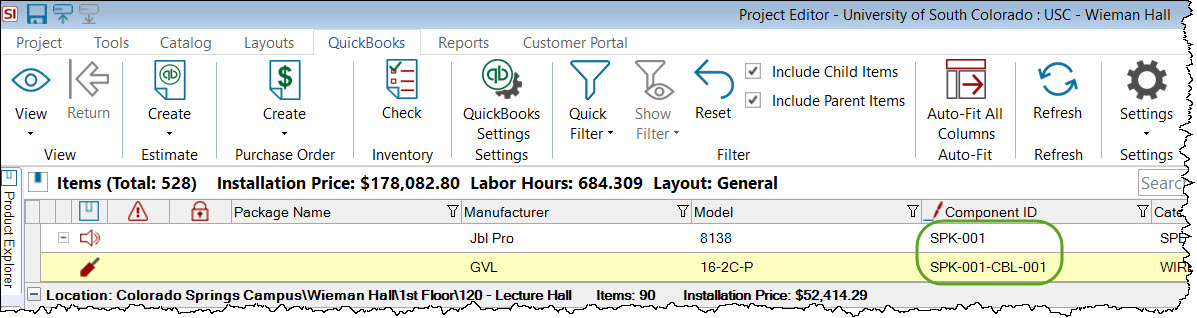
Example: This example will use the accessory setting above. With this setting checked, and the Product and Wire Component ID Formats set to pull the first three characters of the Category fields, this is the result:
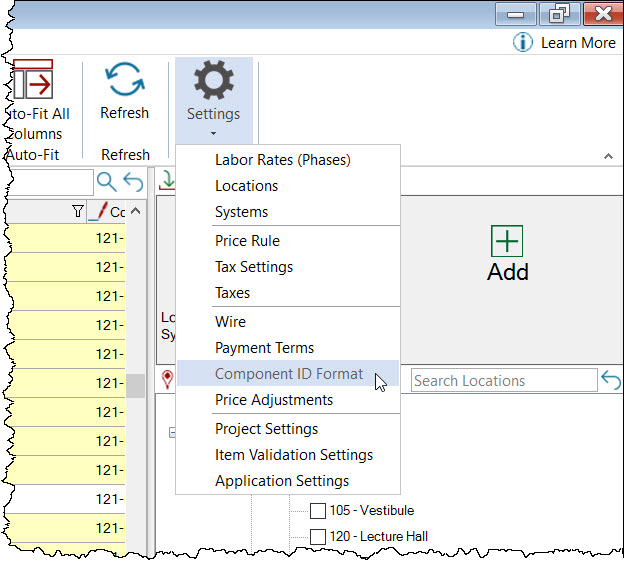
Project Editor
This dialog can be opened within the Project Editor via the Settings button and has a few additional features:
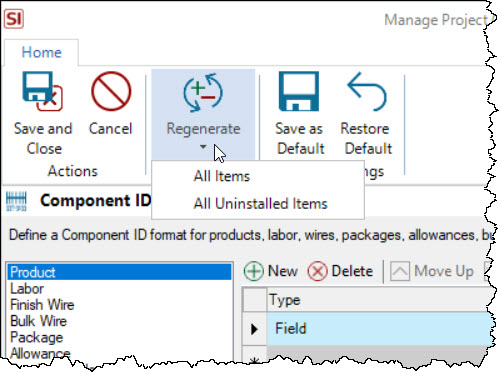
Regenerate
Here you can regenerate the Component IDs for all items within the Project or for just uninstalled items.
If you want to just regenerate the Component IDs for a selection of items vs. all items, select your items either in the Project grid or on a drawing page and use the Regenerate Component ID function from the Tools tab or via right-click in the Project Editor.
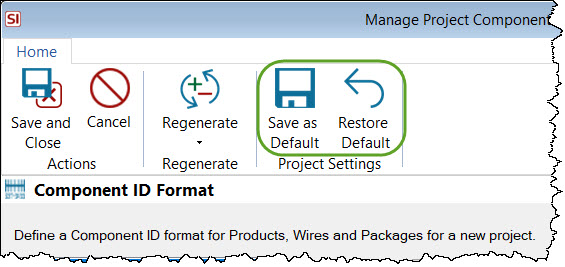
Saving and Restoring
When you make changes to your Component ID format within the Project Editor, those changes apply only to that Project. If you wish to save your changes as your default Component ID format (all future Projects will use this format), click Save as Default. If you want to restore your default Component ID format from the Catalog to the Project, click the Restore Default button.
- © Copyright 2024 D-Tools