Connecting to QuickBooks
Table of contents

Overview
This explains how to set up the connection between SI 2015 and QuickBooks.
Video
Details
SI 2015's QuickBooks integration allows you to create Estimates and Purchase Orders in QuickBooks directly from your SI 2015 Projects. You can also create Items in your QuickBooks database directly from your SI 2015 Catalog of Items.
Rules
QuickBooks must be installed on the machine where the SI 2015 Client is installed. Your QuickBooks company file can be stored on any machine on your network, but the actual QuickBooks application must be installed on the machine.
During the "Initial Connection" (see below), you must be logged into QuickBooks as the Admin and you must be in "Single User Mode".
Initial Connection
- Open your QuickBooks company (.QBW) file and login as the Admin and switch to "Single User Mode".
- In QuickBooks Settings, map SI 2015 to your QuickBooks company (.QBW) file. Configure the rest of your QuickBooks Settings. Note: your file paths in QB and SI 2015 must match exactly, click here for details.
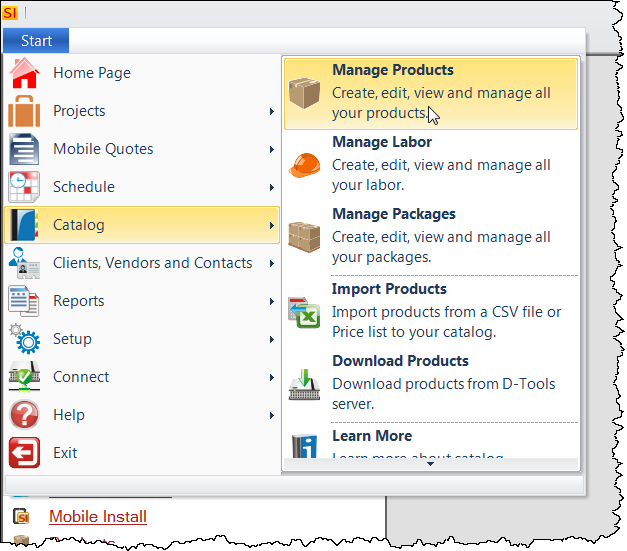
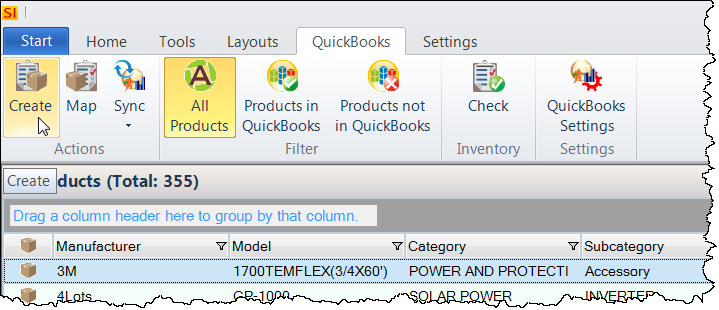
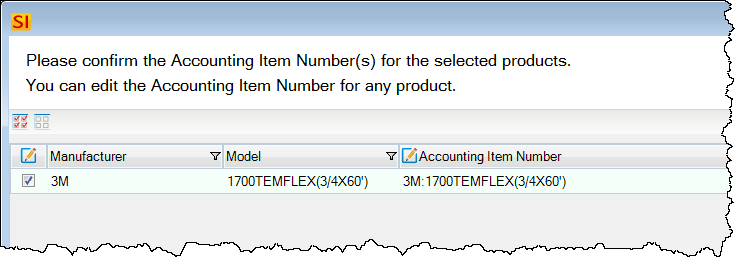
- Open Product Explorer, select a Product in the grid, then click on QuickBooks Tab, then click the Create button:
- QuickBooks will alert you on your Task Bar that action is required. Click on the QuickBooks icon on your Task Bar.
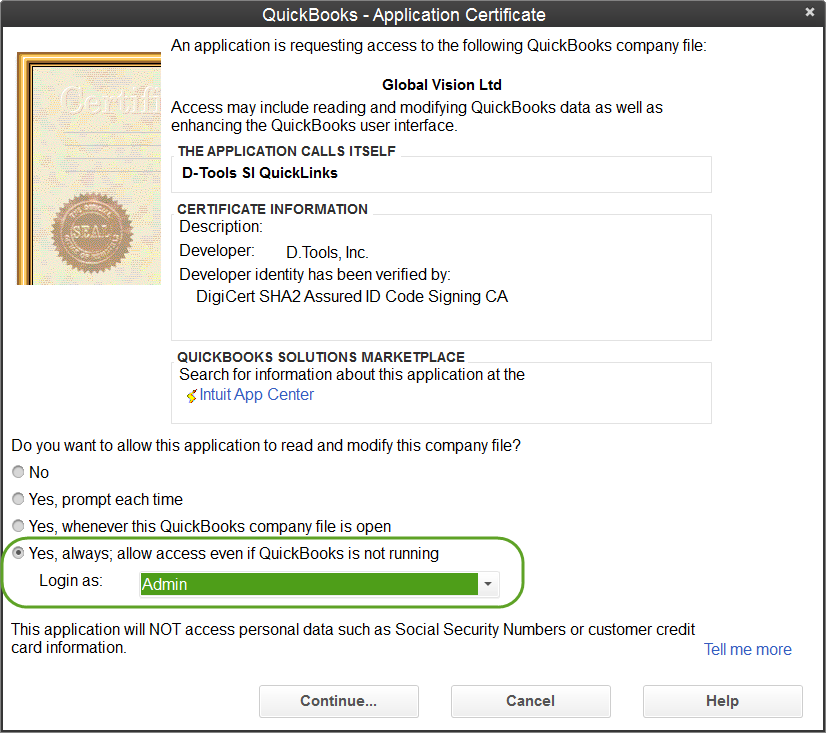
- On the QuickBooks form, make the following selections and click [Continue...]. You must set "Login as" to Admin.
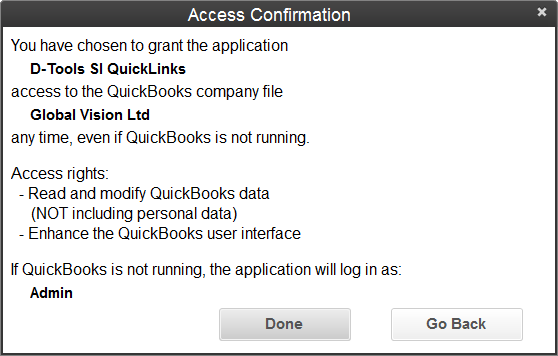
- Then click [Done]:
- The Create QuickBooks Items form will open, click [Close]. The intent here is not create the item, but just to make SI 2015 and QuickBooks work together. To see how to create QuickBooks Items, click here.
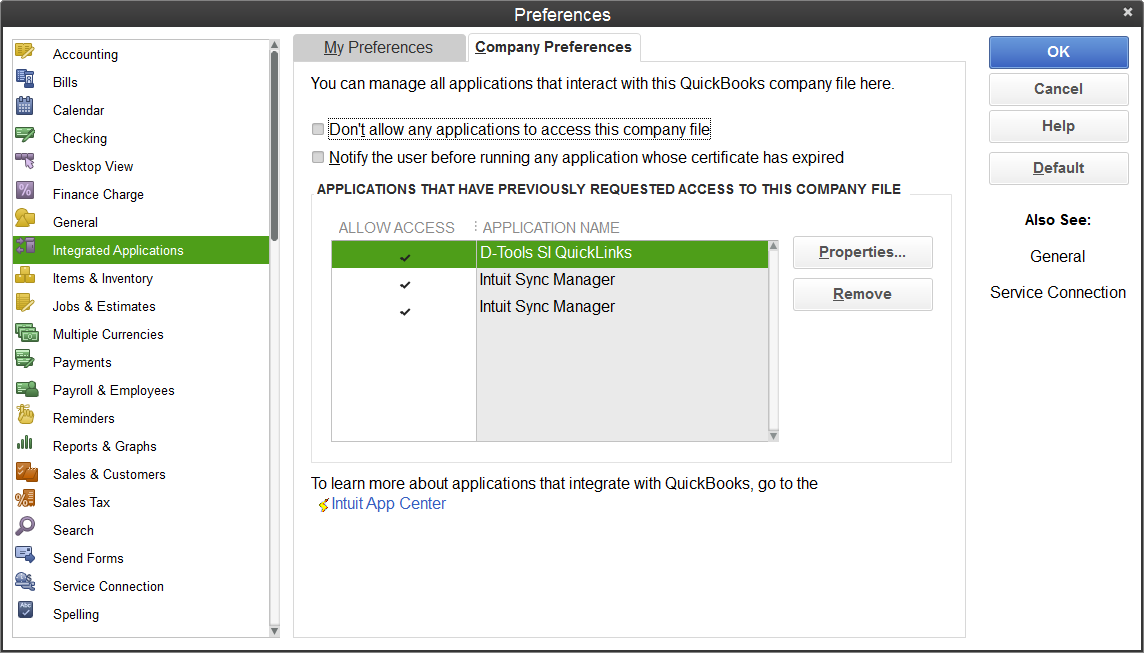
You have now made the connection between SI 2015 and QuickBooks. What happened in QuickBooks can be viewed under Edit->Preferences. When the Preferences form opens, click Integrated Applications and then the Company Preferences tab:
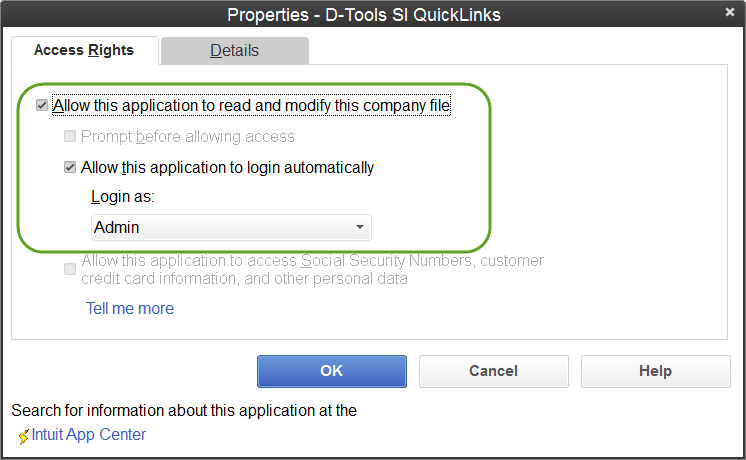
Click the Properties button to see the permissions you just granted, it should look similar to the image below:
If you have not already done so, you will next want to continue with your QuickBooks Settings.
- © Copyright 2024 D-Tools