Upgrading to SI 2017
![]()
Details
These instructions will cover upgrading from the following three previous versions of SI: SI 2016, SI 2015, SIX 2013.
The upgrade to SI 2017 is not a side by side install. It is an update to your existing SI installation. Thus it is imperative that you backup your SI data in the event that you wish to roll back to your previous version or if there are any unforeseen issues/errors while updating to SI 2017.
You will not be able to update any of your SI Clients until you update your SI Server to SI 2017.
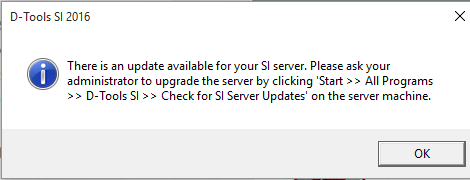
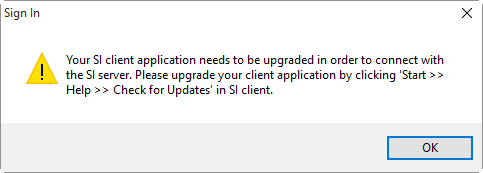
When the SI 2017 update is available to you, you will see the following message when you launch an SI 2016 (or before) Client:
Steps
Back up your current SI Data
- Have all Users Check-In all projects and close their SI Client.
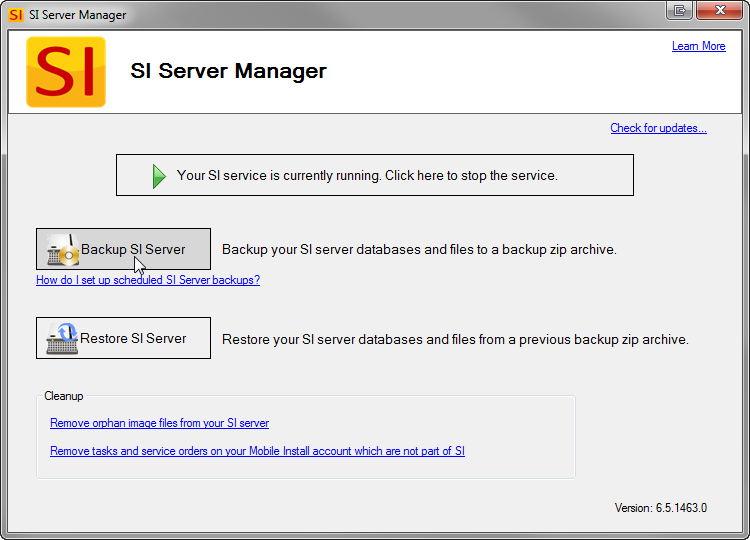
- Open the SI Administration Console on your SI Server:
![]()
- Click the [Backup SI Server] button:
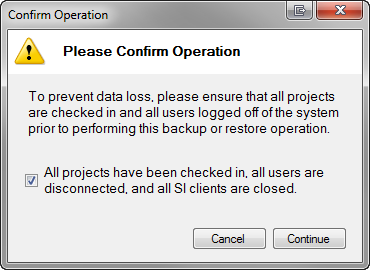
- Check box verifying that you have completed step 1 then click [Continue]:
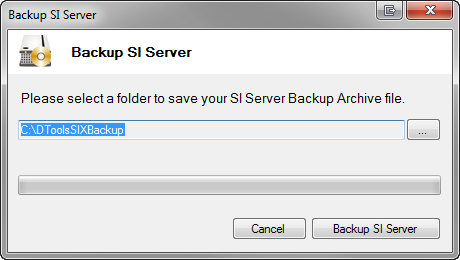
- Choose a different backup location path if desired, click [Backup SI Server]:
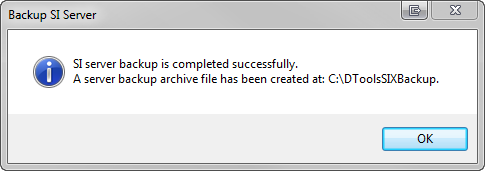
You will get a confirmation when the backup is complete:
Upgrade your SI Server to SI 2017
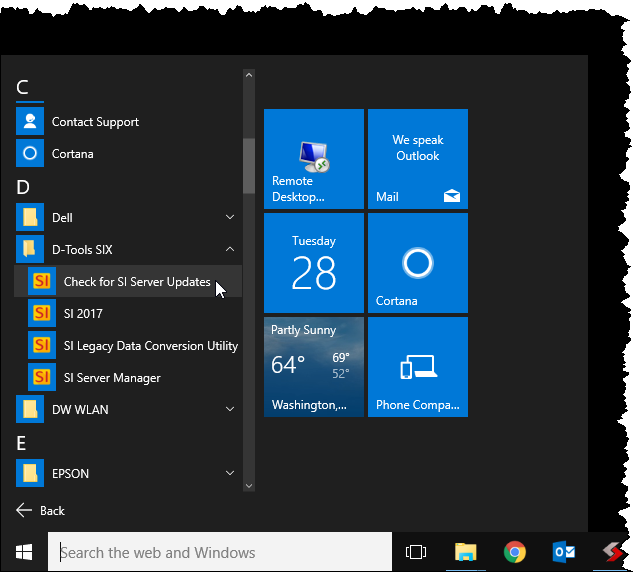
On your SI Server, click Start->All Programs->D-Tools SIX->Check for Server Updates:
You will see a message similar to this one:
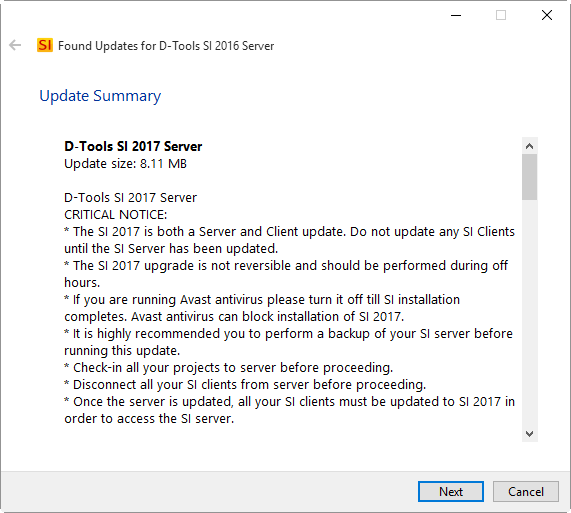
Follow the on-screen prompts to download the SI 2017 Server Upgrade. Click here for instructions on installing the SI 2017 Server.
Note: during the upgrade you will be prompted to backup your SI Server. If you skipped that step above, you really should perform the backup when prompted.

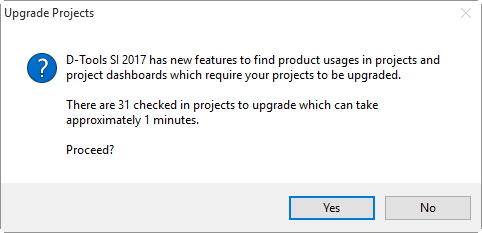
You will also be prompted to upgrade your Projects, click Yes on this.
When done you will get a confirmation:

Upgrade your SI Clients to SI 2017
Once your SI Server has been upgraded to SI 2017, the next time you launch an SI 2016 (or earlier) Client, you will see the following prompt:
Click [OK] and you will see a screen similar to the one below:
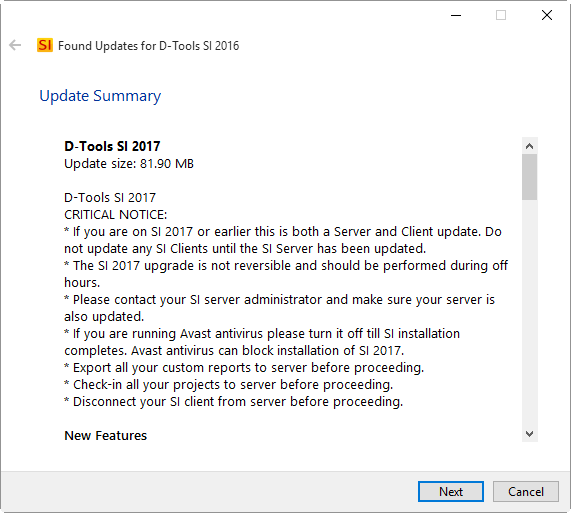
Follow the on-screen prompts to download the SI 2017 Client Upgrade. Click here for instructions on installing the SI 2017 Client.
Upgrade Legacy Schedule (SIX 2013)
The following only applies if you are upgrading from SIX 2013
If you used the Scheduling Editor in SIX 2013, you will need to upgrade your "legacy schedule" to the new SI 2017 format.
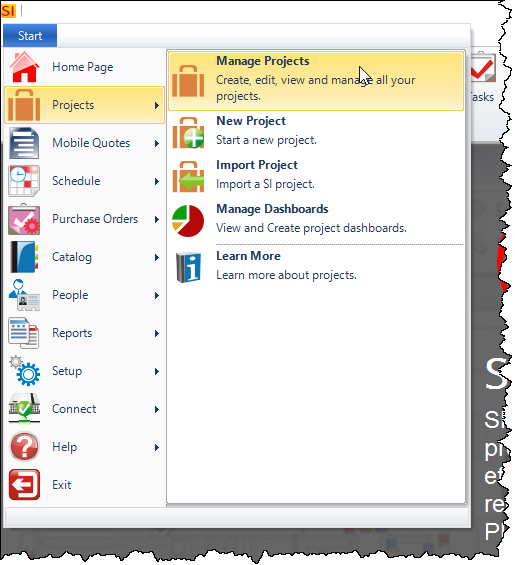
Open SI 2017 and click Start->Projects->Manage Projects:
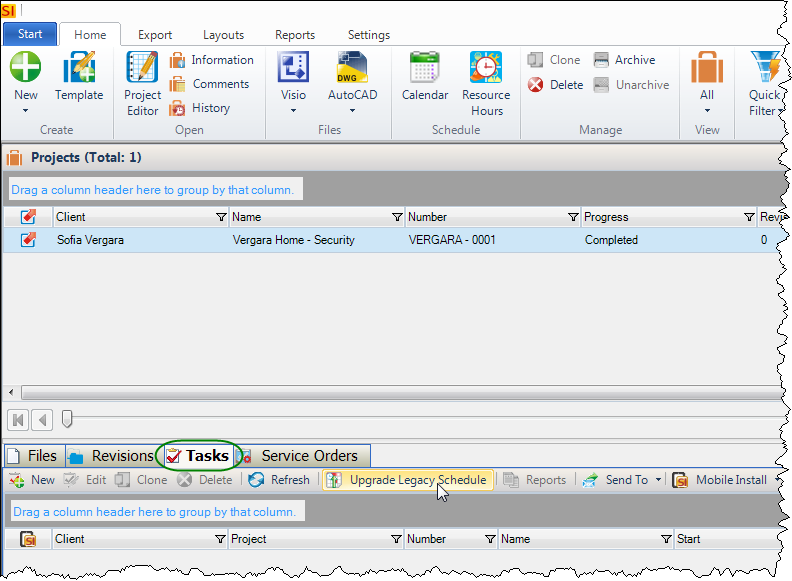
Select the Project for which you want to update the schedule and click the Tasks tab along the bottom of the interface and then click the [Upgrade Legacy Schedule] button. This button will only be active if there is a legacy schedule to update.
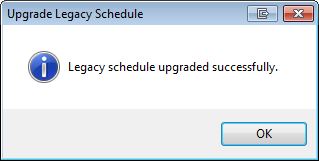
You will get a confirmation of the upgrade:
Any previous Tasks from SIX 2013 will now display on the Tasks tab and they will be editable in SI 2017.
- © Copyright 2024 D-Tools