Service Orders
Service Orders
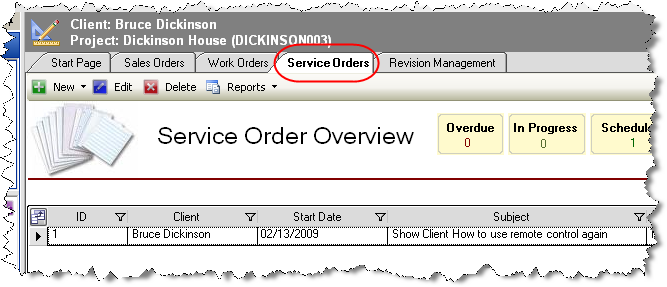
Service orders are used to schedule a time for a technician to go out to a job site, for something other than normal project installation. It is important to be able to quickly specify where to go, what to do, when to do it, what equipment to bring, and how much it will cost to do it. When the order is completed the technician needs to be able to update the order with how much time it actually took, and bill the client appropriately. Service Orders can be pushed over to QuickBooks but unlike most QuickLinks functions, Service Orders are not pushed via our QuickLinks interface.
![]()
New/Edit/Delete – Use these to create, edit, or delete Service Orders.
Reports – allows you to run Service Order Reports
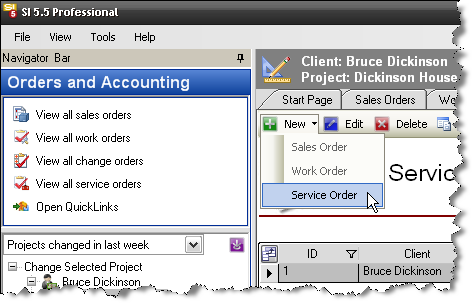
New->Service Order
The following form opens:

Save – Saves the Service Order
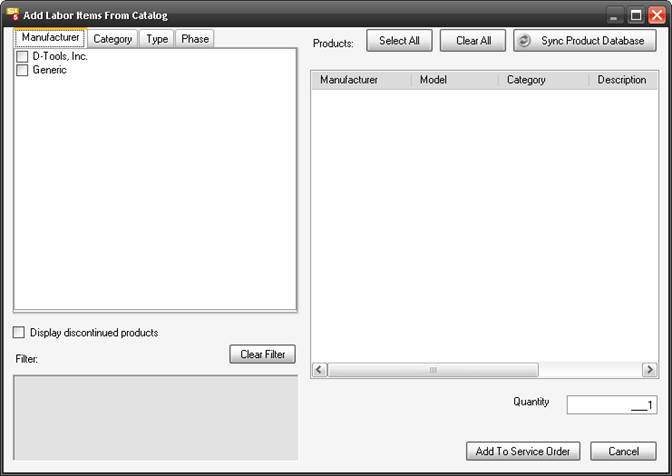
Add->Labor Items – opens the following form that filters your database to display just your Labor Products (see Labor Products). This allows you to add Labor Products to a Service Order.
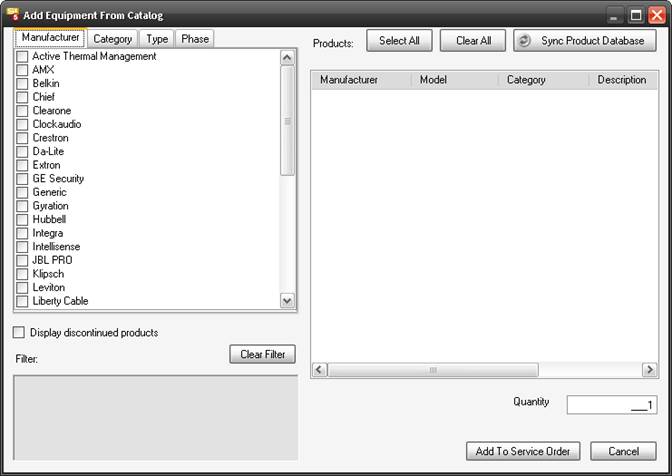
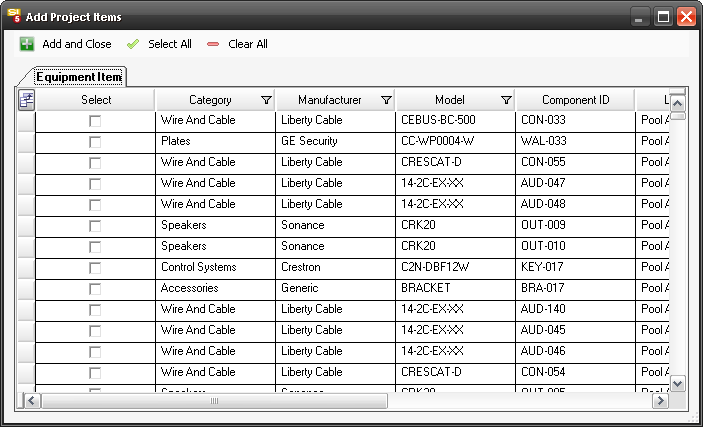
Add->Equipment Items
Opens the following form that filters your database to display just your Equipment Products (everything that is not a Labor Product). This allows you to add Products to a Service Order that were not part of the original project.
Add->Repair Items
Opens the following form that allows you to add products from the project to the Service Order.
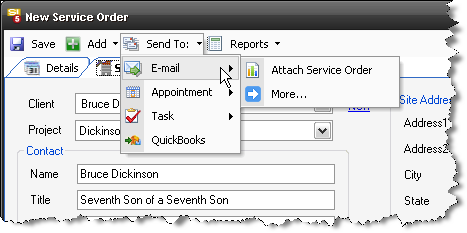
Send To:
Allows you to send any of the Service Order reports (see below) to Outlook as either an Email, Appointment, or Task. You can also send a Service Order over to QuickBooks, this is discussed further on this page.
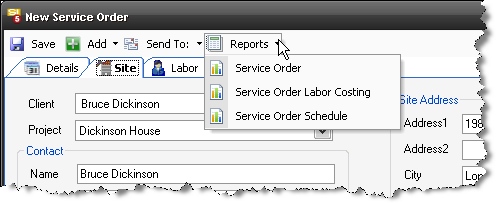
Reports
Will generate any of the following reports for the Service Order: Service Order, Service Order Labor Costing, Service Order Schedule. The Reports will display on a tab within the Task form.
Details Tab
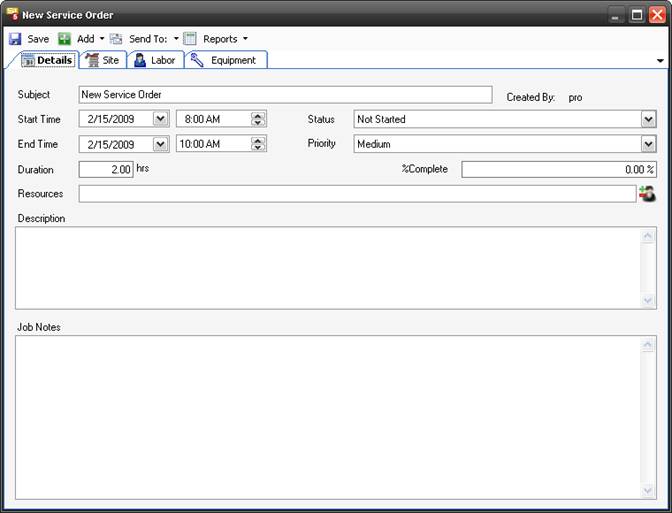
Subject – name the Task
Start/End Time – assign duration of time to the Task
Duration – Displays the value determined by the Start/End Time fields
Status – Choose between Not Started, In Progress, Completed, Waiting, or Deferred
Priority – Choose between Low, Medium, or High
%Complete – this field allows you to manually enter how complete the Task is. If the Status is set to “Completed” this will display 100%. This field is completely independent of any Actual Work that you add to Equipment or Labor Items within the Task.
Description/Job Notes – editable fields for instructions/notes/whatever
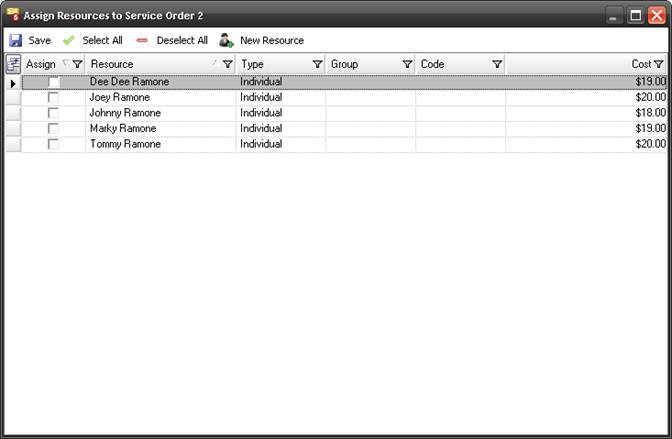
Resources – Clicking the ![]() button opens the following form and allows you to select resources to add to the Task
button opens the following form and allows you to select resources to add to the Task
Site Tab
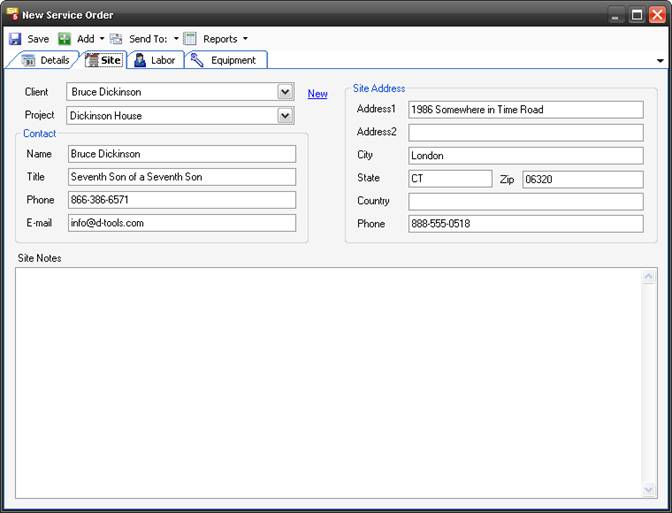
This tab contains the Contact information and site address for the project selected. The Site Notes field is another place to add any comments you desire.
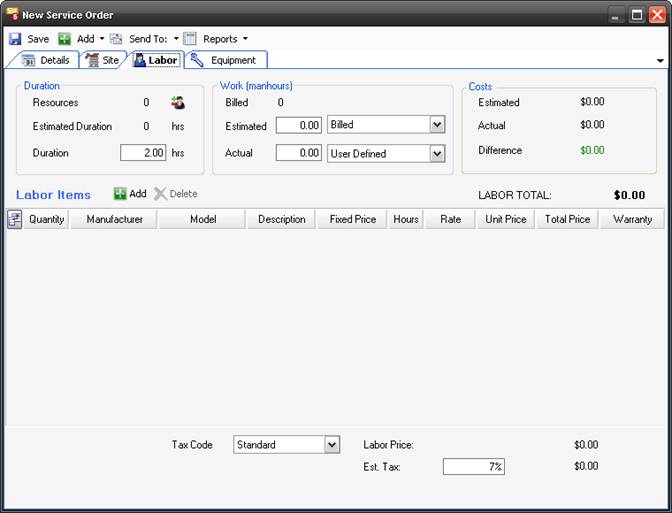
Labor Tab
Resources – lists the number of Resources assigned to the Task. Use the ![]() button to add or remove Resources.
button to add or remove Resources.
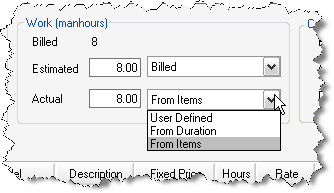
Estimated Duration – populates with the total hours for the Task based on the Equipment and Labor Products that you have added to the Task divided by the number of Resources assigned to the Task. The value that displays here is determined by what value you select for the “Projected” field’s dropdown menu, see below.
Duration – editable field that displays the value determined by the Start/End Time fields
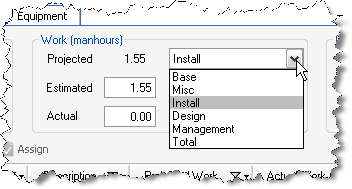
Projected – populates with the total hours for the Task based on the Equipment and Labor Products that you have added to the Task. The value that displays here is determined by what value you select for the “Projected” filed, see below. The dropdown menu allows you to choose between: Base, Misc, Design, Management, Install, and Total. Install = Base + Misc. Total = Base + Misc + Design + Management.
Estimated – populates based on the selection from the dropdown menu. You can use the Projected, Quoted, or User Defined. “Projected” pulls from the Projected field described above. “User Defined” allows you to manually modify this value. “Quoted” does not pull from anywhere and is intended for use to “lock down” a User Defined entry.

Actual – populates based on the selection from the dropdown menu. You can select: From Duration, From Items, or User Defined. User Defined allows you manually modify this field. From Duration will pull from the Duration field. The From Items field populates based on the labor hours assigned the items.
The Costs section of the form shows the dollar values of your costs based on your selections on this form.
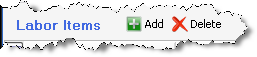
In the Labor Items section you can [Add] or [Delete] Labor items.
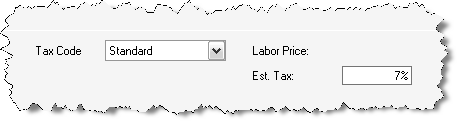
Tax Code and Est. Tax – allow you to add the appropriate tax to Labor if you charge Labor Sales Tax.
Warranty – when the warranty column is checked, the Total Price zeros.

Equipment Tab
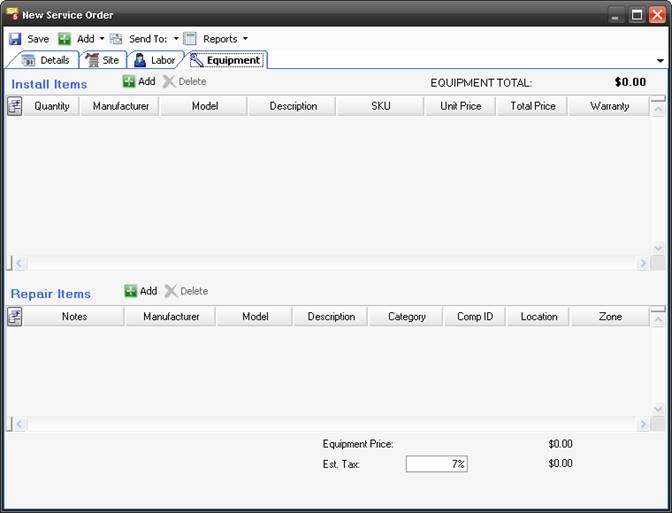
This tab allows you to [Add] or [Delete] Install or Repair items.
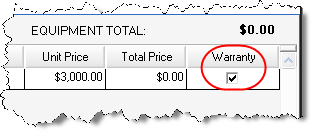
Warranty – when the warranty column is checked, the Total Price zeros.
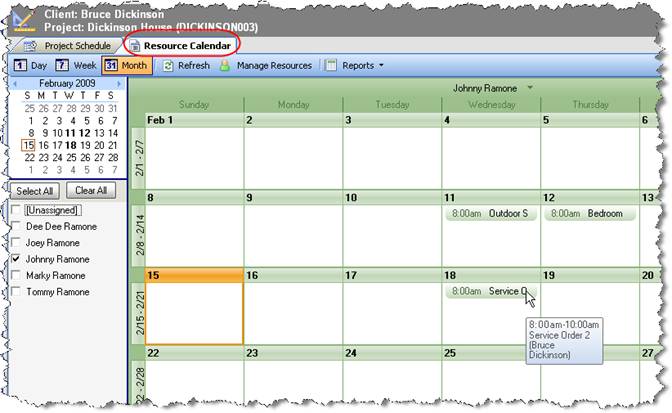
If you have assigned Resources to a Service Order, the Service Order will display on the Resource Schedule. See Resource Calendar for details.
Send To->QuickBooks
This function allows you to transfer the Products that you have added to the Labor tab and the Products from the Install Items section of the Equipment tab over to QuickBooks as an Estimate. Repair Items from the Service Order are not included in this transfer.
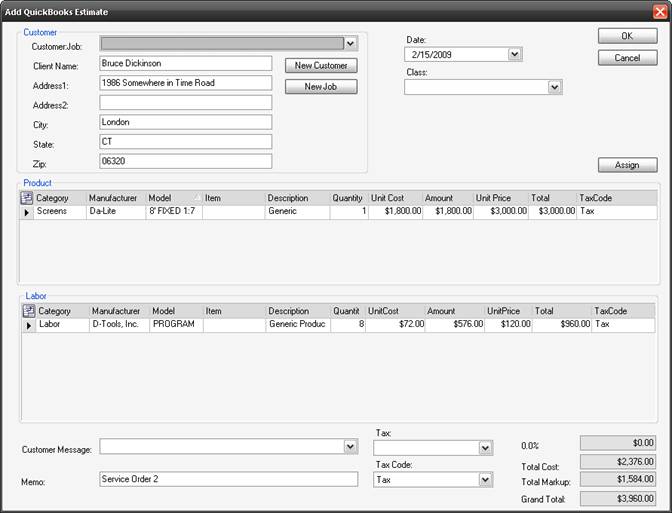
See the QuickLinks for details concerning transferring an Estimate to QuickBooks.
- © Copyright 2024 D-Tools