Custom Visio Shapes
Table of contents
Creating Your Own SI5 Visio Shapes
This post will show how to create a basic custom SI5 shape that is linked to your SI5 database and displays the chosen property fields for the product associated with the shape. Instructions are written for Visio 2010 but notes will indicate if something is different for Visio 2007 users.
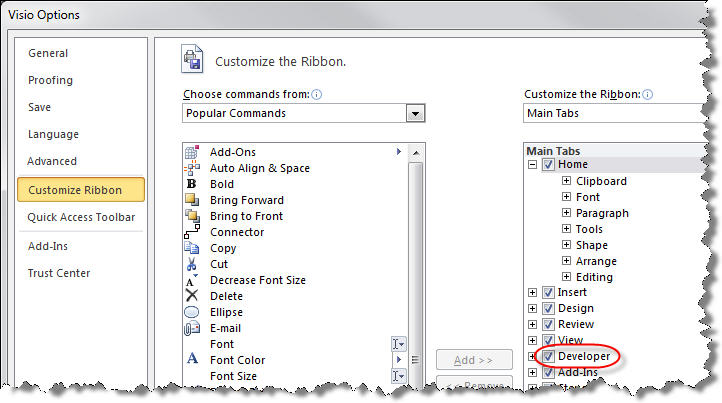
You will want to be show your Developer menu option for this exercise. To do this, select File->Options, then click on Customize Ribbon. Check the box for “Developer”:
- Create a stencil to store your shape in. In the Shapes window, click More Shapes then select New Stencil, either US unit or Metric.
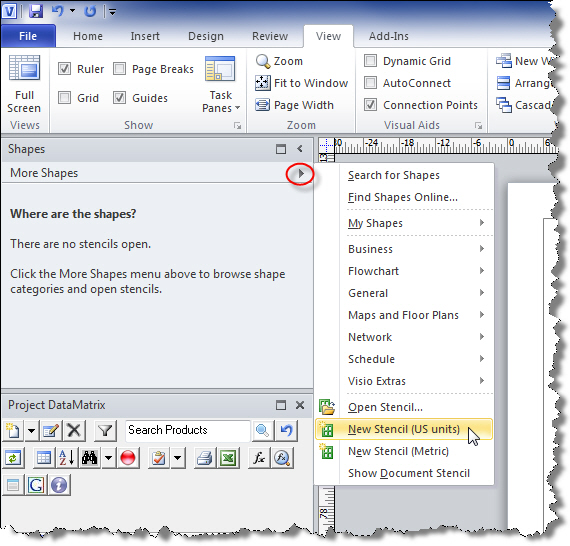
Note: In Visio 2007 select File->Shapes->New Stencil.
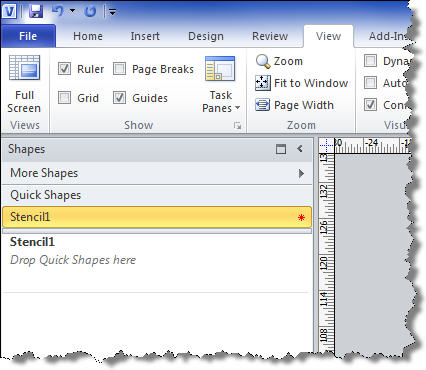
- The new stencil will appear in the Shapes window and will already be open for edit, indicated by the red asterisk:
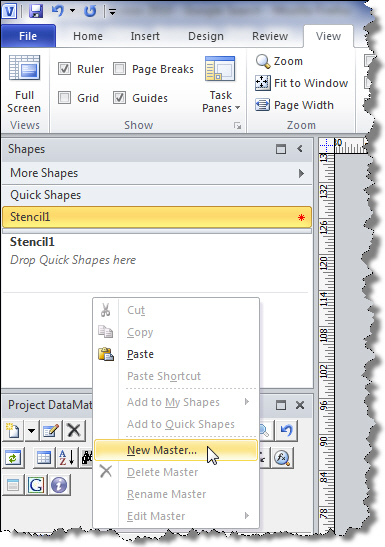
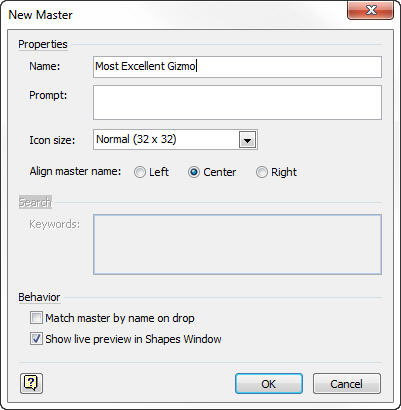
- Right-click in the stencil and select New Master... and then name the shape in the window that opens:
- Right-click on the shape and select Edit Master->Edit Master Shape:

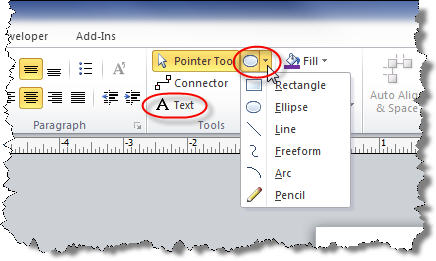
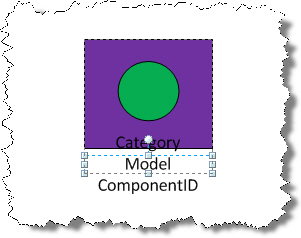
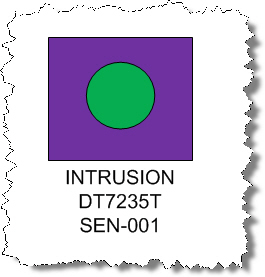
- When the shape opens for edit, it will look like a blank document. Use the drawing tools in Visio to create your shape and add a Text box. In this example, I created a purple box w/ a green circle and added the word “Text” to the textbox so it is visible.
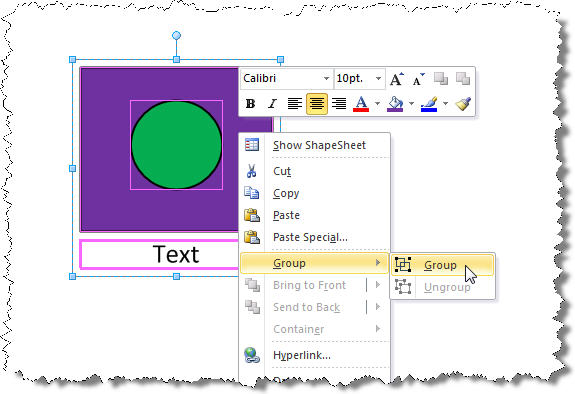
- Hit Ctrl + A to select all and then right-click and choose Group->Group:
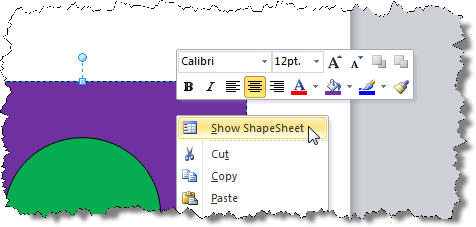
- Right-click the grouped shape and select Show Shapesheet:
- Maximize the ShapeSheet window and then right-click in any section and select “Insert Section…”:
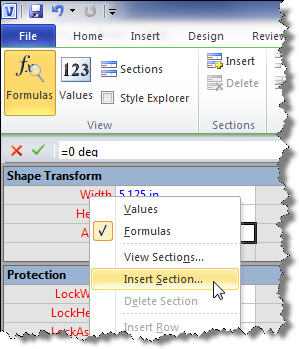
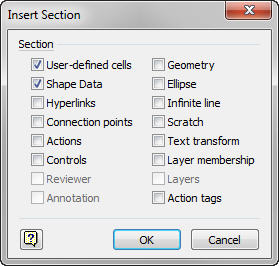
- On the Insert Section form that opens, check “User-defined cells” and “Shape Data” then click OK.
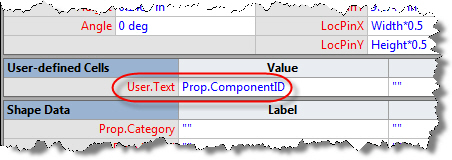
- In the Shape Data section, click in the left cell (the one with red text) and type “Category” (without the quotes). When you tab out of the cell it will display Prop.Category in red text. Type “Category” (with the quotes this time) in the Value cell:

Note: The table below lists the available fields that you can add to SI5 shapes:
|
Property Name |
| ComponentID |
| Manufacturer |
| Model |
| Type |
| Category |
| Height |
| Width |
| Depth |
| CustomProperty1 |
| CustomProperty2 |
| CustomProperty3 |
| CustomProperty4 |
| CustomProperty5 |
| CustomProperty6 |
| CustomProperty7 |
| CustomProperty8 |
| CustomProperty9 |
| CustomProperty10 |
| SKU |
| Keyword1 |
| Keyword2 |
| Keyword3 |
| UnitCost |
| UnitPrice |
| UnitLaborHrs |
| ProductDescription |
| InstallPrice |
| Voltage |
| Amps |
| BTU |
| Hyperlink |
| IPAddress |
| SerialNumber |
| ClientDescription |
| Location |
| Zone |
| MSRP |
| Phase |
| Weight |
- To add another field, right-click where Prop.Category is displayed and select “Insert Row”
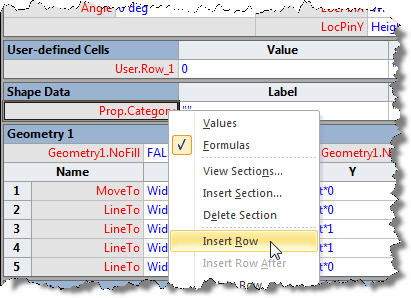
- Repeat step 10 and 11 for whatever other values of the product you wish to display. In this example I added Model and ComponentID:

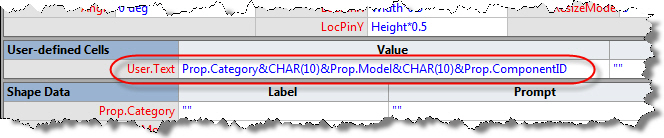
- In the User-defined Cells section, click in the left cell (the one with red text) and type “Text” (without the quotes). When you tab out of the cell it will display User.Text in red text. In the Value cell, type the following: Prop.Category&CHAR(10)&Prop.Model&CHAR(10)&Prop.ComponentID
- Close the ShapeSheet window and you will be taken back to the window with your grouped shape.
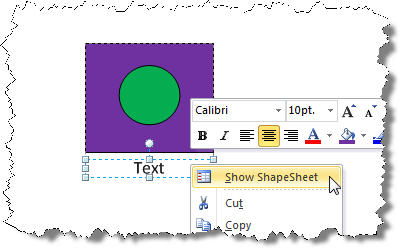
- Click once on the text box so that just it is selected then right-click and select Show ShapeSheet:
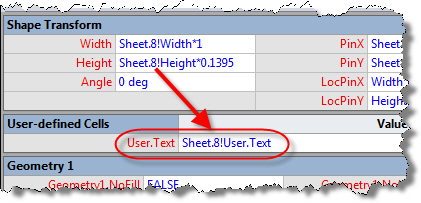
- Repeat steps 8-9 to insert a new section, except on step 9 you only need to check User-defined cells.
- In the User-defined Cells section, click in the left cell (the one with red text) and type “Text” (without the quotes). When you tab out of the cell it will display User.Text in red text. In the Value cell, type the following: Sheet.8!User.Text
- Close the ShapeSheet.
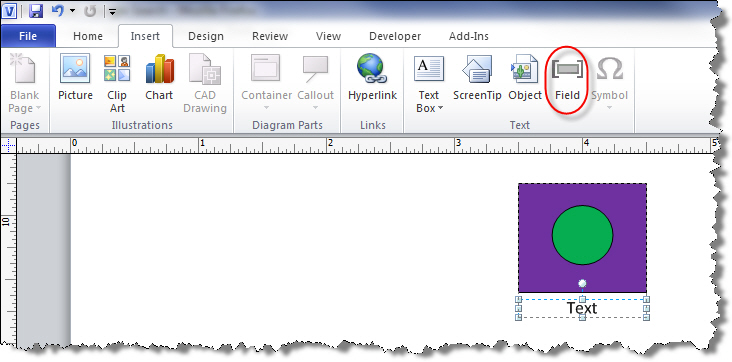
- While the text box is still selected, click on the Insert menu and then click “Field”:
- On the Field form, select “User-defined Cells” and then click OK:
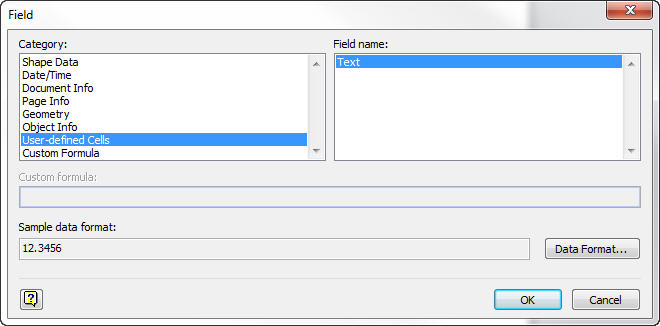
- The fields you set in step 13 now appear in the text box:
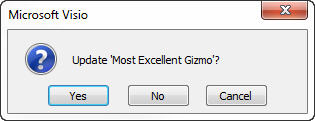
- Close the Master Shape window and when prompted to update the shape, choose Yes:
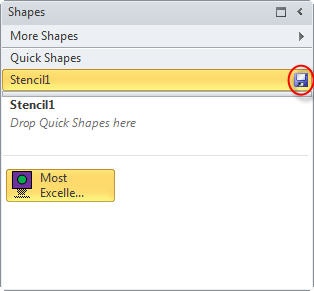
- Back in the Shapes window of the main Visio interface, save your stencil. In order for this new stencil to appear in your SI5 Stencil Tree, you must save it to the following location:
- Drag your shape over to an SI5 Visio drawing page. You will be prompted to select a product from your SI5 database. Once you select a product, the properties will display on the shape:
- © Copyright 2024 D-Tools