Home > SI 2016 Documentation > User Guide > Projects > AutoCAD Interface > Creating an AutoCAD File
Creating an AutoCAD File
Creating an AutoCAD File
Table of contents
![]()
Steps
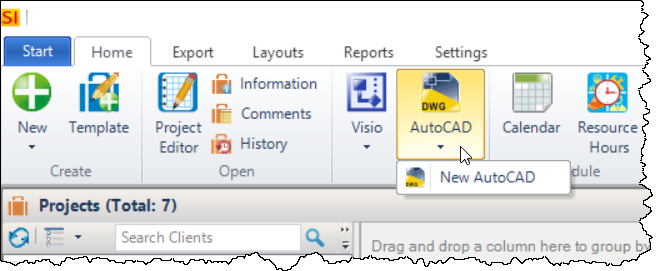
- Select the Project in the Project Explorer and click the Visio button in the ribbon and select "New AutoCAD":
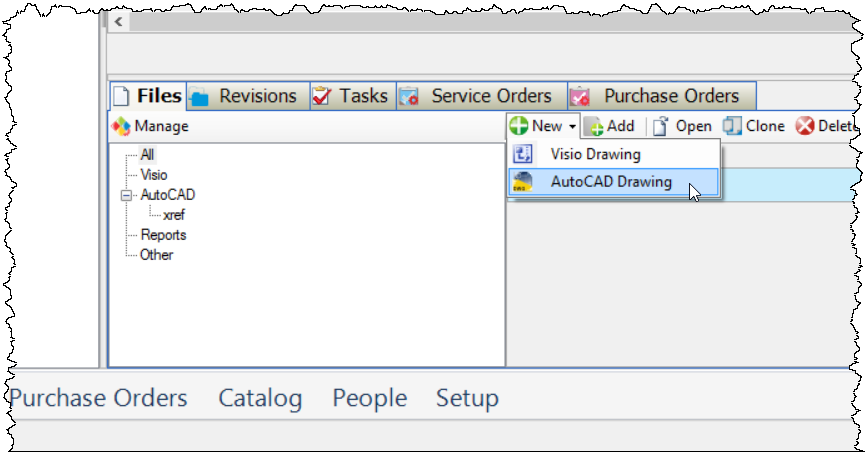
You can also click the [New] button from the Files tab at the bottom of the Project Explorer interface:
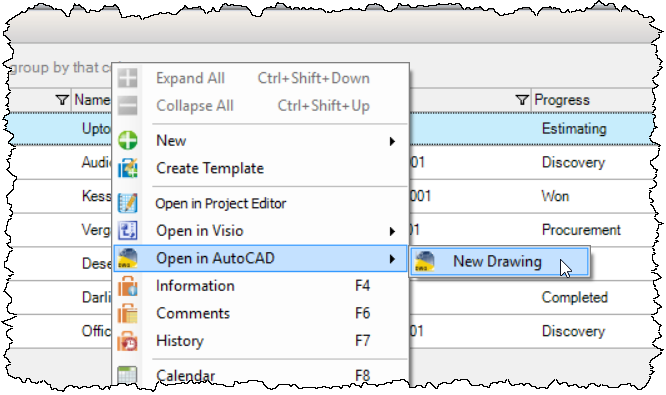
Or you can also right-click to create an AutoCAD file:
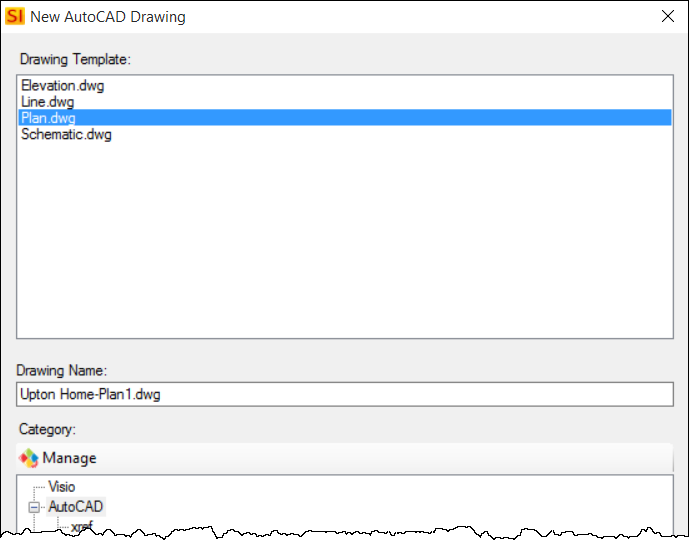
The New AutoCAD Drawing form will open:
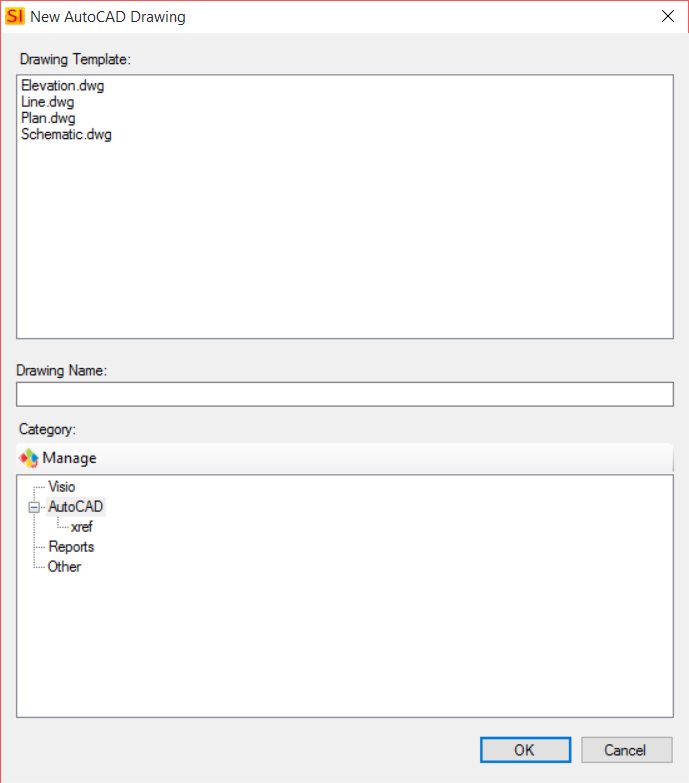
- Once you select the template you want to use, the Drawing Name field will populate with the project name followed by a number. If for some reason you want to change the file category you can as well.
- Click [OK] and the project will open in the AutoCAD interface.
- © Copyright 2024 D-Tools